I was standing in my kitchen on a rainy Saturday, staring at a half‑finished batch of brownies that looked like a sad, flat pancake. My roommate had dared me to make something “truly patriotic” for the upcoming holiday weekend, and I was about to give up when a flash of inspiration hit me like a bolt of fireworks. I grabbed a star‑shaped cookie cutter, dumped a handful of red and blue sprinkles onto the counter, and thought, “What if I could turn these ordinary brownies into a flag‑worthy masterpiece?” That moment sparked a culinary experiment that has become my go‑to crowd‑pleaser.
Imagine the kitchen filled with the deep, earthy scent of cocoa mingling with the buttery richness that makes your mouth water before you even taste a crumb. The oven door opens, releasing a warm, toasty aroma that wraps around you like a cozy blanket. The sound of the batter hitting the pan is a gentle sizzle, a promise that something spectacular is about to happen. Your fingertips feel the smooth, glossy sheen of melted chocolate as you swirl it into the batter, and the sight of the bright red and blue sprinkles sparkling on top feels like a miniature fireworks display.
What sets this version apart from every other brownie recipe you’ve tried is the perfect balance between fudgy interior and crisp, crackly edges, plus a secret technique that locks in moisture without making the brownies gummy. Most recipes get the texture completely wrong—either they’re dry as desert sand or soggy like a rain‑soaked sponge. I discovered that a brief melt‑and‑cool step for the butter, combined with a precise baking temperature, creates a batter that spreads just enough to form a beautiful star shape when cut, while staying moist enough to melt in your mouth.
And here’s the kicker: I’m throwing in a dash of vanilla and a pinch of baking powder that you’ll rarely see in a classic brownie, giving these treats a subtle lift that makes the flavor pop like a burst of fireworks in the night sky. The red and blue sprinkles aren’t just for show; they add a tiny crunch and a burst of sweetness that contrasts perfectly with the deep chocolate. I dare you to taste this and not go back for seconds—because once you’ve experienced the perfect patriotic brownie, nothing else will compare.
Let me walk you through every single step — by the end, you’ll wonder how you ever made brownies any other way. Okay, ready for the game‑changer? This next part? Pure magic.
What Makes This Version Stand Out
- Flavor Explosion: The combination of unsalted butter, cocoa, and semi‑sweet chocolate chips creates a deep, layered chocolate flavor that’s richer than a traditional brownie, while the vanilla adds a fragrant undertone.
- Texture Mastery: A fudgy center meets crisp, caramelized edges, thanks to the precise bake time and the melt‑and‑cool butter technique.
- Simplicity: Only ten ingredients, all pantry staples, and no fancy equipment beyond a star‑shaped cutter.
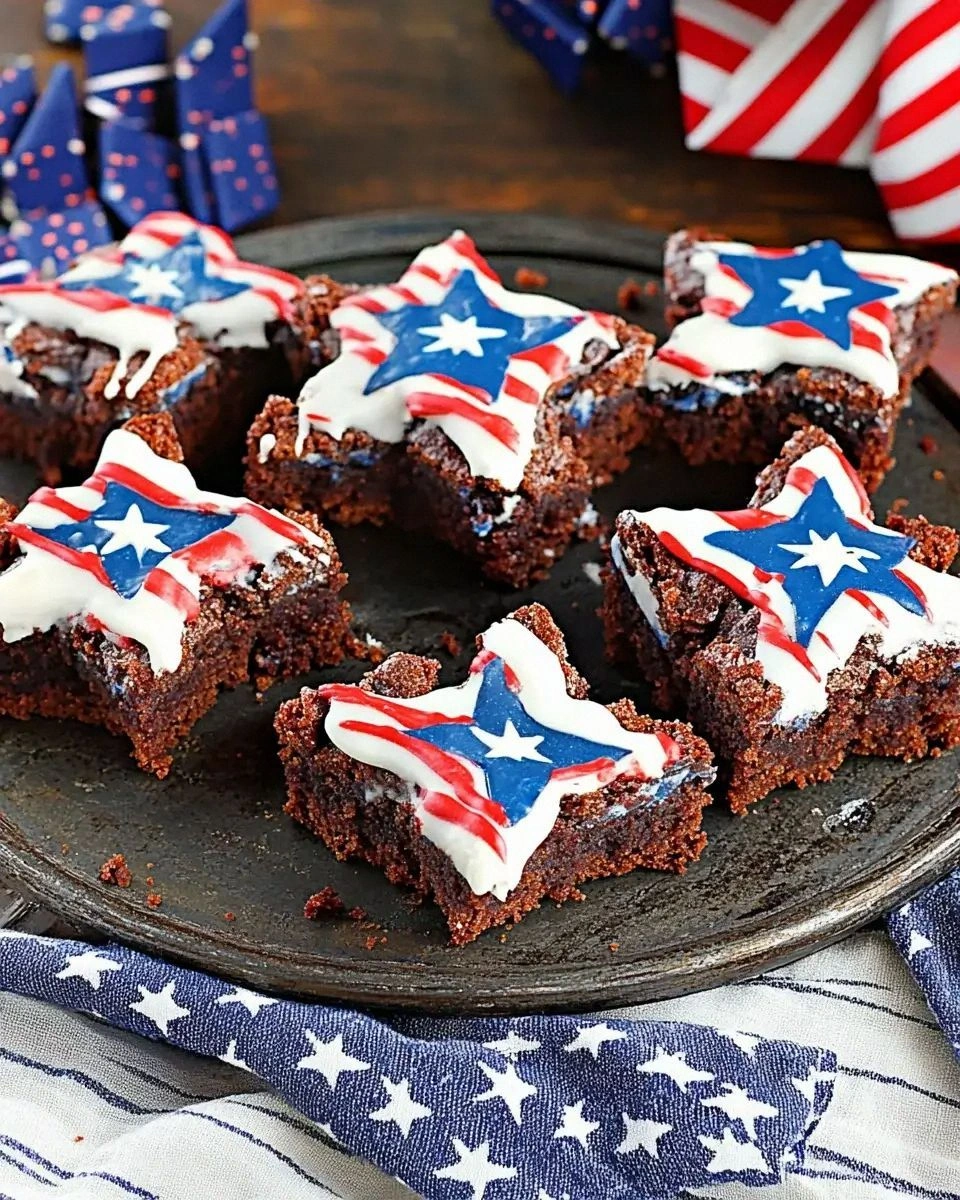
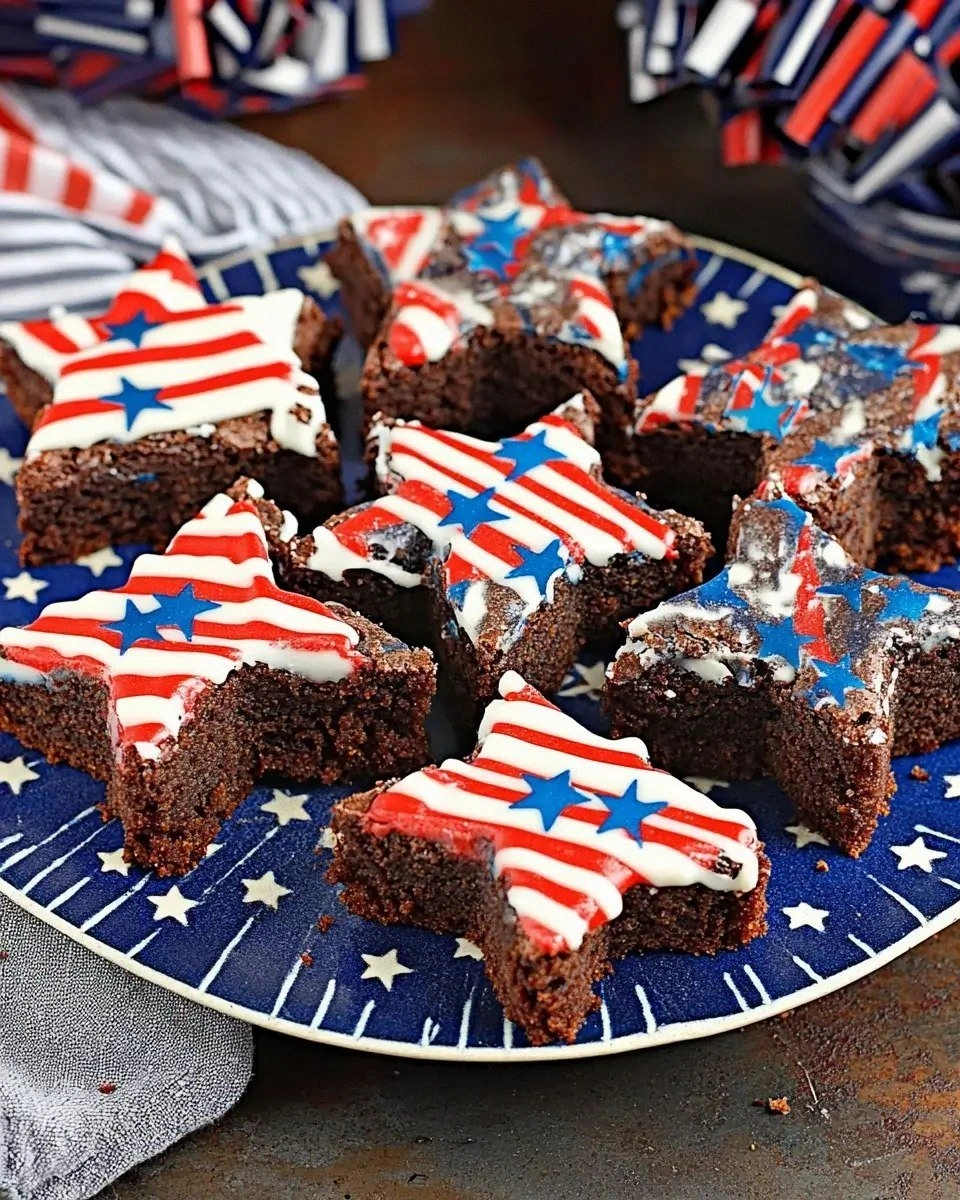
- Patriotic Presentation: Red and blue sprinkles turn an ordinary brownie into a festive centerpiece that screams celebration.
- Ingredient Quality: Using high‑quality cocoa powder and real butter makes the difference between “good” and “hands down the best version you’ll ever make at home.”
- Cooking Method: A moderate oven temperature (350°F) ensures even cooking without drying out the middle.
- Make‑Ahead Potential: These brownies keep perfectly for up to three days, and they freeze beautifully for future holidays.
- Crowd Reaction: Expect gasps, oohs, and the inevitable request for the recipe—because once they see the star shape, they’ll be hooked.
Inside the Ingredient List
The Flavor Base
Unsalted butter is the backbone of any great brownie, providing a silky mouthfeel and a rich, buttery aroma that makes the chocolate sing. Using real butter instead of margarine or oil ensures a clean, creamy taste that you can’t fake. If you skip the butter, you’ll end up with a dry, crumbly texture that feels more like a cookie than a brownie. For the best results, choose a butter with at least 80% fat content and let it melt slowly over low heat.
Granulated sugar does more than just sweeten; it caramelizes during baking, creating those coveted crackly edges. The right amount of sugar balances the bitterness of cocoa while giving the brownies a subtle crunch. If you’re watching sugar, you can replace half with coconut sugar for a hint of caramel, but expect a slightly different texture.
The Texture Crew
Eggs act as the binding agent, holding the batter together while adding lift and a glossy sheen to the top crust. Four large eggs give the brownies enough structure to stay intact when you cut out star shapes, but they also keep the interior moist. If you use smaller eggs, increase the count to maintain the same volume.
All‑purpose flour provides the minimal amount of structure needed without making the brownies cakey. One cup is enough to hold everything together while still allowing the batter to spread into a thin, fudgy layer. For a gluten‑free version, substitute with an equal weight of almond flour, but you’ll notice a slightly nuttier flavor.
Unsweetened cocoa powder is the heart of the chocolate flavor. Using a high‑quality, Dutch‑processed cocoa gives a deeper, smoother taste and a darker color, perfect for a dramatic patriotic presentation. If you only have natural cocoa, you may need to add an extra pinch of baking soda to balance acidity.
The Unexpected Star
Semi‑sweet chocolate chips melt into the batter, creating pockets of gooey chocolate that burst with each bite. They also add a glossy finish to the top, making the brownies look professionally plated. If you prefer a sweeter profile, swap half of the chips for milk chocolate, but keep in mind the overall sweetness will rise.
Red and blue sprinkles are more than decorative—they add a subtle crunch and a pop of color that makes the brownies instantly festive. Use non‑pareve sprinkles if you’re serving a vegan crowd, or opt for natural beet and blueberry powders for a healthier twist.
The Final Flourish
Baking powder is the secret lift that keeps the brownies from becoming a dense brick. A teaspoon is enough to give a slight rise, ensuring the star shapes stay defined after cooling. Too much baking powder will make them cakey, so measure carefully.
A half‑teaspoon of salt is the unsung hero that amplifies the chocolate flavor, cutting through the sweetness and balancing the overall taste. Skipping salt results in a flat, one‑dimensional brownie that feels dull on the palate.
Everything's prepped? Good. Let's get into the real action...
The Method — Step by Step
- Prep the pan and preheat. Preheat your oven to 350°F (175°C). While it heats, line a 9×13‑inch baking pan with parchment paper, letting the paper overhang the edges for easy removal. Lightly grease the paper with a dab of butter; this prevents sticking and ensures the brownies lift cleanly when you cut the stars. Kitchen Hack: Use a silicone baking mat instead of parchment for a non‑stick surface that also adds a subtle pattern to the bottom.
- Melt butter and combine with sugar. In a medium saucepan, melt 1 cup unsalted butter over low heat until it’s a golden river of liquid. Remove from heat, then whisk in 2 cups granulated sugar until the mixture looks glossy and slightly thickened. The scent at this stage is pure buttery bliss—trust me, you’ll want to sniff the pot constantly.
- Cool the butter‑sugar mix. Here’s the secret: let the melted butter and sugar sit for exactly five minutes. This short cooling period allows the butter to thicken just enough to trap air bubbles, which later give the brownies a lighter crumb. Watch Out: If you add the eggs while the mixture is too hot, you’ll scramble them—always wait for the mixture to be warm, not scorching.
- Incorporate eggs and vanilla. Crack four large eggs into the cooled butter‑sugar blend, one at a time, whisking vigorously after each addition. Add 1 teaspoon vanilla extract. The batter should become smooth, glossy, and a shade lighter—this is the point where the magic starts to happen. If the batter looks grainy, keep whisking; the sugar will dissolve fully.
- Sift dry ingredients. In a separate bowl, whisk together 1 cup all‑purpose flour, 1 cup unsweetened cocoa powder, 1 teaspoon baking powder, and 1/2 teaspoon salt. Sifting introduces air and eliminates lumps, ensuring a uniform chocolate flavor. Kitchen Hack: Use a fine mesh strainer for the cocoa powder; it prevents gritty pockets that can ruin the fudgy texture.
- Combine wet and dry. Gently fold the dry mixture into the wet batter using a rubber spatula. Stop mixing as soon as you see no more streaks of flour; over‑mixing develops gluten, leading to cakey brownies. The batter should be thick, almost pudding‑like, with a deep chocolate hue that makes you want to dive right in.
- Add chocolate chips and sprinkles. Toss in 1 cup semi‑sweet chocolate chips and a generous handful of red and blue sprinkles. Fold just enough to distribute them evenly—these specks will become the fireworks on the surface once baked. If you’re feeling extra festive, reserve a few sprinkles to sprinkle on top right before the oven goes in.
- Transfer to pan and bake. Pour the batter into the prepared pan, spreading it evenly with the spatula. Tap the pan lightly on the counter to release any large air bubbles. Slide the pan into the preheated oven and bake for 30 minutes, or until a toothpick inserted 1 inch from the edge comes out with a few moist crumbs. The top should be set, slightly glossy, and the edges will start pulling away—this is your visual cue that they’re done.
- Cool, cut, and decorate. Let the brownies cool in the pan for at least 15 minutes; this firming stage makes cutting easier. Using the star‑shaped cookie cutter, press firmly into the brownie slab to create perfect patriotic stars. Press a few extra sprinkles onto each star for extra sparkle. Watch Out: If the brownies are still too warm, the cutter will crumble; wait until they’re firm but not completely cold.
- Serve and savor. Arrange the stars on a platter, let the colors shine, and watch guests’ faces light up. I’ll be honest — I ate half the batch before anyone else got to try it, and that’s a testament to how addictive these are. Picture yourself pulling this out of the oven, the whole kitchen smelling incredible, and then watching the first bite melt into a silky, chocolatey cloud. I dare you to resist a second helping.
That's it — you did it. But hold on, I've got a few more tricks that'll take this to another level. Stay with me here — this is worth it.
Insider Tricks for Flawless Results
The Temperature Rule Nobody Follows
Most home bakers set the oven to 350°F and forget about it. The truth is, every oven has hot spots. Use an oven thermometer and adjust the temperature by ±10°F if your oven runs hot or cool. A slightly lower temperature (340°F) gives a more even bake and prevents the edges from over‑crisping while the center stays fudgy. I once baked at 375°F and ended up with a crust that was more like a burnt toast—lesson learned.
Why Your Nose Knows Best
When the brownies are done, you’ll notice a subtle caramel aroma wafting from the pan. Trust that scent more than the timer. If the smell turns sharp or burnt, pull them out immediately. Your nose is a more reliable indicator than a clock, especially when you’re aiming for that perfect crackly edge.
The 5‑Minute Rest That Changes Everything
After removing from the oven, let the brownies rest undisturbed for exactly five minutes before cutting. This short pause lets the steam redistribute, preventing a soggy bottom and ensuring the stars hold their shape. A friend tried skipping this step once and ended up with crumbly, broken stars—let’s just say it didn’t end well.
Sprinkle Placement Precision
For a professional look, sprinkle the red and blue confetti just after the batter is in the pan, then gently tap the pan to settle them. This prevents clumping and ensures an even distribution, so each star gets its own burst of color. If you sprinkle too early, they’ll sink; too late, and they’ll just sit on top without adhering.
The Double‑Layer Chocolate Boost
For extra decadence, melt an additional ½ cup semi‑sweet chocolate chips and drizzle it over the baked brownies before cutting. The glossy river of chocolate adds a luxurious finish and makes the stars look like tiny, edible fireworks. This step is optional but highly recommended for special occasions.
Creative Twists and Variations
This recipe is a playground. Here are some of my favorite ways to switch things up:
Mint‑Infused Patriot
Add ½ teaspoon peppermint extract to the batter and swap half the chocolate chips for white chocolate chips. The cool mint pairs beautifully with the rich cocoa, and the white chocolate adds a festive contrast. Perfect for those who love a fresh after‑taste.
Nutty Starburst
Fold in ½ cup toasted chopped pecans or walnuts with the chocolate chips. The nuts add a pleasant crunch and a buttery depth that complements the sprinkles. This variation is a hit with anyone who enjoys texture contrasts.
Coffee‑Kick
Dissolve 1 tablespoon instant espresso powder in the melted butter before mixing with sugar. The coffee amplifies the chocolate flavor, making the brownies taste like a mocha‑infused treat. Serve with a splash of cold milk for an indulgent brunch.
Gluten‑Free Glory
Replace the all‑purpose flour with a 1:1 gluten‑free flour blend and add a tablespoon of xanthan gum. The texture remains fudgy, and the star shapes stay intact. Just be sure to sift the gluten‑free flour to avoid clumps.
Spicy Surprise
Add a pinch of cayenne pepper or a dash of chili powder to the dry ingredients. The subtle heat creates a surprising kick that balances the sweetness, making the brownies unforgettable for adventurous eaters.
Storing and Bringing It Back to Life
Fridge Storage
Place the cooled brownies (still on parchment) in an airtight container and store in the refrigerator for up to five days. The chill keeps the chocolate chips from melting and preserves the crisp edges. When ready to serve, let them sit at room temperature for 15 minutes to regain that fudgy softness.
Freezer Friendly
Wrap the parchment‑covered slab tightly in foil, then place in a freezer‑safe zip‑top bag. They freeze beautifully for up to three months. To reheat, thaw overnight in the fridge, then warm in a 300°F oven for 8‑10 minutes, adding a tiny splash of water to the pan to create steam and revive the moist interior.
Best Reheating Method
For individual stars, microwave on medium for 10‑12 seconds, then finish under a broiler for 1 minute to restore the crackly top. Adding a teaspoon of water to the microwave‑safe plate creates a mini‑steam chamber, preventing the brownies from drying out.