I was standing in my kitchen on a rainy Tuesday, staring at a half‑finished cinnamon roll that had somehow turned into a sticky, doughy mess. The scent of cinnamon was everywhere, but my heart was still yearning for that classic apple‑pie comfort that only shows up when you’re curled up with a blanket and a good book. I tossed a handful of diced apples into the pan, added a splash of lemon, and before I knew it, the kitchen was a battlefield of caramelized fruit and buttery dough. That chaotic moment sparked a dare: “I bet you can combine the best of both worlds and make something that’s both a roll and a pie, and you’ll still have enough left for seconds.” I accepted, and after a few frantic taste tests (yes, I ate half the batch before anyone else got a chance), I emerged with the ultimate hybrid: Cinnamon Roll Apple Pie Cups.
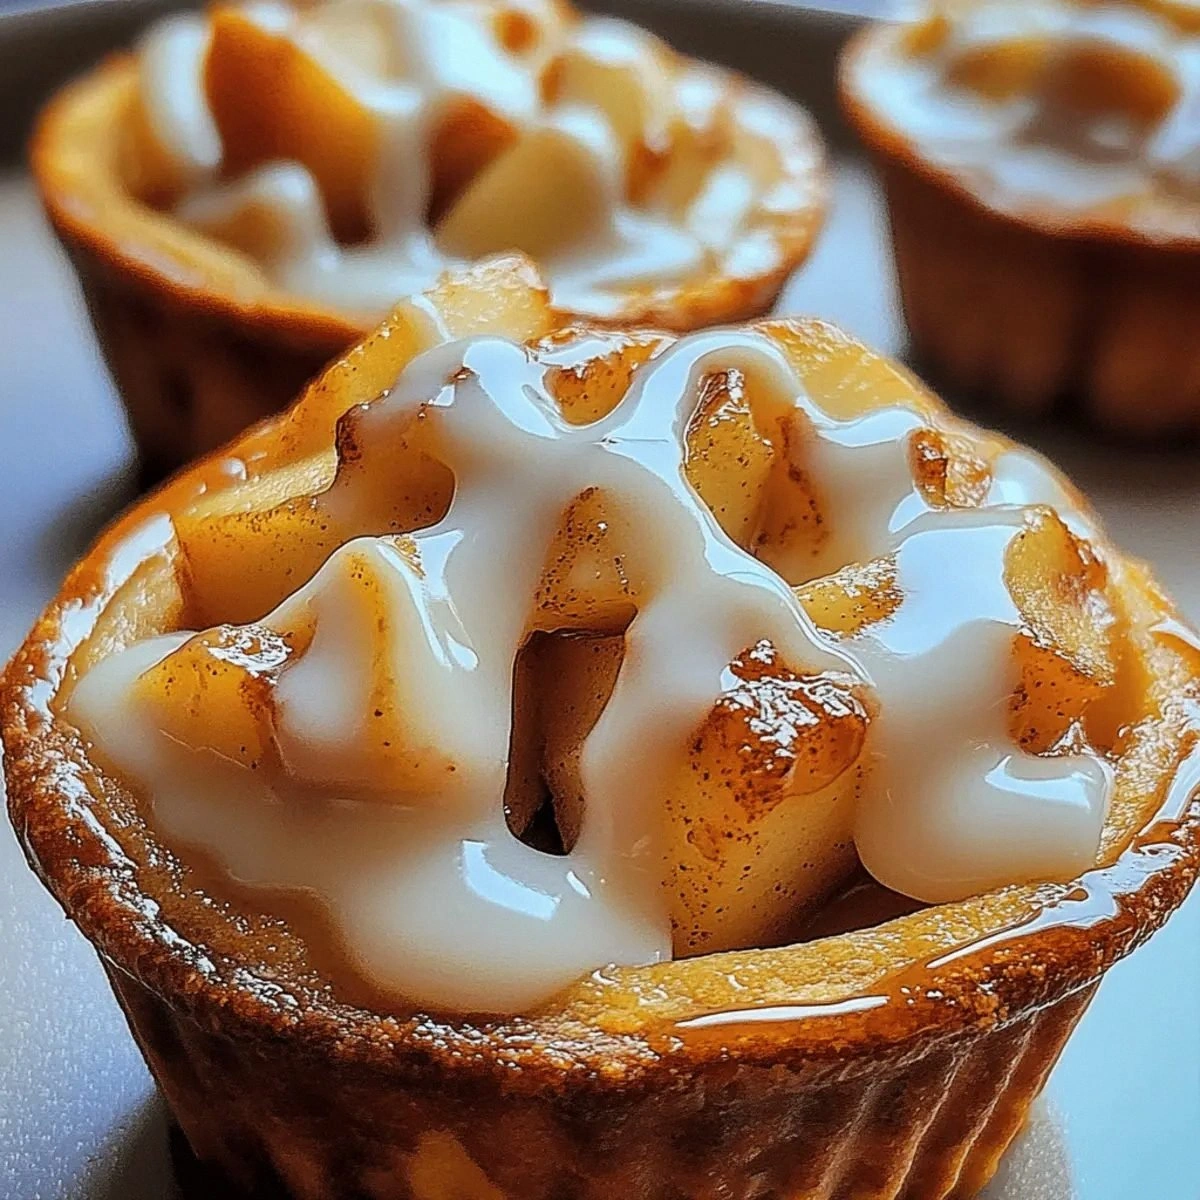
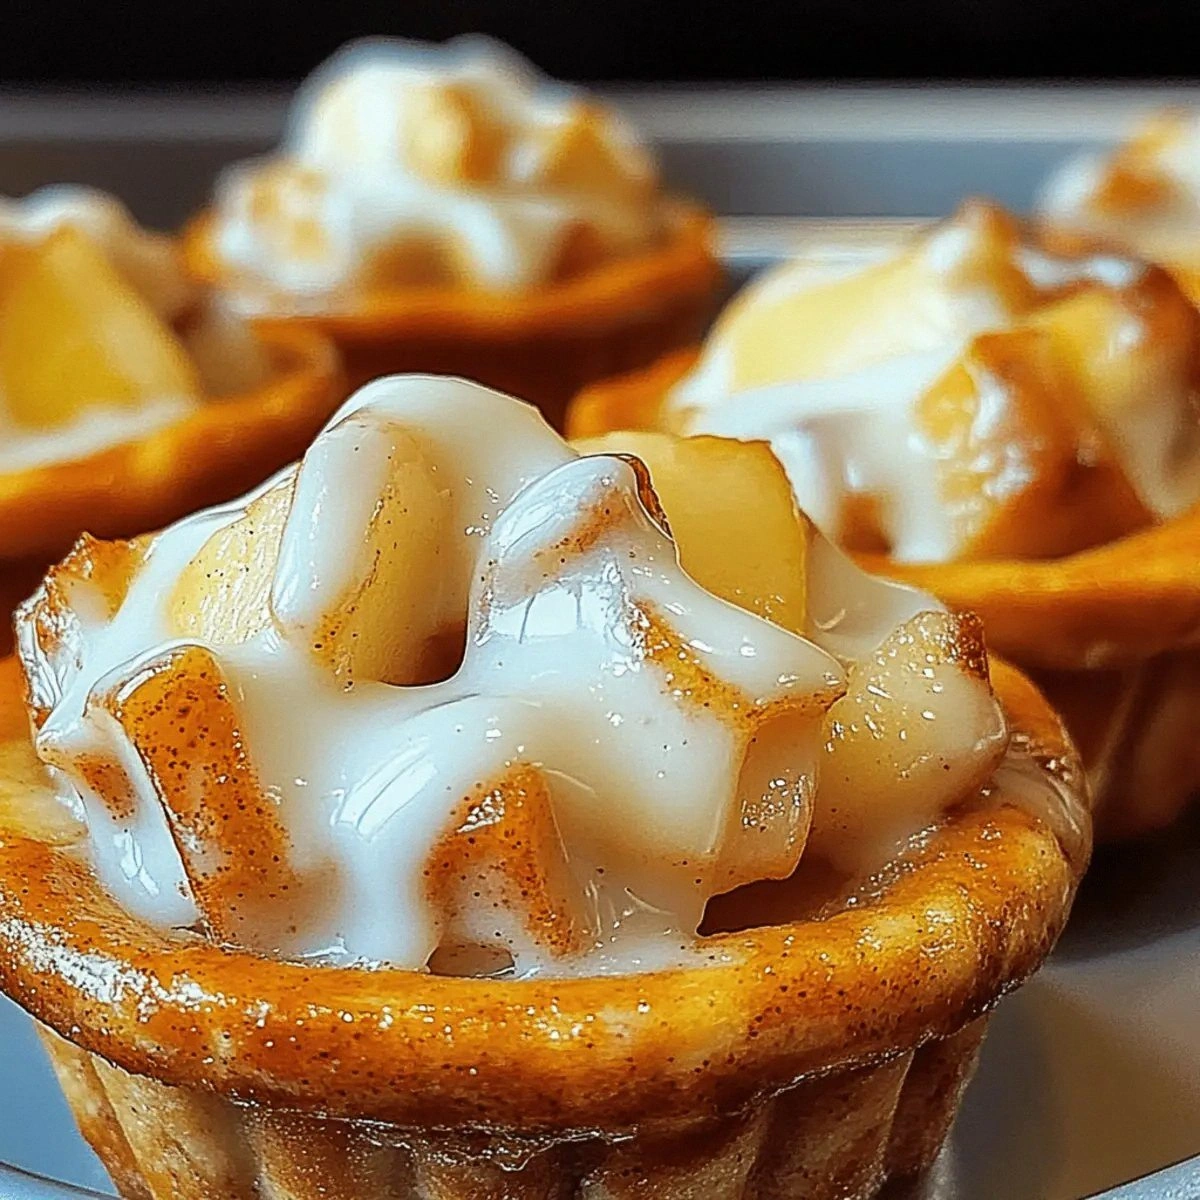
Picture this: a golden‑brown cinnamon roll base, its swirls puffed up like a cloud, cradling a molten apple‑pie filling that oozes out with each bite. The aroma that fills the room is a head‑on collision of sweet spices, caramelized apple, and that unmistakable buttery dough that makes you want to hug the oven door. The first bite delivers a contrast so perfect it feels like a culinary high‑five – the crisp, caramelized edges of the roll give way to a soft, juicy apple core that’s spiced just right. The texture dance is like a waltz between a flaky pastry and a tender, fruit‑laden custard, and the final drizzle of icing adds a glossy finish that’s almost too pretty to eat (but you will, because you’re not a monster).
Most recipes that try to mash up cinnamon rolls and apple pie end up either soggy or overly sweet, missing that delicate balance. I’ve tried a dozen variations that left me with either dough that was too dense or filling that overpowered the roll. The secret to this version is a simple technique: pre‑baking the dough just enough to create a sturdy cup, then layering the apple mixture and finishing it with a short second bake that caramelizes the tops without turning the interior into a mushy mess. It’s a game‑changer, and I’m about to spill every detail so you can replicate it without a single kitchen disaster.
Let me walk you through every single step — by the end, you’ll wonder how you ever made it any other way. I’ll share the exact ingredient ratios, the timing tricks that make the crust perfectly flaky, and a handful of hacks that will shave minutes off your prep while boosting flavor. Ready? Okay, ready for the game‑changer? Let’s dive in and turn your ordinary dessert routine into a cozy, unforgettable experience.
What Makes This Version Stand Out
- Taste: The sweet‑spicy apple filling is balanced by the buttery, cinnamon‑infused dough, creating a harmonious flavor profile that sings with every bite.
- Texture: You get a crisp, caramelized edge on the roll, a soft, juicy apple core, and a silky glaze of icing that ties everything together.
- Simplicity: Using refrigerated cinnamon roll dough cuts the prep time in half, so you can go from raw ingredients to baked perfection in under an hour.
- Uniqueness: This isn’t just a cinnamon roll or an apple pie – it’s a handheld, bite‑size dessert that feels like a warm hug in a cup.
- Crowd Reaction: Guests will immediately ask for seconds, and you’ll hear the same line: “I dare you to taste this and not go back for more.”
- Ingredient Quality: The recipe leans on high‑quality refrigerated dough and fresh apples, ensuring each component shines without artificial shortcuts.
- Cooking Method: The two‑stage bake creates a sturdy cup first, then caramelizes the top, preventing sogginess and delivering that perfect crunch.
- Make‑Ahead Potential: These cups can be assembled ahead of time and baked right before serving, making them perfect for potlucks or holiday gatherings.
Inside the Ingredient List
The Flavor Base
The heart of this dessert is the apple mixture. Diced apples provide the juicy, tart backbone that cuts through the sweet dough. Brown sugar adds depth and caramel notes, while cinnamon and nutmeg create that classic warm spice profile we all love. Lemon juice isn’t just there for a zing; it balances the sweetness and helps prevent the apples from turning brown before they hit the oven. If you skip the lemon, you’ll notice a flat, overly sweet flavor that lacks that bright, fresh finish.
The Texture Crew
Refrigerated cinnamon roll dough is the unsung hero here. It’s pre‑rolled, buttery, and already seasoned with a hint of cinnamon, which means you get a consistent texture without the labor of rolling dough from scratch. The chopped pecans introduce a crunchy contrast that pops against the soft apple interior, while raisins add little pockets of chewy sweetness that burst with each bite. If you’re allergic to nuts, toasted oat flakes can provide a similar crunch without the flavor shift.
The Unexpected Star
Vanilla ice cream might seem like a garnish, but it’s actually the secret weapon for a dreamy, melt‑in‑your‑mouth finish. When a warm cup meets a scoop of ice cream, the heat instantly creates a silky sauce that drapes over the entire dessert, turning each bite into a luxurious experience. For dairy‑free friends, coconut‑milk ice cream works beautifully, adding a subtle tropical note that pairs surprisingly well with the cinnamon.
The Final Flourish
The icing from the cinnamon roll package is the finishing touch that brings visual appeal and a final sweet glaze. It’s essentially a thin, sugary veil that solidifies as it cools, giving each cup a glossy sheen. If you crave a more sophisticated finish, mix a pinch of sea salt into the icing for a salted‑caramel effect that elevates the dessert to gourmet status.
Everything's prepped? Good. Let's get into the real action...
The Method — Step by Step
Preheat your oven to 375°F (190°C). While the oven warms, line a muffin tin with parchment paper or lightly grease it. This step is crucial because the dough needs a non‑stick surface to rise evenly without tearing when you remove the cups later. The heat should be steady; an uneven oven can cause the dough to puff unevenly, leading to a lopsided cup.
Unroll the refrigerated cinnamon roll dough and separate the individual triangles. Using a gentle press, fit each triangle into a muffin cup, pressing the dough up the sides to form a cup shape. If the dough resists, let it sit for a minute – the butter will soften, making it easier to mold. Pro tip: Lightly flour your hands to prevent sticking.
Place the dough‑filled cups on a baking sheet and bake for 8‑10 minutes, just until the edges start to turn a light golden brown. This partial bake creates a sturdy shell that won’t collapse when you add the wet apple mixture later.
Kitchen Hack: Rotate the tray halfway through baking for an even color on all sides.While the dough is baking, combine the diced apples, brown sugar, cinnamon, nutmeg, and lemon juice in a large bowl. Toss until every apple piece is evenly coated. Let the mixture sit for 5 minutes; this allows the sugar to draw out a little juice, creating a natural syrup that will caramelize beautifully in the oven.
After the initial bake, remove the dough cups from the oven and fill each one with a generous spoonful of the apple mixture, pressing down lightly so the filling hugs the dough. Sprinkle chopped pecans and raisins over the top of each cup. The nuts will toast during the second bake, releasing a nutty aroma that mingles perfectly with the caramelized apples.
Return the filled cups to the oven and bake for an additional 12‑15 minutes, or until the apples are bubbling and the dough edges are deep golden brown. You’ll know it’s ready when the edges start pulling away from the tin, creating a clean, crisp border.
Watch Out: Keep an eye on the nuts; they can burn quickly after the apples have caramelized.While the cups are still warm, drizzle the included icing over each one. The heat will melt the icing just enough to create a glossy, sweet glaze that sets as the cups cool. If you love a little salty contrast, sprinkle a pinch of flaky sea salt over the icing now.
Let the cups cool in the tin for about 5 minutes, then carefully remove them using a small offset spatula. This short cooling period lets the crust firm up just enough to hold its shape without cracking.
Serve each cup with a generous scoop of vanilla ice cream on top. The moment the warm cup meets the cold ice cream, you’ll hear a satisfying sizzle that signals the dessert is ready for devouring. For a dramatic presentation, dust a little extra cinnamon on the ice cream.
Enjoy immediately, or store the cooled cups in an airtight container for up to two days. Reheat gently in a 300°F oven for 5‑7 minutes before adding fresh ice cream if you’re serving leftovers. That sizzle when it hits the pan? Absolute perfection.
That's it — you did it. But hold on, I've got a few more tricks that'll take this to another level. Trust me, these little adjustments will make your cups the talk of the town, and you’ll be the go‑to host for any dessert craving.
Insider Tricks for Flawless Results
The Temperature Rule Nobody Follows
Never bake refrigerated dough straight from the freezer; give it a 5‑minute sit at room temperature first. This prevents the butter from solidifying too quickly, which can cause uneven puffing. I once baked a batch straight from the freezer and ended up with dough that sank in the middle, looking like a sad pancake. The extra minute makes the dough pliable enough to expand evenly, giving you that perfect cup shape every time.
Why Your Nose Knows Best
Rely on scent, not just timer, to gauge doneness. When the dough edges start releasing a nutty, caramel aroma, you’re approaching the sweet spot. If you hear a faint crackling sound, that’s the sugar caramelizing and the nuts toasting. Trust your nose; it’s the most reliable indicator that the flavors are marrying perfectly.
The 5‑Minute Rest That Changes Everything
After the second bake, let the cups rest for exactly five minutes before adding icing. This short pause allows the steam inside to settle, preventing the icing from sliding off and ensuring a smooth, glossy finish. Skipping this step leads to a soggy top layer that never sets, and nobody wants that.
The Ice Cream Melt Hack
Place a spoonful of ice cream on a warm plate for 10 seconds before topping the cup. This tiny melt creates a thin, creamy sauce that spreads evenly, coating the entire surface instead of pooling in the center. It’s a subtle trick that makes every bite feel luxurious.
The Secret Salt Sprinkle
A pinch of flaky sea salt on the icing after it sets elevates the dessert from sweet to sensational. The salt cuts through the richness, balancing the sugar and enhancing the spice notes. I tried this on a friend’s birthday, and they swore they could taste the “hidden flavor” that made the dessert unforgettable.
Creative Twists and Variations
This recipe is a playground. Here are some of my favorite ways to switch things up:
Maple Bacon Bliss
Swap the raisins for crispy bacon bits and drizzle a touch of maple syrup over the icing. The salty‑sweet combo adds a breakfast‑brunch vibe that’s perfect for lazy Sundays.
Pear & Ginger Delight
Replace apples with diced pears and add a pinch of fresh grated ginger to the spice mix. Pears bring a subtle floral note, while ginger adds a warm zing that pairs beautifully with the cinnamon dough.
Chocolate Hazelnut Dream
Mix a tablespoon of cocoa powder into the brown sugar mixture and sprinkle chopped toasted hazelnuts instead of pecans. Top with a drizzle of chocolate ganache for an indulgent twist.
Pumpkin Spice Autumn
Incorporate half a cup of pumpkin puree into the apple mixture and add extra pumpkin spice. This version screams fall and pairs wonderfully with a scoop of cinnamon‑spiced ice cream.
Tropical Coconut
Use diced pineapple and shredded coconut in place of apples, and swap the vanilla ice cream for coconut‑milk ice cream. The tropical flavors create a vacation‑in‑your‑mouth experience.
Storing and Bringing It Back to Life
Fridge Storage
Place cooled cups in an airtight container and store them in the refrigerator for up to 3 days. Keep the icing on top to prevent the cups from drying out. When ready to serve, let them sit at room temperature for 10 minutes before adding fresh ice cream.
Freezer Friendly
Wrap each cup individually in plastic wrap, then place them in a freezer‑safe bag. They’ll keep for up to 2 months. To reheat, unwrap and bake at 325°F (160°C) for 8‑10 minutes, then add a fresh scoop of ice cream.
Best Reheating Method
For the ultimate texture, reheat in a preheated oven rather than a microwave. Add a tiny splash of water (about a teaspoon) to the cup before reheating; the steam will revive the dough’s fluffiness and prevent it from becoming rubbery.