I was halfway through a frantic holiday party prep when my roommate accidentally knocked a whole tray of store‑bought peppermint bark onto the floor. The shards clattered, the mint scent wafted, and I swear I heard a tiny voice whisper, “There’s a better way.” That moment sparked a dare: create a candy bite that not only survives a kitchen catastrophe but also makes every bite melt like a snow‑kissed dream. I tossed the broken pieces into the trash, rolled up my sleeves, and set out to engineer the ultimate peppermint swirl that would have even the most skeptical sweet‑tooth begging for seconds.
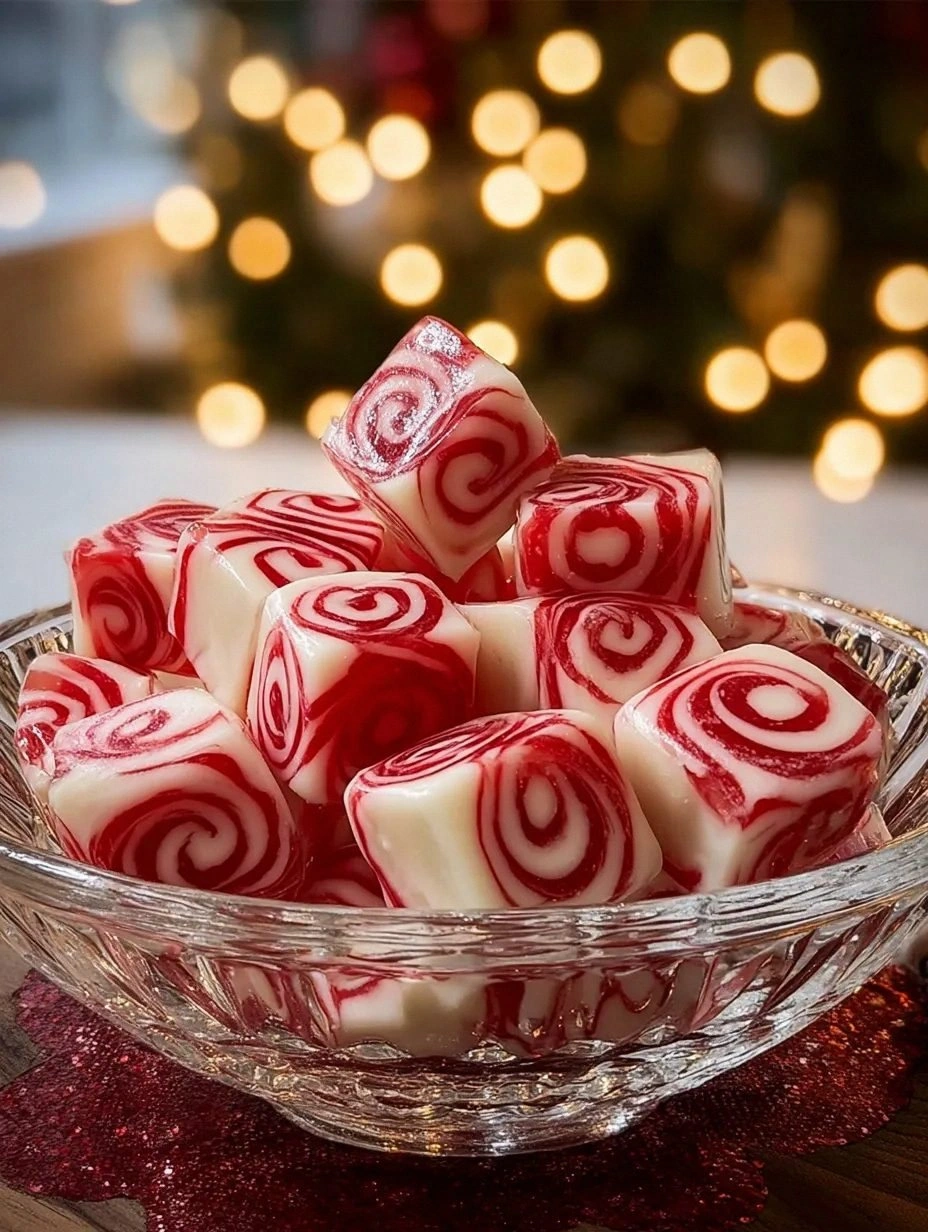
Picture this: a glossy white chocolate shell that cracks delicately under your teeth, revealing a buttery, melt‑in‑your‑mouth center swirled with a vibrant peppermint ribbon that shimmers like fresh‑fallen snow. The aroma of peppermint oil hits you first, sharp and invigorating, followed by a buttery richness that coats the palate like velvet. When you bite, the contrast between the crisp exterior and the silky interior is so satisfying it feels like a tiny fireworks show in your mouth. The sound of the snap, the cool rush of mint, the lingering sweetness—each sense gets its own spotlight, turning a simple candy into a full‑blown sensory performance.
Most recipes out there either skimp on the peppermint punch or drown the bite in a syrupy mess that never truly sets. I’ve tried them all: the ones that over‑cook the chocolate and turn it grainy, the ones that use too much oil and end up greasy, the ones that forget the crucial cooling step and end up a sticky blob. This version, however, hits the sweet spot by tempering the chocolate just right, using a precise butter‑cream base, and folding in a secret‑weapon: a dash of vanilla‑bean paste that lifts the mint without overwhelming it. The result? A candy bite that’s crisp, creamy, and unforgettable.
And here’s the kicker: I’m about to reveal a technique that most bakers overlook—using a silicone mat with a subtle oil spray to create the perfect swirl pattern without any tearing. It’s a game‑changer that guarantees every bite looks as good as it tastes. I dare you to taste this and not go back for seconds. Let me walk you through every single step — by the end, you’ll wonder how you ever made it any other way.
What Makes This Version Stand Out
- Flavor Explosion: The peppermint isn’t just a garnish; it’s woven through the entire bite, delivering a consistent cool burst that lingers long after the chocolate melts.
- Texture Harmony: A crisp, tempered chocolate shell meets a silky, buttery center, creating a contrast that’s as satisfying as biting into a perfectly toasted marshmallow.
- Simplicity Meets Sophistication: Only eight pantry staples are required, yet the result feels like a confectionery from a high‑end patisserie.
- Unique Swirl Technique: The silicone‑mat method guarantees a flawless marble effect without any messy hand‑spooning.
- Crowd‑Pleaser Factor: Even the most skeptical adults admit these are “the best candy bites they’ve ever had.”
- Ingredient Quality: Using real peppermint oil and premium white chocolate elevates the flavor profile beyond the artificial‑tasting store versions.
- Cooking Method Precision: Tempering the chocolate locks in shine and snap, preventing bloom and ensuring a glossy finish.
- Make‑Ahead Magic: Store them in an airtight tin for up to two weeks and they stay as fresh as the day you made them.
Inside the Ingredient List
The Flavor Base
The star of the show is white chocolate chips. Choose couverture‑grade chips; they contain a higher cocoa butter percentage, which gives you that melt‑in‑your‑mouth feel. Skipping this for a cheaper brand will result in a waxy texture and a dull finish. If you can’t find white chocolate, a blend of milk chocolate and a touch of vanilla extract works, but expect a slightly caramelized note.
Peppermint oil is the next hero. A single teaspoon is enough to permeate the entire bite without overwhelming the palate. Avoid peppermint extract—its alcohol base can cause the chocolate to seize. For a milder version, start with half a teaspoon and taste before adding more.
Vanilla‑bean paste might seem optional, but it adds depth, turning the mint from “sharp” to “refined.” Scrape the seeds from a single pod; the specks also give a visual cue of luxury. If you’re out of paste, a teaspoon of pure vanilla extract works, though the flavor will be less nuanced.
The Texture Crew
Unsalted butter provides richness and a tender crumb. Use room‑temperature butter and beat it until pale and fluffy; this incorporates air, making the center softer. If you substitute margarine, the flavor will be flat and the texture slightly gritty.
Powdered sugar sweetens without adding grit. Sift it twice to avoid lumps that could break the smoothness of the bite. For a lower‑sugar version, replace half with erythritol, but expect a slight cooling effect on the tongue.
Heavy cream stabilizes the butter mixture and adds a luxurious mouthfeel. It also helps the candy set faster once cooled. Skim milk can be used in a pinch, but the final bite will lack that silkiness.
The Unexpected Star
Sea salt flakes might sound counterintuitive, yet a pinch amplifies the peppermint’s brightness and balances the sweetness. Sprinkle them on top just before the chocolate sets for a subtle crunch that pops.
Red food coloring is purely aesthetic, giving the swirl a festive pop. Use a gel version; it delivers color without diluting the chocolate. If you prefer a natural approach, beet powder can replace the dye, though the hue will be deeper.
The Final Flourish
A light dusting of cocoa nibs adds a bitter contrast that rounds out the sweetness. This is optional but recommended for those who love a hint of espresso‑like bitterness. Skip it if you’re serving the bites to kids who might find the nibs too intense.
Everything's prepped? Good. Let's get into the real action...
The Method — Step by Step
Start by setting up a double boiler: fill a saucepan with a couple of inches of water, bring it to a gentle simmer, and place a heat‑proof bowl on top. Add the white chocolate chips, stirring constantly. Once the chocolate reaches 115°F (46°C), remove the bowl and begin the tempering process by adding a handful of unmelted chips, stirring until the temperature drops to 88°F (31°C). You’ll see the chocolate become glossy and fluid—this is the moment of truth.
Kitchen Hack: If you don’t have a thermometer, dip a spoon into the chocolate; if it thickens quickly and forms a shiny coating on the spoon within 5 seconds, it’s tempered.While the chocolate is tempering, cream the butter in a separate bowl. Begin on low speed, then crank up to medium‑high until the mixture turns pale and airy—about 3 minutes. This aeration is crucial; it creates that melt‑in‑your‑mouth center we all crave.
Add the powdered sugar, one cup at a time, to the butter, beating after each addition. The mixture will look fluffy and slightly grainy—don’t worry, that’s normal. Scrape the sides to ensure everything is fully incorporated.
Pour in the heavy cream, vanilla‑bean paste, and peppermint oil. Mix until the batter is silky smooth. Taste at this stage; you should detect a subtle minty whisper. If the flavor feels shy, add another ¼ teaspoon of peppermint oil—just a whisper more.
Now for the swirl: line a silicone baking mat on a flat tray. Using a spatula, spread a thin layer of tempered chocolate (about ¼ inch thick) over the mat. Quickly dollop spoonfuls of the butter‑cream mixture on top, then use a skewer to create a marble swirl. The key is to work fast—once the chocolate starts to set, it’ll become difficult to swirl.
Sprinkle a pinch of sea salt flakes over the swirled surface, then lightly dust with cocoa nibs if you’re feeling fancy. The salt will amplify the mint, while the nibs add a whisper of bitterness that balances the sweetness.
Transfer the tray to the refrigerator and let the candy set for at least 30 minutes. You’ll know it’s ready when the chocolate feels firm to the touch and the center is no longer tacky.
Watch Out: Do not leave the tray out at room temperature for more than 10 minutes after removing from the fridge; the chocolate can bloom, turning dull and speckled.Once set, break the slab into bite‑size pieces using a sharp, warm knife. The warmth ensures clean cuts without shattering the delicate swirl. Each piece should reveal a perfect marble of minty cream encased in glossy chocolate.
Arrange the bites on a parchment‑lined platter, drizzle a thin ribbon of melted white chocolate for extra shine if desired, and serve immediately. The aroma of fresh peppermint will fill the room, making your guests think you’ve hired a professional confectioner.
That’s it — you did it. But hold on, I've got a few more tricks that'll take this to another level…
Insider Tricks for Flawless Results
The Temperature Rule Nobody Follows
Temper the chocolate to exactly 88°F (31°C) before you start swirling. If you’re even a degree off, the chocolate will either be too soft (causing a gummy bite) or too hard (resulting in a dull, brittle shell). I once tried to “wing it” with a kitchen thermometer that was off by 5 degrees, and the entire batch turned into a crumbly mess. Keep a dedicated candy thermometer on hand; it’s a small investment for massive payoff.
Why Your Nose Knows Best
When the chocolate is perfectly tempered, you’ll smell a faint, buttery aroma that’s richer than raw cocoa butter. Trust that scent as a checkpoint—if the chocolate smells “raw” or “metallic,” it needs a few more minutes of gentle heating. My nose is my secret weapon; I once saved a batch by catching a subtle burnt note before it turned into a bitter disaster.
The 5‑Minute Rest That Changes Everything
After mixing the butter‑cream base, let it sit for five minutes before adding peppermint oil. This short rest lets the butter fully absorb the cream, preventing the oil from separating later. Skipping this step can cause the swirl to look streaky rather than marbled. It’s a tiny pause that yields a professional‑grade finish.
Silicone Mat Mastery
A silicone baking mat isn’t just for non‑stick; its slight give allows you to pull the chocolate gently, creating a flawless edge. Lightly spray the mat with a neutral oil spray before pouring the chocolate; this ensures the swirl releases cleanly without tearing. I once tried a parchment sheet and ended up with ragged edges that ruined the visual appeal.
Cool‑Down Countdown
When the candy is in the fridge, set a timer for exactly 30 minutes. Over‑chilling can cause the chocolate to contract, making the bite harder to break and sometimes leading to a “frosted” appearance. If you’re in a rush, a blast of cold air from a fan can speed up the setting time without compromising texture.
Creative Twists and Variations
This recipe is a playground. Here are some of my favorite ways to switch things up:
Chocolate‑Covered Espresso Swirl
Swap the peppermint oil for a shot of espresso and add a teaspoon of finely ground coffee to the butter‑cream. The result is a sophisticated, slightly bitter bite that pairs wonderfully with after‑dinner coffee.
Berry Burst
Replace peppermint oil with raspberry puree and fold in freeze‑dried raspberry pieces. The tartness cuts through the sweetness, creating a bright, summery treat.
Nutty Caramel Crunch
Stir in caramel bits and toasted almond slivers into the butter‑cream. The caramel adds chewiness while the nuts give a satisfying crunch, turning the candy into a textural adventure.
Holiday Spice
Add a pinch of ground cinnamon, nutmeg, and a dash of clove to the butter‑cream, then drizzle a thin line of dark chocolate on top. This variation screams festive and makes a great addition to a holiday cookie platter.
Vegan Velvet
Swap butter for coconut oil, use a plant‑based white chocolate, and replace heavy cream with full‑fat coconut milk. The flavor shifts slightly, but the texture remains luxuriously smooth—perfect for vegan guests.
Storing and Bringing It Back to Life
Fridge Storage
Place the bites in an airtight tin lined with parchment. They’ll stay fresh for up to two weeks. Keep the tin in the refrigerator’s main compartment, not the door, to maintain a consistent temperature.
Freezer Friendly
If you want to make a big batch, freeze the bites on a tray for 15 minutes, then transfer them to a zip‑top freezer bag. They’ll keep for three months. Thaw them in the fridge for an hour before serving to avoid condensation.
Best Reheating Method
When you’re ready to serve, pop the bites on a plate and microwave for 5‑7 seconds. Add a tiny splash of water to the plate before microwaving; the steam revives the buttery center and restores that melt‑in‑your‑mouth feel. Avoid microwaving for longer than 10 seconds, or you’ll lose the delicate snap.