I still remember the Great Chili Disaster of 2019 like it happened yesterday. There I was, standing in my tiny apartment kitchen, clutching a sad can of tomatoes and a packet of mystery spices I'd bought at the dollar store because I was too cheap to spring for the good stuff. The resulting sludge tasted like someone had dissolved a cardboard box in dishwater and added a single bean for texture. My roommate took one bite, looked me dead in the eye, and said, "This tastes like disappointment and regret." That night, I swore I'd crack the code for the perfect classic chili if it killed me. Spoiler alert: it didn't kill me, but it did involve three months of obsessive testing, seventeen different spice combinations, and one very confused grocery store clerk who watched me buy twenty pounds of ground beef in a single week.
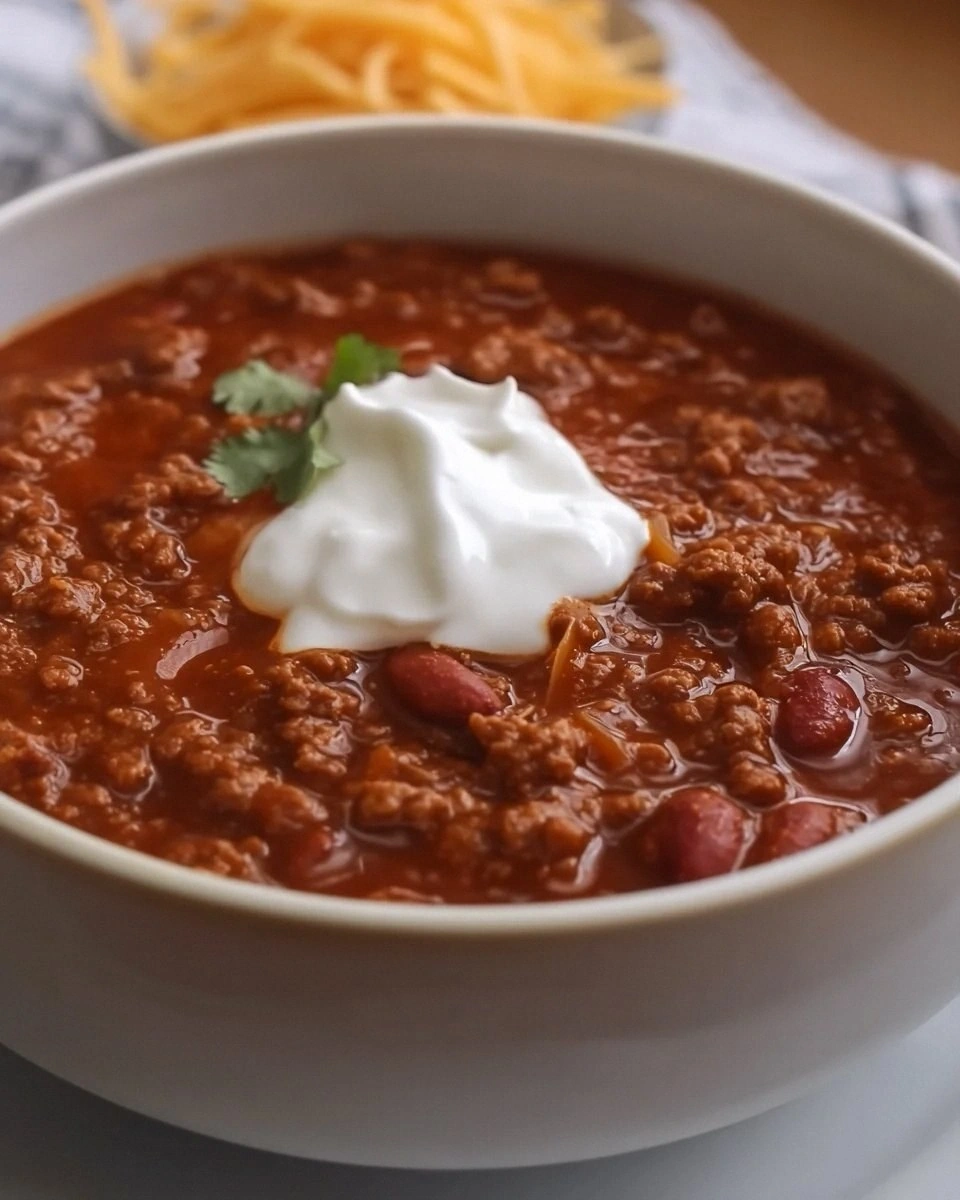
Fast forward to today, and I'm here to share the fruits of that deliciously obsessive journey—a chili recipe so good it'll make you want to write poetry about beans. I'm talking about a rich, complex flavor that tastes like it simmered for eight hours (spoiler: it didn't), a texture that hits that perfect spot between hearty and spoon-coating, and a depth of flavor that makes people close their eyes involuntarily when they taste it. This isn't just another chili recipe; this is the chili recipe that'll ruin all other chilis for you forever. I dare you to serve this at your next game day gathering and watch grown adults fight over the last spoonful like it's the final slice of pizza at 2 AM.
What makes this version different? Oh, just minor details like the way we bloom our spices in oil until they release their essential oils (trust me, you'll smell the moment everything changes), the sneaky ingredient that adds umami without anyone being able to identify it, and the technique that gives you that slow-simmered taste in under an hour. I've made this for picky toddlers, spice-obsessed heat seekers, and that one friend who claims to hate beans (he ate three bowls). The best part? It uses pantry staples you probably already have, requires zero fancy equipment, and comes together faster than ordering takeout. Picture yourself pulling this bubbling pot of magic off the stove, the whole kitchen smelling like the best Tex-Mex restaurant you've ever visited, your neighbors knocking on your door asking what on earth you're making.
Let me walk you through every single step—by the end, you'll wonder how you ever made it any other way.
What Makes This Version Stand Out
Speed: Most "authentic" chili recipes demand you babysit a pot for six to eight hours like it's a newborn baby. This version delivers that slow-cooked depth of flavor in just 45 minutes, thanks to a few strategic techniques that concentrate flavors fast. We're talking restaurant-quality results in less time than it takes to watch an episode of your favorite show.
Layered Spices: While other recipes dump everything in at once and hope for the best, we build flavors like constructing a flavor skyscraper. Each spice gets its moment to shine, from the earthy cumin that hits the hot oil first to the smoky paprika that goes in last, creating a complexity that tastes like you studied under a chili master in Texas.
The Secret Ingredient: Most recipes get this completely wrong—I'm adding a tablespoon of cocoa powder that disappears into the sauce but adds this mysterious depth that makes people ask, "What's that amazing flavor I can't quite place?" It's not chocolatey; it's like adding a bass note to a song you didn't know was missing it.
Texture Perfection: Nobody talks about this, but chili texture is just as important as flavor. We're achieving the perfect ratio of saucy to chunky, creamy to defined, so every spoonful gives you something interesting. The beans hold their shape, the meat is fall-apart tender, and the sauce coats your spoon like velvet.
Make-Ahead Magic: This chili actually tastes better the next day (I know, everyone says that, but hear me out). The flavors meld and deepen overnight, transforming into something even more spectacular. I make a double batch every time because I know tomorrow's lunch will be the highlight of my day.
Crowd Reaction: I've served this to a table of ten hungry football fans who started out polite and ended up licking their bowls clean while arguing over who got the last serving. One friend texted me at midnight asking if I had any left because he couldn't stop thinking about it. Another claimed it was better than his grandmother's recipe, then immediately called her to confess his culinary betrayal.
Ingredient Quality: We're using simple, affordable ingredients but treating them like royalty. That can of tomatoes? We're roasting half of it to concentrate the flavor. Those humble beans? They're getting a special treatment that makes them taste like they were cooked from scratch by someone who really cares about beans.
Alright, let's break down exactly what goes into this masterpiece...
Inside the Ingredient List
The Flavor Base
Ground beef is the star here, but not just any ground beef. I'm talking about the 80/20 blend that hits the sweet spot between lean enough to avoid a greasy pool and fatty enough to stay juicy and flavorful. Skip the ultra-lean stuff unless you enjoy chewing on meat-flavored cardboard. The fat renders out and becomes part of the sauce, carrying all those beautiful spices to every corner of the pot. If you can find it, grass-fed beef adds this subtle sweetness that takes everything up a notch, but regular grocery store beef works perfectly fine too.
The onion isn't just there for bulk—it's your flavor foundation. A medium yellow onion, diced small enough to disappear into the sauce but not so tiny it melts into nothingness. Cook it until the edges turn golden and it starts to smell like the best burger joint in town. This is where most people rush things, but give it a full five minutes and you'll be rewarded with sweetness that balances the heat and acid in the tomatoes.
The Texture Crew
Three types of beans might seem excessive until you understand what each one brings to the party. Kidney beans are the classic, holding their shape while soaking up flavor like little flavor sponges. Black beans add creaminess when some of them break down into the sauce, creating this luscious thickness that clings to everything. Pinto beans are the middle child—sturdy but creamy, with an earthy flavor that grounds the whole dish. Don't even think about using canned chili beans; they're usually overcooked and swimming in weird seasoning that'll throw off your whole flavor profile.
The corn might seem controversial, but trust me on this one. A half-cup of frozen corn adds tiny pops of sweetness that make your taste buds sit up and pay attention. It also stretches the chili further without anyone feeling cheated, plus it adds these beautiful yellow gems that make the whole pot look like autumn in a bowl. If you're a corn hater, leave it out, but you're missing out on something special.
The Unexpected Star
Here's where things get interesting. That tablespoon of cocoa powder I mentioned? It's not for chocolate flavor—it's for depth. Dutch-processed cocoa works best because it's been treated to remove acidity, leaving pure chocolate flavor that adds complexity without sweetness. Think of it like adding a secret bass note to a song; you might not consciously notice it, but you'd miss it if it were gone. I've had people taste this chili and spend the whole meal trying to figure out what's making it taste so much more interesting than any chili they've had before.
The coffee is another sneaky addition that nobody expects but everyone loves. Just a quarter cup of strong brewed coffee adds this subtle bitterness and roasted flavor that makes the whole chili taste like it's been simmering for hours. Don't worry—it won't taste like a mocha. The coffee flavor disappears into the background, leaving just this incredible depth that makes people ask for your secret. Instant espresso powder works in a pinch, but brewed coffee is better.
The Final Flourish
Lime juice at the end isn't optional—it's the difference between good chili and life-changing chili. Just a squeeze brightens everything, cutting through the richness and making all the flavors pop like someone turned up the contrast on your taste buds. Add it right before serving so the acid stays fresh and vibrant. Some recipes use vinegar, but lime adds this subtle tropical note that plays beautifully with the cumin and chili powder.
Fresh cilantro might be controversial (looking at you, cilantro-haters), but the stems add bright, citrusy notes without the soap-flavor that some people taste in the leaves. Chop them finely and stir them in at the end, or serve them on the side if you're cooking for the cilantro-averse. The stems have all the flavor but none of the weird genetic taste issues that plague about 10% of the population.
Everything's prepped? Good. Let's get into the real action...

The Method — Step by Step
- Start with a cold Dutch oven or heavy pot—this is crucial for rendering the fat properly from your ground beef. Add the meat and break it up with a wooden spoon, but don't go crazy with the mashing. You want some nice big chunks that'll give you something to bite into later. Turn the heat to medium and let it cook undisturbed for about three minutes; this creates those beautiful brown bits on the bottom that'll flavor your entire pot. The sizzle when it hits the pan? Absolute perfection. Once you see the edges turning from pink to brown, that's your cue to start breaking it up more and stirring occasionally.
- While your beef is browning, prep your aromatics but don't add them yet. Dice your onion into consistent pieces—about the size of your thumbnail—so they cook evenly. Mince your garlic until it's almost paste-like; those tiny pieces will melt into the sauce and give you garlic in every bite without any harsh chunks. This is also when you should measure out all your spices into a small bowl. Having everything ready means you won't burn your garlic while frantically hunting for the cumin that's hiding behind the soy sauce in your pantry.
- Push the beef to one side of the pot once it's about 85% cooked—still a little pink is fine because it'll finish cooking later. Tilt the pot so the fat pools in the empty space; this is liquid gold that'll carry all your spices. Add your onions and let them sit undisturbed for two full minutes. I know it's tempting to stir constantly, but those charred edges are flavor bombs. When they start to turn translucent and smell like the best burger joint in Texas, that's when you know you're on the right track.
- Now comes the magic moment: add your spice blend and stir constantly for exactly 60 seconds. This is called blooming, and it's where most home cooks mess up their chili. The heat activates the essential oils in your spices, releasing flavors that would otherwise stay locked up. Your kitchen should smell like a Mexican spice market had a baby with a barbecue joint. The cumin will get nutty, the paprika will release its smoky perfume, and the oregano will become almost floral. Don't walk away from the stove here—this is the moment of truth.
- Time to add your tomato paste and let it caramelize for another minute. This step transforms the raw, sharp tomato flavor into something deep and sweet. Stir it into the meat and onions until everything turns a beautiful brick red color. The paste will start to darken and stick slightly to the bottom—this is exactly what you want. Those browned bits are pure flavor concentrate that'll dissolve into your sauce later. If you've ever wondered why restaurant chili tastes different, this is probably the step you're skipping.
- Pour in your liquids but resist the urge to add everything at once. Start with your crushed tomatoes, but here's the trick: take about a quarter cup of them and spread them on a baking sheet. Broil them for three minutes until they get slightly charred, then scrape them back into the pot. This adds a smoky depth that tastes like you cooked this over a campfire. Add your broth, coffee, and beans, but hold off on the corn and lime juice for now. Bring everything to a gentle simmer—not a rolling boil, which would break your beans into mush.
- Reduce the heat to low, cover partially, and let it bubble away for 20 minutes. This is when the magic happens: flavors meld, the sauce thickens, and your house starts smelling like you hired a professional chef. Every five minutes, give it a gentle stir, scraping the bottom to prevent sticking. The sauce should coat your spoon like heavy cream when it's ready. If it's too thick, add a splash of broth. Too thin? Let it simmer uncovered for a few more minutes. This is where you become the master of your chili destiny.
- The final five minutes are where champions are made. Add your corn and let it heat through—frozen corn works better than canned here because it stays crisp and sweet. Stir in your cocoa powder and let it dissolve completely; you'll notice the color deepen to this gorgeous mahogany brown. Taste and adjust: need more salt? Add it now. Want more heat? A dash of hot sauce does wonders. This is your chili, and you're the artist painting with flavor. When you see little bubbles breaking the surface like a lazy volcano, you know you're done.
- Remove from heat and let it rest for exactly five minutes. I know you're starving, but this brief pause lets the flavors settle and the sauce thicken to the perfect consistency. While you wait, chop your cilantro stems and slice your lime. When you lift the lid after those five minutes, the surface should have a slight sheen from the fat, and the aroma should make you involuntarily smile. Ladle it into bowls, add your toppings, and prepare for people to ask you for this recipe for the rest of your life.
That's it—you did it. But hold on, I've got a few more tricks that'll take this to another level...
Insider Tricks for Flawless Results
The Temperature Rule Nobody Follows
Here's something that'll blow your mind: serve your chili at exactly 165°F. Too hot and you can't taste the subtle flavors, too cool and the fat starts to congeal on top (gross). I use an instant-read thermometer like a total kitchen nerd, but it ensures every bite is perfect. If you've ever wondered why chili tastes different when you reheat it, temperature is usually the culprit. Let it cool to just steaming, then dig in. Your taste buds will thank you, and you'll notice flavors you never caught before—the way the cumin plays with the oregano, how the coffee deepens the tomato, the subtle dance between heat and sweet.
Why Your Nose Knows Best
Your sense of smell is responsible for about 80% of what you taste, so don't be shy with aromatic ingredients. Toast your spices until your kitchen smells like a dream, add fresh herbs at the end so their oils stay volatile, and always serve chili in warmed bowls so the steam carries those beautiful aromas straight to your nose. I've been known to waft the steam toward my face like a total weirdo, but it makes every bite more intense. A friend tried skipping this step once—let's just say it didn't end well. His chili tasted flat despite following the recipe exactly because he couldn't smell what he was cooking over his kitchen's exhaust fan.
The 5-Minute Rest That Changes Everything
After your chili finishes cooking, turn off the heat and let it sit for five minutes with the lid slightly askew. This isn't just about cooling—it allows the fat to rise to the surface where you can skim some off if you want, and it gives the sauce time to thicken to the perfect consistency. The beans absorb just enough liquid to become perfectly tender without getting mushy. Stir gently before serving, and you'll notice the texture is completely different from when you first turned off the heat. It's like the difference between a snapshot and a finished photograph—all the elements need time to come together into something greater than their parts.
Creative Twists and Variations
This recipe is a playground. Here are some of my favorite ways to switch things up:
The Sweet Heat Revolution
Replace the corn with roasted sweet potato cubes and add a diced chipotle pepper in adobo sauce. The sweetness from the potato plays beautifully with the smoky heat from the chipotle, creating this sweet-spicy dance that'll make your taste buds do backflips. I discovered this combo when I was out of corn and had a sweet potato giving me the eye from the counter. Now it's my go-to for when I want to impress people who think they've had every kind of chili possible.
The Breakfast of Champions
Make your chili, then crack four eggs right into the simmering pot during the last five minutes. Cover and let them poach until the whites are set but the yolks are still runny. Serve over toast for the most indulgent breakfast-for-dinner situation you've ever experienced. The egg yolks mix with the chili to create this rich, almost carbonara-like sauce that'll make you wonder why you ever ate chili any other way. Pro tip: add a dash of hot sauce right on top of each egg.
The Veggie-Packed Sneak Attack
Finely dice zucchini, carrots, and bell peppers and add them with the onions. They disappear into the sauce but add nutrition and stretch the chili without anyone noticing. I fed this to my nephew who claims vegetables are "poison" and he asked for seconds. The key is dicing everything small enough that it becomes part of the sauce texture rather than obvious veggie chunks. You get all the health benefits without the dinner table drama.
The International Affair
Swap the cumin for garam masala, use coconut milk instead of broth, and add a cinnamon stick. Suddenly you've got Indian-inspired chili that'll make your house smell like a Mumbai street market. Top with Greek yogurt and fresh mint for a completely different experience. I served this at an international potluck and people lost their minds. One woman demanded the recipe for her Indian mother-in-law, who apparently declared it "better than authentic."
The Three-Alarm Fire
Add a diced habanero, a tablespoon of chili crisp, and replace half the regular chili powder with ancho chili powder. This version isn't for the faint of heart—it'll make you sweat in the best possible way. The trick is building the heat gradually so you taste all the other flavors before the heat hits you like a wave. Serve with cooling toppings like sour cream and avocado to give people a break between bites.
The Cozy Comfort
Add a cup of beer (amber ale works best) instead of coffee, throw in a parmesan rind while it simmers, and finish with a splash of cream. This creates the most luxurious, rich chili that tastes like it came from a fancy restaurant. The beer adds maltiness, the parmesan rind adds umami depth, and the cream smooths everything out into this silky, comforting bowl of hugs. Perfect for snowy days when you need something to warm you from the inside out.
Storing and Bringing It Back to Life
Fridge Storage
Let your chili cool completely before storing—hot chili in the fridge creates condensation that waters down your perfect sauce. Transfer to airtight containers, leaving about an inch of space at the top for expansion. It'll keep for up to five days, but let's be honest, it'll be gone way before then. The flavors actually intensify over the first 48 hours, reaching peak deliciousness on day two. If you notice a layer of orange fat on top when you take it out, don't panic—that's just the spices and fat separating. Stir it back in for maximum flavor, or skim it off if you're watching calories.
Freezer Friendly
Chili freezes beautifully, but skip the corn and lime juice additions before freezing. Add those when you reheat for best texture and flavor. Portion into meal-sized containers (I use 2-cup portions for easy lunches), label with the date, and freeze for up to three months. Pro tip: freeze some in ice cube trays, then transfer to a freezer bag. These chili cubes are perfect for adding flavor to soups, stews, or even as a base for quick chili mac. Thaw overnight in the fridge or use the defrost setting on your microwave, adding a splash of broth to loosen it up.
Best Reheating Method
Reheat gently over medium-low heat, stirring often to prevent scorching. Add a splash of broth or water because the sauce thickens as it sits. Resist the urge to crank up the heat to speed things up—slow and steady wins the race here. Once it's steaming and bubbling gently, add fresh lime juice and toppings. If you're in a rush, microwave works, but cover it with a damp paper towel to create steam and prevent the dreaded chili explosion. Stir every 45 seconds for even heating. And please, for the love of all that's holy, don't reheat it more than once—each reheating degrades the texture and dulls the flavors.