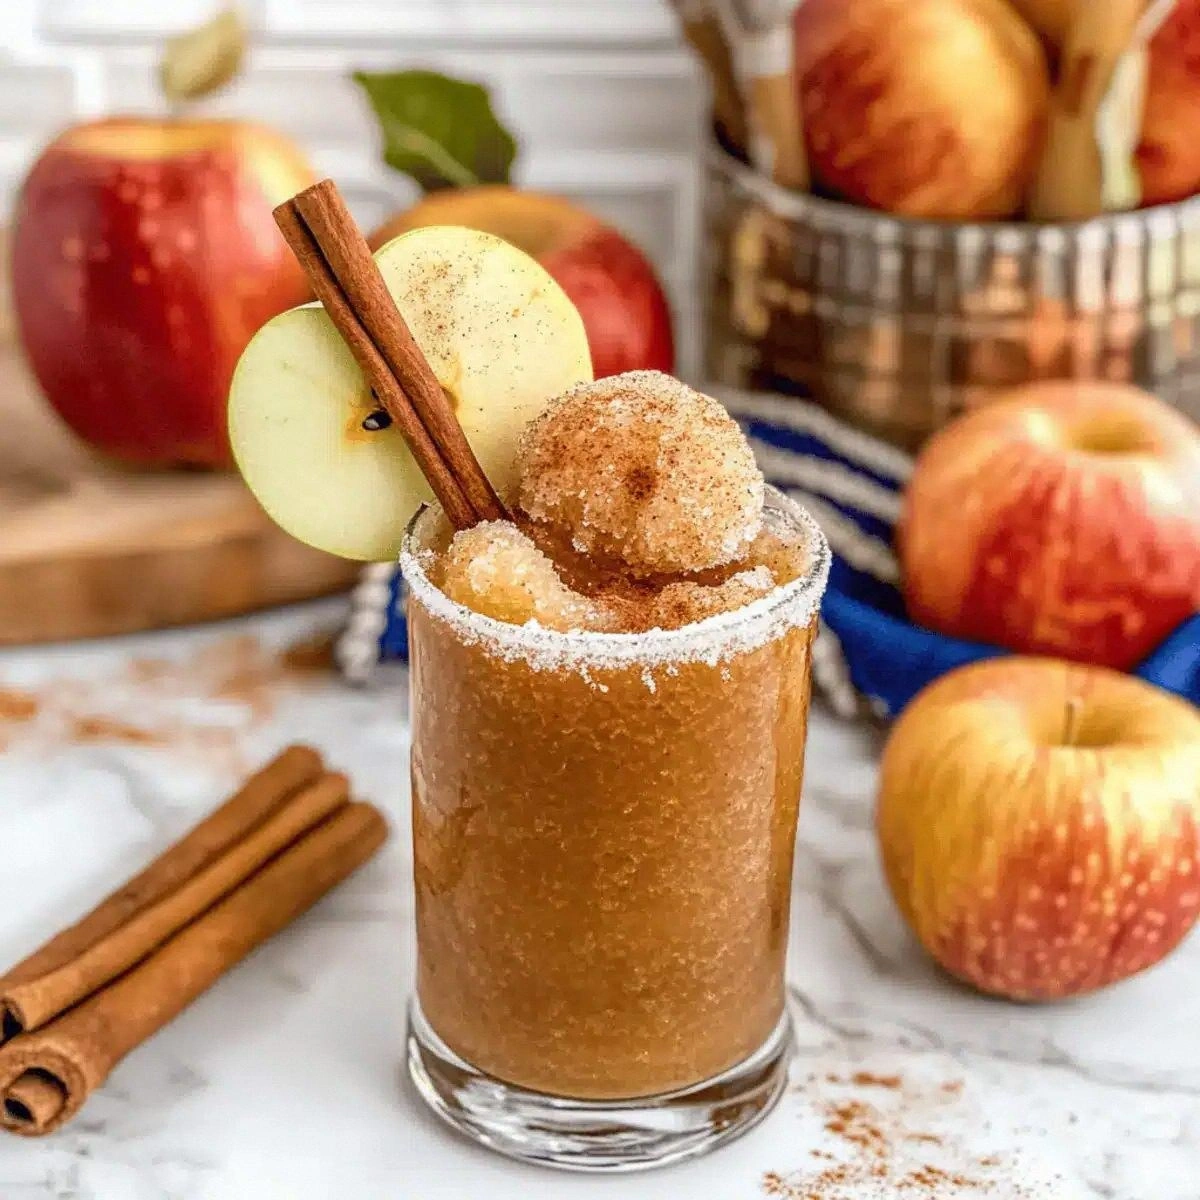
I still remember the night I almost set the kitchen on fire trying to recreate the infamous “Huli Huli” chicken I’d tasted at a luau in Waikiki. The grill was smoking, the sauce was splattering, and I was frantically waving a spatula like a conductor trying to keep a chaotic orchestra in sync. The result? A charred mess that tasted like burnt rubber, but the scent of caramelized pineapple lingered long enough to convince me that I wasn’t completely out of my depth. That disaster sparked a stubborn dare: I was going to perfect the recipe, and I’d dare you to taste the final product and not beg for seconds.
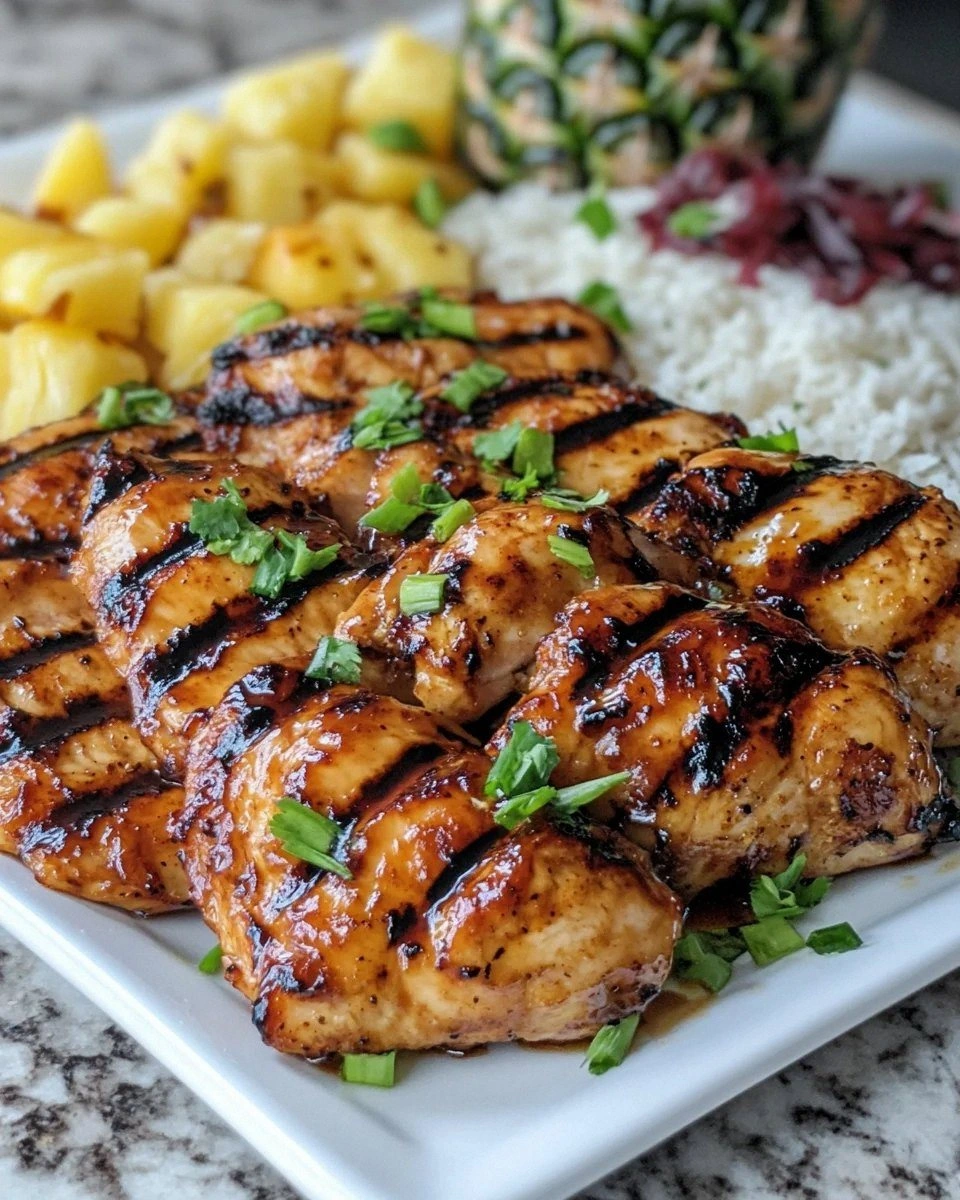
Fast forward a few weeks, a few extra bottles of soy sauce, and a relentless quest for the perfect balance of sweet, salty, and smoky. Picture this: the kitchen humming with the low roar of a grill, the air thick with the perfume of ginger and garlic, and a glossy amber glaze that clings to chicken skin like a second, caramelized coat. When you bite in, the first thing you notice is the crackle of the skin, followed by a juicy interior that practically melts on the tongue, while the pineapple‑infused glaze sings a tropical chorus that makes you feel like you’re on a beach at sunset. That’s the moment I realized I’d finally cracked the code.
What makes this version truly special is the marriage of a few unexpected tricks with the classic Hawaiian spirit. I’m talking about a splash of rice vinegar that cuts through the sweetness, a whisper of sesame oil that adds depth, and a secret step of double‑marinating that builds layers of flavor you won’t find in any generic recipe. Most recipes get the glaze right but forget the texture – they end up soggy or overly sweet. Not this one. Here, the skin stays crisp, the meat stays moist, and the sauce forms a glossy, caramel‑kissed crust that you can’t help but admire before you devour.
Okay, ready for the game‑changer? I’m about to walk you through every single step – from picking the perfect chicken to the final glaze that will have your guests begging for the recipe. By the end, you’ll wonder how you ever made Huli Huli any other way, and I’ll be honest — I ate half the batch before anyone else got to try it. Let’s dive in and make some magic.
What Makes This Version Stand Out
- Flavor Depth: A balanced blend of pineapple juice, soy sauce, and a dash of rice vinegar creates a sweet‑savory symphony that dances on the palate without overwhelming it.
- Texture Perfection: Double‑marinating locks in moisture while a high‑heat grill sears the skin, giving you that coveted crisp‑outside, juicy‑inside contrast.
- Simplicity: Only nine pantry staples are needed, and most of them are things you already have lurking in the back of your cupboard.
- Unique Twist: A splash of sesame oil and a pinch of chili flakes add an unexpected umami‑and‑heat dimension that most versions skip.
- Crowd Reaction: I dare you to serve this at a party and watch the line form; the first bite is a conversation starter, the second bite is a repeat performance.
- Ingredient Quality: Using fresh pineapple juice instead of canned, and choosing a good quality soy sauce, elevates the entire dish from “good” to “legendary.”
- Cooking Method: Grilling gives that authentic smoky flavor, but the recipe also works on a stovetop grill pan for apartment dwellers.
- Make‑Ahead Potential: The glaze can be prepared days in advance, and the marinated chicken can sit refrigerated for up to 12 hours, making it perfect for busy weeks.
Inside the Ingredient List
The Flavor Base
The backbone of any Huli Huli sauce is pineapple juice. Its natural acidity not only tenderizes the chicken but also provides that unmistakable tropical sweetness. If you can’t find fresh juice, look for a brand that lists “100% pineapple juice” with no added sugars – the flavor will be far superior to the canned cocktail mixes. Skipping the juice? You’ll lose the bright, fruity note that makes this dish feel like a vacation on a plate.
Soy sauce brings the salty umami that balances the pineapple’s sugar. I recommend a low‑sodium Japanese soy sauce for a smoother, less harsh salt bite. If you’re watching sodium, you can halve the amount and supplement with a splash of fish sauce for depth. Buying a bottle with a dark amber hue usually signals a richer, more fermented product.
The Sweet & Tangy Crew
Brown sugar is the secret weapon that caramelizes during grilling, creating that glossy glaze that clings like a second skin. Use packed brown sugar for consistent sweetness; the molasses in it also contributes a subtle earthy note. If you prefer a healthier alternative, try coconut sugar – it will add a hint of caramel without the refined sugar punch.
Ketchup adds a tomato‑based tang and a little body to the sauce. Opt for a no‑sugar‑added variety if you’re watching carbs; the acidity will still shine through. A splash of rice vinegar is the unsung hero that cuts through the sweetness, preventing the glaze from becoming cloying. It also helps the sauce set faster on the grill, giving you that perfect snap.
The Aromatic Boost
Fresh ginger and garlic are the aromatic duo that give the glaze its punch. Grated ginger releases its zing faster than sliced, while minced garlic distributes its flavor evenly throughout the sauce. If you’re allergic to garlic, a pinch of asafoetida can mimic its depth without the harsh bite. Skipping these aromatics would leave the sauce flat, like a song without a chorus.
A teaspoon of sesame oil adds a nutty undertone that rounds out the flavor profile. It’s a tiny amount but makes a world of difference, especially when paired with a hint of chili flakes for those who like a gentle heat. Remember, a little goes a long way – you don’t want the oil to dominate the delicate pineapple notes.
The Final Flourish
Chicken thighs are the star of this show because they stay juicy even after high‑heat grilling. The skin‑on, bone‑in pieces render fat that bastes the meat from the inside, giving you that melt‑in‑your‑mouth sensation. If you’re short on time, boneless, skinless thighs work, but you’ll sacrifice some of that coveted crispness.
A quick drizzle of vegetable oil on the grill grates prevents sticking and helps the glaze caramelize evenly. Finish each piece with a sprinkle of sliced green onions for a fresh, peppery bite and a pop of color that makes the dish Instagram‑ready. Everything’s prepped? Good. Let’s get into the real action…
The Method — Step by Step
-
Start by gathering all the sauce ingredients in a medium bowl: pineapple juice, soy sauce, brown sugar, ketchup, rice vinegar, grated ginger, minced garlic, sesame oil, and chili flakes. Whisk them together until the sugar dissolves completely – you’ll notice a glossy sheen forming, which is a good sign. This is the moment of truth: the sauce should smell sweet, tangy, and a little spicy, like a tropical breeze with a hint of fire.
Kitchen Hack: Prepare the sauce the night before and refrigerate; the flavors meld overnight, giving you a richer glaze without extra effort. -
Place the chicken thighs in a large zip‑top bag or a shallow dish and pour half of the sauce over them. Seal the bag, massage the sauce into the meat, and let it marinate in the fridge for at least 2 hours, preferably 6. The chicken will start to turn a light amber color, and you’ll hear a faint sizzle when you later hit the grill – that’s the sugar caramelizing.
-
After the first marination, remove the chicken, pat it dry with paper towels, and set it on a rack uncovered in the fridge for 30 minutes. This step is crucial for achieving that crackly skin; moisture on the surface will steam the chicken instead of searing it.
Watch Out: If you skip the drying step, the skin will stay soggy and you’ll lose the signature Huli Huli crunch. -
Preheat your grill to medium‑high heat, aiming for about 400°F (200°C). Lightly oil the grates with a paper towel dipped in vegetable oil – this prevents sticking and helps the glaze caramelize evenly. When the grill is hot, you should hear a faint “whoosh” as the heat hits the oil.
-
Place the chicken thighs skin‑side down on the grill. Close the lid and let them cook for 6‑8 minutes, resisting the urge to move them. You’ll know they’re ready to flip when the edges start to pull away from the grates and the skin has a deep, golden‑brown hue.
Kitchen Hack: Use a spray bottle with water to mist the grill briefly if flames flare up; this tames flare‑ups without steaming the chicken. -
Flip the chicken and brush generously with the remaining sauce. Cook for another 6‑8 minutes, basting every two minutes. The glaze will thicken, turning sticky and glossy – that’s the caramelization you’ve been waiting for. The scent at this point should be intoxicating, a mix of smoky char and sweet pineapple that makes your mouth water.
-
Check for doneness by inserting an instant‑read thermometer into the thickest part of the thigh; you’re aiming for 165°F (74°C). If you don’t have a thermometer, pierce the meat – the juices should run clear, not pink. Once done, remove the chicken from the grill and let it rest for 5 minutes; this allows the juices to redistribute, keeping every bite juicy.
-
While the chicken rests, give the leftover sauce a quick boil on the stovetop for 2‑3 minutes to thicken it into a dipping glaze. Slice the chicken, drizzle the thickened glaze over the top, and garnish with sliced green onions. That final drizzle is pure magic, coating each piece like a lacquered jewel.
That’s it — you did it. But hold on, I’ve got a few more tricks that’ll take this to another level…
Insider Tricks for Flawless Results
The Temperature Rule Nobody Follows
Never grill chicken straight from the fridge. Let it sit at room temperature for 20‑30 minutes before it hits the heat. This prevents the meat from contracting too quickly, which can squeeze out juices and make the interior dry. I once rushed this step and ended up with a chicken that tasted like a rubber band – not a good look.
Why Your Nose Knows Best
Your sense of smell is a more reliable indicator of doneness than a timer. When the glaze starts to bubble and the aroma shifts from sharp vinegar to sweet caramel, you’re nearing the perfect finish. Trust that nose; it’ll save you from over‑cooking and give you that signature caramelized edge.
The 5‑Minute Rest That Changes Everything
Resting the chicken after grilling is non‑negotiable. Those five minutes let the muscle fibers relax and re‑absorb the juices you just fought hard to lock in. Skipping this step results in a dry bite and a sauce that slides off rather than clinging.
Sauce Thickening Shortcut
If your glaze isn’t thick enough after the final boil, stir in a teaspoon of cornstarch mixed with cold water. It’ll instantly achieve that glossy, cling‑to‑the‑skin consistency without making the sauce gummy.
Grill‑Pan Alternative
Living in an apartment? No grill? No problem. Heat a cast‑iron grill pan over medium‑high heat, add a drizzle of oil, and follow the same steps. The pan will give you those char lines and a similar smoky flavor, especially if you finish with a quick torch for that extra char.
Creative Twists and Variations
This recipe is a playground. Here are some of my favorite ways to switch things up:
Spicy Pineapple Inferno
Add a tablespoon of sriracha and double the chili flakes. The heat will cut through the sweetness, creating a bold contrast that’s perfect for spice lovers. Serve with cooling cucumber slices to balance the fire.
Coconut‑Milk Huli Huli
Replace half of the pineapple juice with coconut milk and add a teaspoon of toasted coconut flakes to the glaze. This gives the sauce a creamy, tropical richness that pairs beautifully with grilled chicken.
Teriyaki‑Style Fusion
Swap soy sauce for a dark, sweet teriyaki glaze and add a splash of mirin. The resulting flavor leans more toward Japanese umami while retaining the pineapple’s bright note – a true East‑West hybrid.
Smoky Chipotle Huli Huli
Introduce a chipotle pepper in adobo sauce to the mixture. The smoky depth enhances the grill’s natural char, and the subtle sweetness of the adobo balances the pineapple. Ideal for a backyard BBQ with a southwestern twist.
Veggie‑Forward Huli Huli
Marinate thick slices of portobello mushrooms or cauliflower steaks using the same sauce. The vegetables absorb the glaze, becoming caramelized and juicy, making a fantastic vegetarian main or side.
Storing and Bringing It Back to Life
Fridge Storage
Place leftover chicken in an airtight container and store in the refrigerator for up to 3 days. The glaze will keep the meat moist, but reheat gently to avoid drying out the skin.
Freezer Friendly
Wrap individual portions in parchment paper, then seal them in a freezer‑safe zip‑top bag. They’ll freeze solid for up to 2 months. When you’re ready to eat, thaw overnight in the fridge and follow the reheating steps below.
Best Reheating Method
Preheat your oven to 350°F (175°C). Place the chicken on a wire rack over a baking sheet, add a splash (about a tablespoon) of water or leftover glaze, and cover loosely with foil. Heat for 12‑15 minutes, then uncover for the last 3 minutes to revive the crisp skin. The added moisture steams the meat back to juiciness while the foil protects the glaze from burning.