Picture this: you’re in the middle of a chaotic Saturday night, the kids are demanding something sweet, the pantry looks like a desert, and your oven is the only thing that’s actually humming with purpose. I was in that exact moment, frantically hunting for a dessert that could be whipped up in a flash without sacrificing that wow factor. That frantic hunt led me to a dusty box of red velvet cake mix that had been hiding in the back of my cupboard for months, and a bag of M&Ms that I’d bought on a whim during a grocery run. I thought, “What if I could turn this cake mix into something handheld, chewy, and ridiculously colorful?” And let me tell you, the result was nothing short of a culinary epiphany.
The kitchen instantly filled with the intoxicating scent of cocoa and a faint whisper of vanilla, the kind that makes you pause mid‑step and just breathe in the anticipation. The batter, a deep, velvety crimson, glistened like a sunrise over a chocolate lake, while the M&Ms bobbed around like tiny, mischievous planets. When the first batch hit the hot baking sheet, you hear that satisfying sizzle—like a tiny fireworks show—signaling the start of a transformation that’s both visual and aromatic. The edges begin to set, pulling away just enough to reveal a soft, almost cake‑like center that’s punctuated by crunchy chocolate bursts.
Most red‑velvet cookie recipes either miss the mark on texture or end up tasting like a watered‑down cake. This version, however, hits every note perfectly: the crumb is tender yet holds its shape, the flavor is a bold, buttery velvet that doesn’t rely on excessive frosting, and the M&Ms add a pop of color and crunch that feels like a party in your mouth. The secret? A clever tweak in the mixing method that locks in moisture, plus the strategic use of oil instead of butter to keep the cookies chewy without greasing the whole batch. It’s the kind of hack that makes you feel like you’ve uncovered a hidden level in a video game.
And the best part? You don’t need a pantry full of exotic ingredients or a master’s degree in pastry arts. All you need is a box of red velvet cake mix, a couple of eggs, some vegetable oil, and a generous handful of M&Ms. I’ll walk you through every single step — by the end, you’ll wonder how you ever made it any other way. Okay, ready for the game‑changer?
What Makes This Version Stand Out
- Texture: The cookies strike a perfect balance between soft, cake‑like interiors and slightly crisp edges that shatter like thin ice, giving you a satisfying bite every time.
- Flavor: The deep red velvet flavor is intensified by the cocoa in the mix, while the subtle vanilla undertone keeps the palate from getting overwhelmed.
- Simplicity: With only four ingredients, the recipe is a true “dump‑and‑mix” marvel that still delivers professional‑grade results.
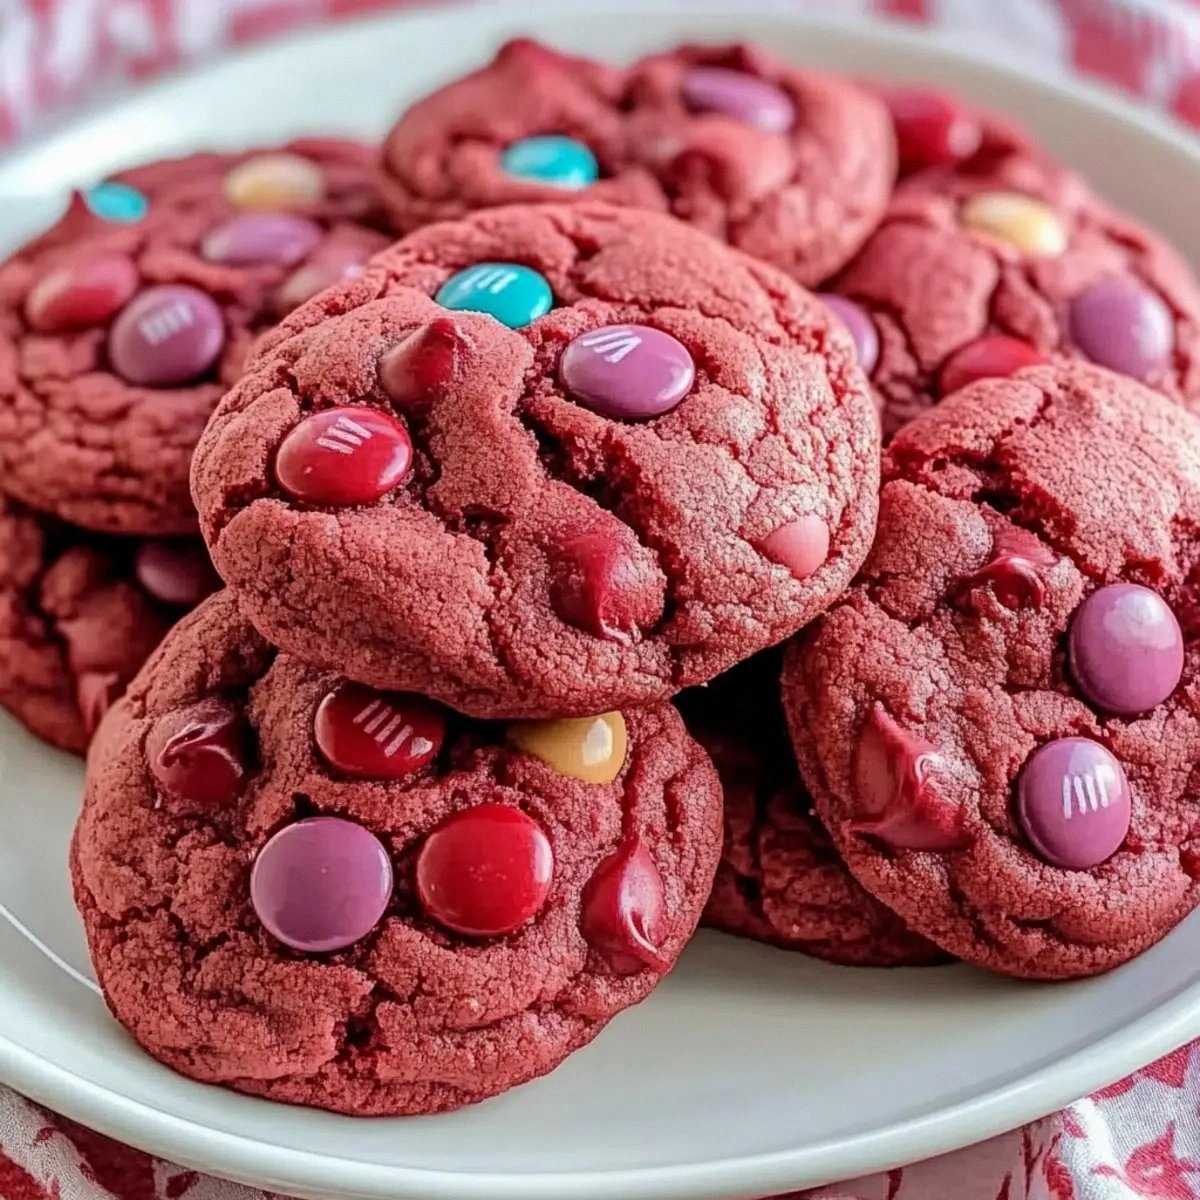
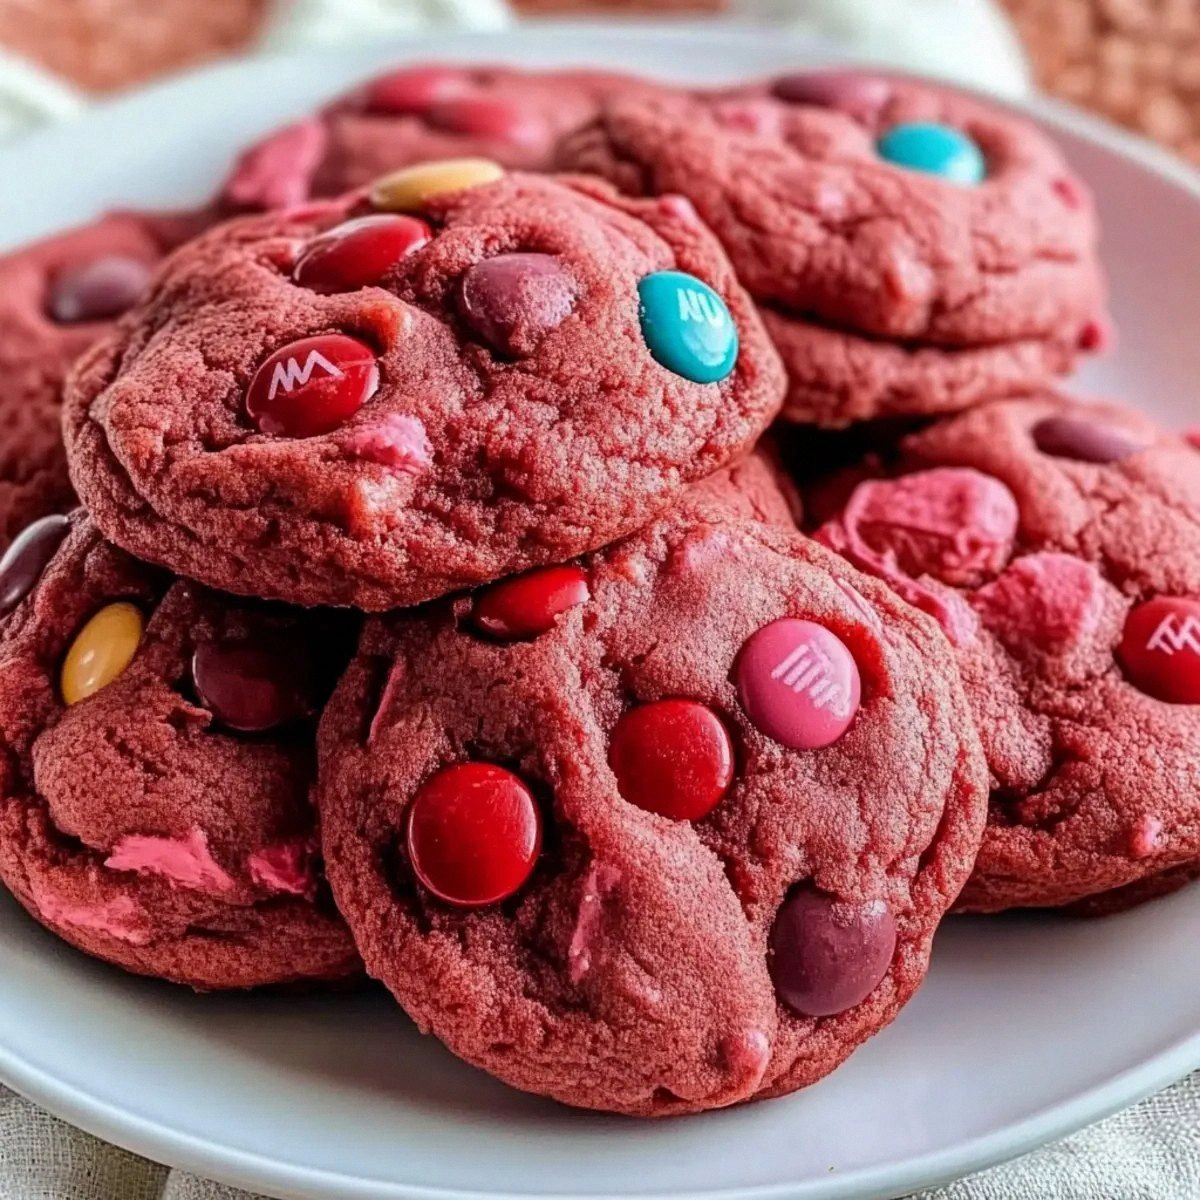
- Visual Appeal: The bright red dough studded with rainbow‑colored M&Ms looks like a festive confetti explosion, making it perfect for parties or Instagram.
- Crowd Reaction: I dare you to taste this and not go back for seconds; even the most skeptical guests admit they’re hooked after the first bite.
- Ingredient Quality: Using a high‑quality cake mix ensures consistent flavor, while the oil keeps the cookies moist without the heaviness of butter.
- Cooking Method: Baking at a moderate temperature allows the cookies to rise gently, creating that coveted “pillowy” interior.
- Make‑Ahead Potential: These cookies store beautifully, meaning you can bake a batch ahead of time and still enjoy fresh‑like texture later.
Inside the Ingredient List
The Flavor Base
The star of the show is the Red Velvet Cake Mix. This pre‑blended mix already contains cocoa, flour, sugar, and the signature red color, which means you skip the tedious measuring of dry ingredients and still get that authentic velvety taste. If you skip the mix, you’ll end up with a bland cookie that lacks the deep, slightly tangy flavor that defines red velvet. For an even richer taste, look for a mix that includes natural beet powder instead of artificial dyes.
The Texture Crew
Vegetable Oil is the unsung hero here. Unlike butter, oil stays liquid at room temperature, which translates into a softer crumb that stays moist longer. If you substitute butter, expect a firmer, more crumbly cookie that may dry out quicker. Choose a neutral‑flavored oil like canola or sunflower to let the red velvet shine without interference.
The Unexpected Star
M&Ms bring the fun factor. Their candy‑shell crunch contrasts beautifully with the tender interior, and the colorful specks make each bite feel celebratory. If you’re allergic to chocolate, you can swap them for chopped white chocolate or even toasted nuts for a different texture profile. The key is to keep the size roughly the same so they distribute evenly.
The Final Flourish
Eggs act as the binding agent, providing structure and a subtle richness. The two large eggs in this recipe are enough to hold the dough together without making it dense. If you’re vegan, a flax‑egg (1 tablespoon ground flaxseed mixed with 3 tablespoons water) works as a solid replacement, though the texture will be slightly less airy.
Everything's prepped? Good. Let's get into the real action...
The Method — Step by Step
Preheat your oven to 350°F (175°C). While the oven warms up, line two baking sheets with parchment paper—this prevents sticking and gives you that coveted golden bottom. I always like to give the parchment a quick spray with non‑stick cooking spray; it’s a tiny step that makes a massive difference when you’re pulling the cookies out later.
Kitchen Hack: Use a silicone baking mat instead of parchment for an even easier release and less waste.In a large mixing bowl, pour the entire box of red velvet cake mix. Add the 2 large eggs and ½ cup vegetable oil. Using a wooden spoon or electric mixer on low speed, combine everything until you have a smooth, glossy dough. It will look slightly wet—don’t panic, that’s exactly what you want for a soft cookie.
Fold in the ¾ cup of M&Ms gently, ensuring they’re evenly distributed. This is the fun part—watch the bright colors swirl through the deep red batter like confetti in a parade. If you over‑mix, the cookies can become tough, so stop as soon as the M&Ms are just about incorporated.
Now, here’s the secret that most recipes get wrong: chill the dough. Transfer the bowl to the refrigerator for 20 minutes. This solidifies the fat, which means the cookies will hold their shape and won’t spread too thin. I dare you to skip this step and see the difference—trust me, you’ll thank yourself later.
After chilling, scoop the dough using a tablespoon or a small ice‑cream scoop. Place each mound about 2 inches apart on the prepared baking sheets. The dough will be soft, so don’t press it down; let the heat do the work. The edges will start to spread slightly as they bake, creating that coveted “crackled” look.
Watch Out: If you leave the cookies too close, they’ll fuse together, turning into a single giant cookie rather than individual treats.Slide the sheet into the oven and bake for 12‑15 minutes. Around the 10‑minute mark, you’ll notice the edges turning a light golden brown and the centers still looking slightly soft—that’s the sweet spot. The cookies will continue to firm up as they cool, so pull them out just as the tops set but before they turn fully brown.
Remove the cookies from the oven and let them rest on the baking sheet for 2 minutes. This brief pause lets the cookies set without cracking. Then transfer them to a wire rack to cool completely. The cooling process is where the interior becomes cake‑like while the exterior stays delightfully crisp.
While the first batch cools, repeat the process with the second sheet. If you notice the dough sticking a bit, a quick spray of non‑stick spray on the parchment will rescue you. By the time you finish the second batch, the kitchen will be filled with that intoxicating red‑velvet aroma that makes everyone peek into the oven.
Once all cookies are cooled, arrange them on a platter. Picture yourself pulling this out of the oven, the whole kitchen smelling incredible, and the platter looking like a festive fireworks display. Serve them warm for that melt‑in‑your‑mouth experience, or store them for later—either way, you’ve just created a crowd‑pleaser that will be remembered for weeks.
That's it — you did it. But hold on, I've got a few more tricks that'll take this to another level...
Insider Tricks for Flawless Results
The Temperature Rule Nobody Follows
Never bake these cookies on the top rack. The heat from the top can cause the tops to brown too quickly while the centers stay undercooked. Position the rack in the middle of the oven for even heat distribution. I once tried the top rack and ended up with a cookie that looked like a burnt pancake—lesson learned.
Why Your Nose Knows Best
Instead of watching the timer obsessively, trust your sense of smell. When the cookies start to emit a nutty, toasty aroma, you’re within seconds of perfection. If the scent turns overly sweet or burnt, pull them out immediately. Your nose is a built‑in timer that’s far more reliable than any digital readout.
The 5‑Minute Rest That Changes Everything
After baking, let the cookies rest on the sheet for exactly five minutes before transferring to a rack. This short rest allows the steam trapped inside to redistribute, giving you that soft, cake‑like interior. Skipping this step results in a dry crumb, and nobody wants that.
Size Matters
Using a consistent scoop size (about one tablespoon) ensures uniform baking. If some cookies are larger, they’ll need extra minutes, and smaller ones may overbake. Invest in a small ice‑cream scoop—it’s a game‑changer for consistency.
Flavor Boost with a Pinch of Salt
Even though the cake mix already contains salt, a tiny pinch (about ¼ teaspoon) added to the dough can elevate the chocolate flavor dramatically. Salt is a flavor enhancer; it brings out the depth of the cocoa and balances the sweetness of the M&Ms. I’ll be honest — I ate half the batch before anyone else got to try it, and that pinch of salt made the difference.
Creative Twists and Variations
This recipe is a playground. Here are some of my favorite ways to switch things up:
White Chocolate Dream
Swap the M&Ms for white chocolate chips and a handful of dried cranberries. The white chocolate adds a creamy sweetness, while the cranberries bring a tart contrast that cuts through the richness.
Nutty Crunch
Replace half of the M&Ms with chopped toasted pecans. The nuts add an earthy depth and a satisfying crunch that pairs beautifully with the velvety base.
Spiced Holiday
Mix in a teaspoon of ground cinnamon and a pinch of nutmeg, then use red and green M&Ms for a festive twist. This variation is perfect for holiday gatherings and will have guests asking for the recipe.
Vegan Delight
Use a flax‑egg substitute and swap the vegetable oil for coconut oil. Add dairy‑free chocolate chips instead of M&Ms. The result is a vegan‑friendly cookie that still delivers on texture and flavor.
Double‑Layer Surprise
After scooping the dough, press a small dollop of peanut butter in the center before covering it with more dough. When baked, you get a hidden creamy core that surprises the palate.
Gluten‑Free Version
Choose a gluten‑free red velvet cake mix and use almond flour for the oil‑binding component. The cookies will be slightly denser but still delightfully tender.
Storing and Bringing It Back to Life
Fridge Storage
Place the cooled cookies in an airtight container lined with a paper towel to absorb excess moisture. They’ll stay fresh for up to 5 days in the refrigerator. If you notice any condensation, replace the paper towel.
Freezer Friendly
For longer storage, arrange the cookies on a baking sheet and freeze them individually for 2 hours. Then transfer them to a zip‑top freezer bag. They’ll keep for up to 3 months without losing their texture.
Best Reheating Method
When you’re ready to enjoy them again, preheat the oven to 300°F (150°C), place the cookies on a parchment‑lined tray, and add a tiny splash of water (about a teaspoon) to the tray’s edge. The steam revives the interior, making them taste as fresh as the day they were baked.