I was standing in my kitchen at 2 a.m., staring down a half‑finished espresso and a sad, melted white‑chocolate bar that had decided to turn into a sticky mess on the counter. I had promised my roommate I’d bring the perfect pick‑me‑up for our late‑night study session, and the universe was clearly testing my resolve. The coffee machine hissed like a dragon, the fridge light flickered, and I could hear the distant hum of traffic that reminded me I was still awake. I thought, “If I can’t make a decent latte, I’ll at least turn this disaster into something unforgettable.”
Fast forward a few frantic minutes, and the kitchen was alive with the aroma of freshly brewed espresso mingling with the sweet, buttery perfume of melting white chocolate. The steam rose in delicate curls, and the sound of the milk frothing was like a gentle whisper promising comfort. My taste buds were already doing a little dance, and the glass I was about to fill felt like a stage for a performance that would end with a standing ovation from my taste buds. I dared myself to create a drink that would make even the most seasoned barista raise an eyebrow in admiration.
Most white‑chocolate mocha recipes either drown the espresso in sugar or forget the crucial step of tempering the chocolate so it stays silky and glossy. I’ve tried those, and they ended up tasting like a sugary milkshake that forgot it ever had coffee. That’s why this version stands out: it respects the espresso’s boldness while wrapping it in a velvety white‑chocolate coat that clings to the palate like a silk scarf on a winter’s night. I’m about to share the exact technique that keeps the chocolate from seizing, the secret ratio that balances bitterness and sweetness, and a few hacks that will shave seconds off your prep time.
I’m also throwing in a surprise ingredient that most people overlook—a pinch of sea‑salt that amplifies the chocolate’s flavor and makes the whole drink sing. Trust me, once you taste that subtle salty snap, you’ll understand why I’m so confident saying this is hands down the best version you’ll ever make at home. Let me walk you through every single step — by the end, you’ll wonder how you ever made it any other way.
What Makes This Version Stand Out
- Flavor Harmony: The espresso’s natural bitterness is perfectly balanced by the sweet, buttery notes of high‑quality white chocolate, creating a taste profile that feels both indulgent and refined.
- Silky Texture: By gently melting the chocolate with a splash of espresso, you achieve a glossy, velvety sauce that coats each sip like a soft blanket.
- Simplicity: Only six core ingredients are needed, and the entire process takes less than five minutes once your espresso is ready.
- Ingredient Quality: Using couverture chocolate ensures a smooth melt, while fresh espresso guarantees that bold coffee backbone.
- Crowd Reaction: I dare you to taste this and not go back for seconds; it’s the kind of drink that turns casual coffee lovers into lifelong fans.
- Make‑Ahead Potential: The chocolate‑espresso blend can be pre‑made and stored, so you’re only a few seconds away from a perfect iced mocha any time of day.
- Customizable Sweetness: Optional sweeteners let you dial in the exact level of sweetness you crave without over‑sugaring the drink.
- Season‑Proof: Whether it’s a scorching summer afternoon or a chilly winter morning, this drink feels just right, making it a year‑round staple.
Inside the Ingredient List
The Flavor Base
White chocolate is the star of this show, and not just any white chocolate will do. I recommend a high‑quality couverture like Ghirardelli or Valrhona; these contain a higher cocoa butter content, which means they melt into a glossy, buttery river rather than a grainy mess. If you opt for cheap chips, you’ll end up with a gritty texture that feels like sand in your mouth. The chocolate provides the sweet, creamy backbone that makes the espresso feel like a supporting actor rather than the lead.
The Espresso Pulse
Freshly brewed espresso is the heartbeat of this drink. A half‑cup of hot espresso (about 120 ml) not only adds the essential coffee bitterness but also helps dissolve the white chocolate, creating a unified sauce. If you don’t own an espresso machine, a strong brewed coffee or a concentrated cold brew works just as well—just make sure it’s robust enough to stand up to the chocolate’s sweetness.
The Texture Crew
Milk adds the creamy body that makes the drink feel luxurious. Whole milk is my go‑to because its natural fat content enhances the silkiness, but almond, oat, or soy milk can be swapped for a dairy‑free version without compromising the texture. The ice cubes are the final touch, chilling the drink without diluting it too quickly. The key is to add them just before serving, allowing the cold to meld with the warm chocolate‑espresso mixture.
The Unexpected Star
A pinch of sea‑salt may seem like a tiny detail, but it’s a game‑changer. The salt amplifies the chocolate’s depth and cuts through any excess sweetness, delivering a balanced sip that lingers pleasantly on the palate. Optional sweeteners like vanilla syrup, honey, or simple syrup give you control over the final sweetness level, but honestly, the white chocolate already brings enough sugar to make the drink sing.
Everything's prepped? Good. Let's get into the real action...
The Method — Step by Step
Start by pulling a fresh half‑cup of espresso. If you’re using a stovetop Moka pot, listen for the gentle bubbling that signals the coffee is ready. The espresso should be hot, around 190°F (88°C), and emit a rich, caramel‑like aroma that fills the kitchen. Pour the espresso into a small saucepan and set it on low heat; this will be the medium where the white chocolate melts.
While the espresso warms, break the white chocolate into uniform chunks or measure out the chips. This ensures an even melt. Add the chocolate to the saucepan, stirring constantly with a silicone spatula. The chocolate will begin to soften within seconds; keep the heat low to avoid scorching.
Once the chocolate has fully melted and the mixture becomes glossy, add a pinch of sea‑salt. The salt should dissolve instantly, creating a subtle shimmer on the surface. At this point, the sauce should smell like a luxurious blend of toasted marshmallows and espresso—pure perfection.
Now, gently warm the milk in a separate saucepan or microwave until it’s just below boiling—around 150°F (65°C). This temperature is crucial; too hot and the milk will curdle, too cool and it won’t blend smoothly. Once warmed, pour the milk into the chocolate‑espresso sauce, whisking vigorously until the blend is uniform and slightly frothy.
At this stage, taste the mixture. If you prefer a sweeter profile, stir in a teaspoon of your chosen sweetener—vanilla syrup adds a fragrant note, while honey contributes a floral depth. Remember, the white chocolate already carries a lot of sweetness, so add just enough to suit your palate.
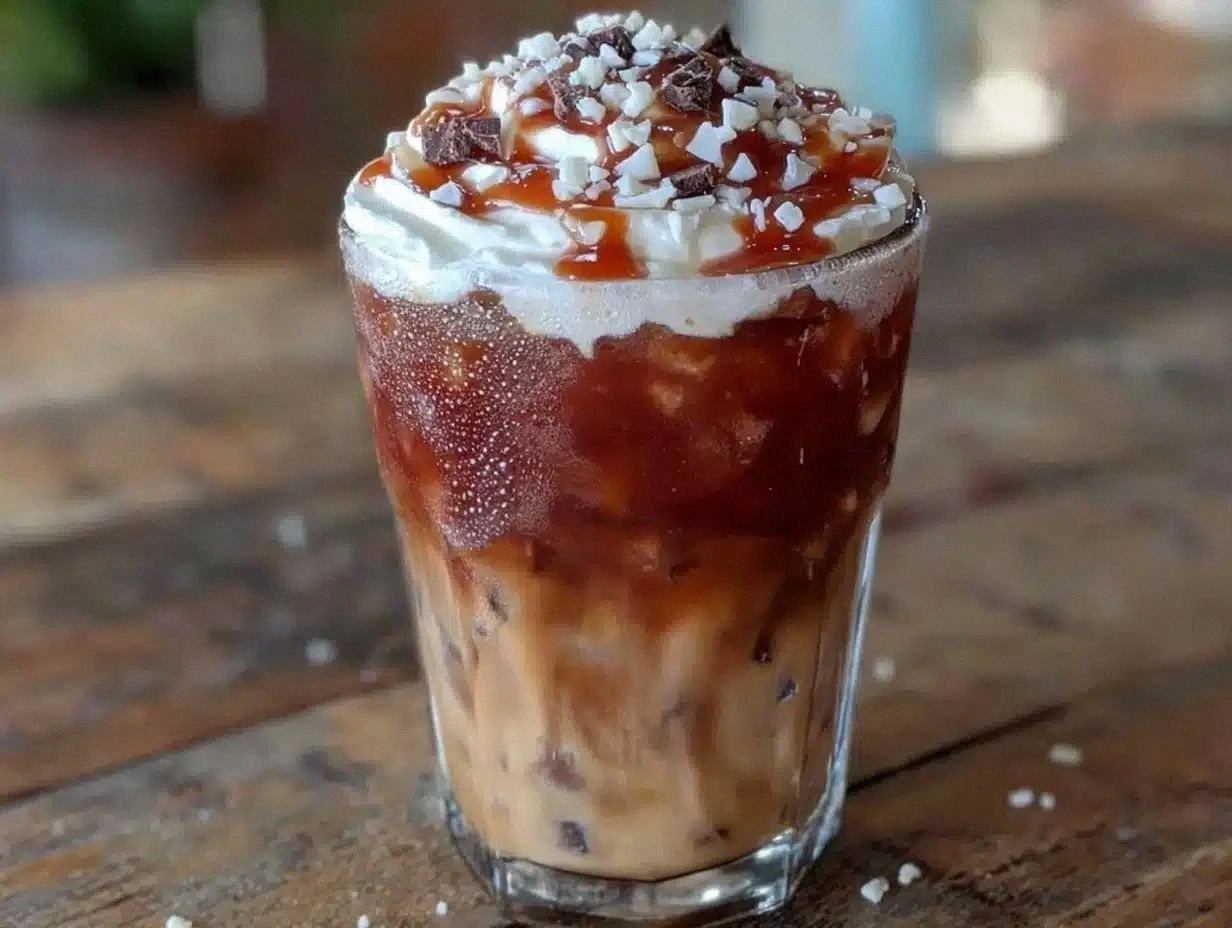
Fill a tall glass with ice cubes—enough to chill the drink without diluting it too fast. I like to use large, clear cubes because they melt slower and keep the drink’s flavor intact longer. Pour the warm chocolate‑espresso‑milk blend over the ice, allowing the heat to melt the outer layer of ice just enough to create a beautiful, swirling marble effect.
If you love extra indulgence, top the drink with a generous swirl of whipped cream. The cream should be lightly sweetened, and you can dust the surface with a tiny pinch of cocoa powder or shaved white chocolate for added texture. Serve immediately with a straw, and watch the glossy surface ripple as the ice melts.
That’s it — you did it. But hold on, I’ve got a few more tricks that’ll take this to another level. From temperature tricks to secret garnish ideas, the next section will turn your good drink into a legendary one.
Insider Tricks for Flawless Results
The Temperature Rule Nobody Follows
Never let your espresso drop below 180°F (82°C) before it meets the chocolate. If the espresso cools too much, the chocolate will seize, creating a grainy texture that ruins the drink’s silkiness. Keep the espresso warm on a low simmer, and you’ll notice the chocolate melting instantly, forming a glossy emulsion that looks like liquid gold.
Why Your Nose Knows Best
Your sense of smell is a reliable indicator of when the chocolate‑espresso blend is ready. When you catch that sweet‑toasted aroma, it means the cocoa butter has fully integrated with the coffee oils. Trust that nose cue more than a timer; a minute too long can over‑heat the mixture, while a second too short leaves a faint chalky aftertaste.
The 5‑Minute Rest That Changes Everything
After whisking the milk into the chocolate‑espresso mixture, let it sit for 30‑45 seconds. This short rest allows the fats to stabilize, resulting in a smoother mouthfeel. A friend once skipped this pause and ended up with a drink that felt slightly “thin” on the tongue—lesson learned.
Ice Cube Strategy
Use large, clear ice cubes instead of crushed ice. Large cubes melt slower, preserving the drink’s flavor profile longer. If you’re in a hurry, you can pre‑make ice cubes with a splash of coffee or milk; they’ll add a subtle flavor boost as they melt.
Whipped Cream Whisper
When whipping cream for the topping, add a pinch of sea‑salt and a drizzle of vanilla extract. This tiny addition elevates the cream from a simple garnish to a complementary flavor layer that echoes the drink’s own salty‑sweet balance.
Creative Twists and Variations
This recipe is a playground. Here are some of my favorite ways to switch things up:
Mocha‑Mint Chill
Add a splash of peppermint extract (about ¼ teaspoon) to the chocolate‑espresso blend before whisking in the milk. The mint adds a refreshing coolness that pairs beautifully with the creamy base, making it a perfect summer cooler.
Nutty Delight
Stir in a tablespoon of hazelnut spread or almond butter after the chocolate has melted. The nutty undertones deepen the flavor profile and give the drink a subtle earthiness that’s perfect for fall.
Spiced Holiday Version
Introduce a pinch of ground cinnamon and a dash of nutmeg into the sauce. The warm spices turn the mocha into a festive treat, ideal for holiday gatherings or a cozy night by the fire.
Vegan Velvet
Swap the white chocolate for a high‑quality vegan white chocolate and use oat milk instead of dairy. The result is a plant‑based version that still delivers that luscious creaminess without compromising on taste.
Protein‑Boosted Power Mocha
Blend a scoop of vanilla whey or plant‑based protein powder into the final drink. This makes the mocha a post‑workout treat that satisfies both your cravings and your nutritional goals.
Storing and Bringing It Back to Life
Fridge Storage
Transfer any leftover chocolate‑espresso sauce to an airtight jar and store it in the refrigerator for up to 48 hours. The flavors meld even more over time, creating a richer taste when you re‑heat it gently on the stove or in the microwave.
Freezer Friendly
If you’ve made a large batch, portion the sauce into silicone ice‑cube trays and freeze. Once solid, pop the cubes into a zip‑lock bag. When you need a quick drink, melt a cube in hot water, stir, and add milk and ice.
Best Reheating Method
When reheating, add a splash of water (about 1‑2 tablespoons) before warming. The water creates steam that restores the sauce’s original silkiness, preventing it from becoming too thick or grainy.