I was in the middle of a frantic Saturday night, the kind where the fridge is half‑empty, the pantry is whispering for attention, and a friend just dared me to make something “so good it’ll make them forget about pizza.” I grabbed the nearest box of strawberry cake mix, a tub of cream cheese, and a mountain of Hershey’s Kisses, then proceeded to create a cookie that would make even the most skeptical sweet‑tooth believers swoon. The first batch was a disaster: flat, bland, and lacking that signature kiss of chocolate. I laughed, I crumbled the dough, and I vowed to get it right. That night, armed with a fresh mindset and a sprinkle of kitchen bravado, I discovered the secret that turned those sad crumbs into buttery, strawberry‑kissed marvels.
Picture this: the kitchen humming with the low whirr of the mixer, the buttery aroma swirling like a warm hug, and the faint scent of strawberry cake mix teasing your nostrils. The sound of chocolate kisses hitting the dough is a tiny “pop” that feels like fireworks in a miniature arena. Your fingertips feel the slick, velvety texture of melted butter coating the bowl, and the dough itself feels like a plush pillow you just want to sink your hands into. When the cookies finally slide onto the baking sheet, the edges turn a golden‑brown that looks like sunrise on a summer morning, and the center stays soft, pink‑tinged, and ready to melt in your mouth.
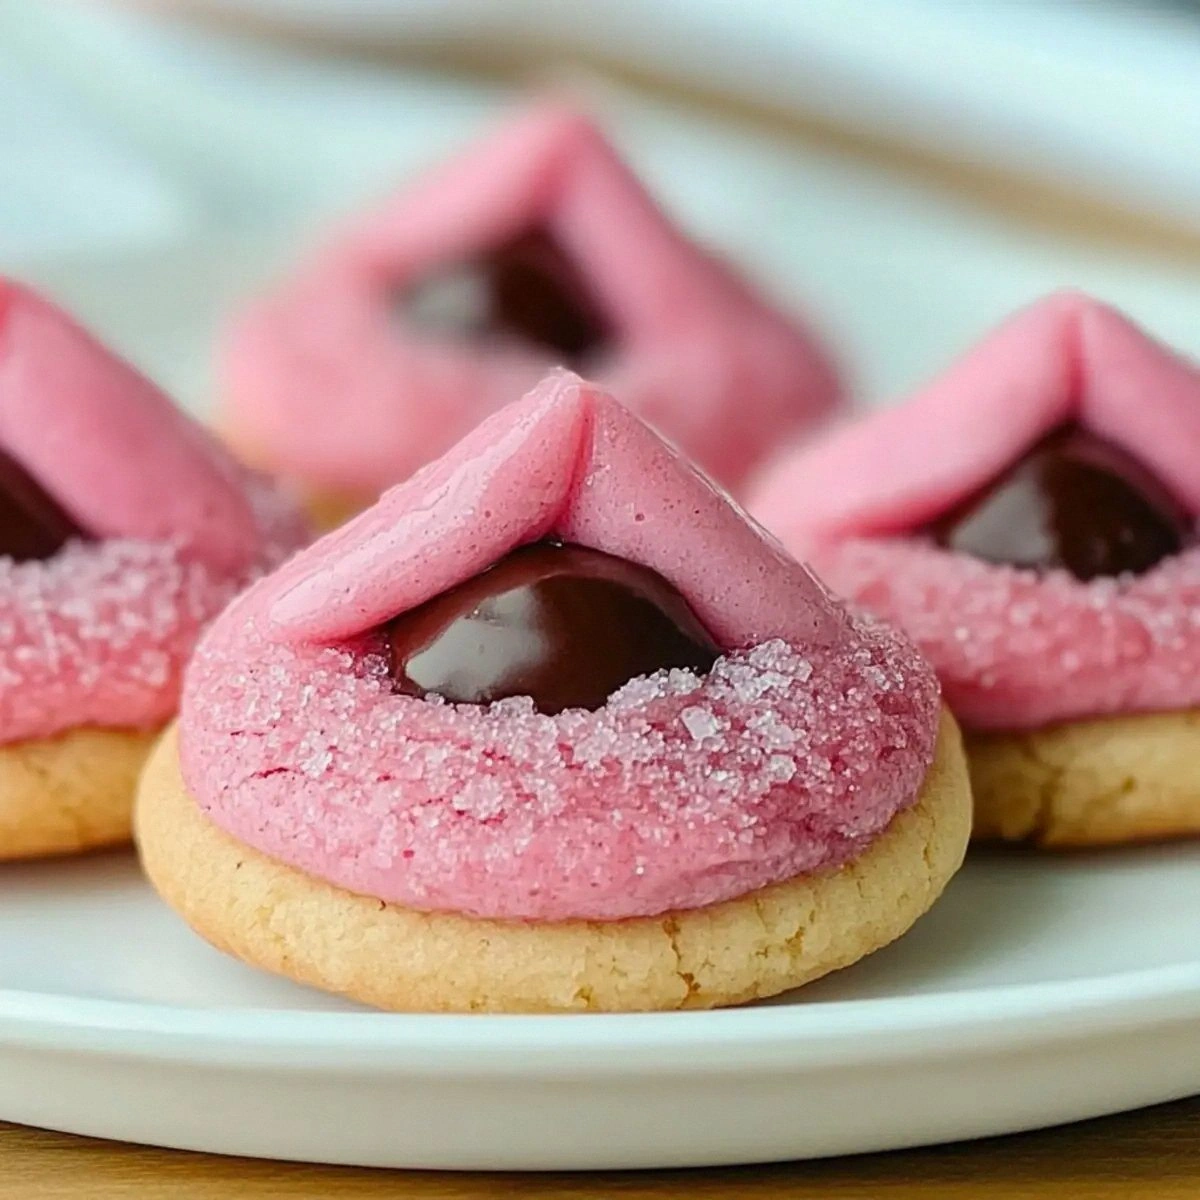
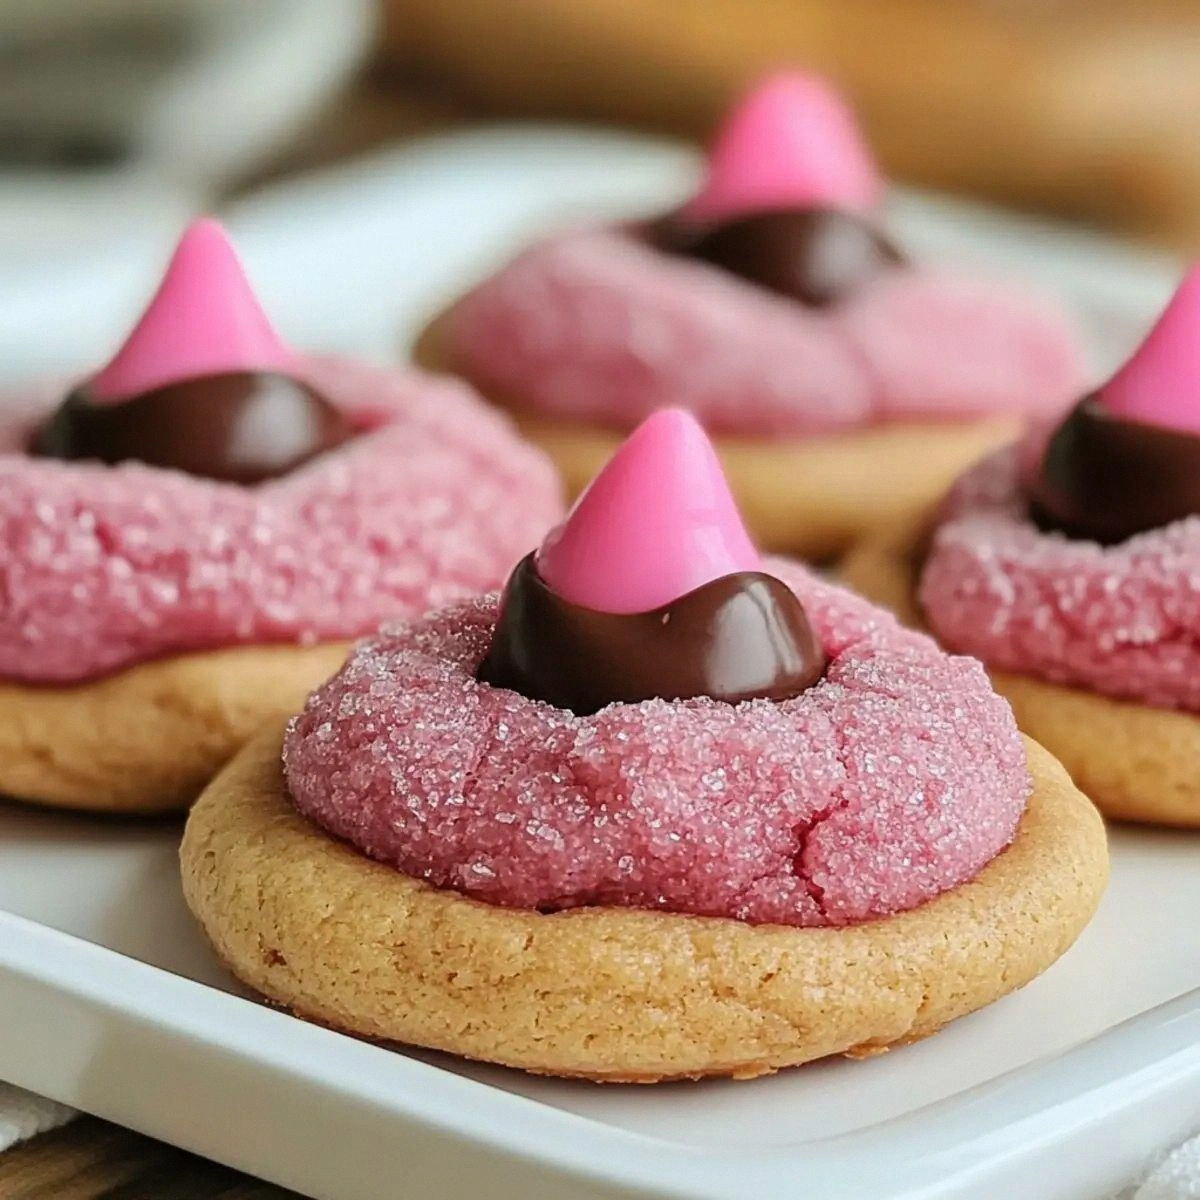
Why does this version stand out? Because most “strawberry‑kiss” recipes either drown the delicate fruit flavor in a sea of sugar or forget the chocolate altogether. I’ve cracked the code by balancing the cake mix’s sweetness with a buttery base, folding in cream cheese for that luxurious crumb, and hiding 30 chocolate kisses right in the middle of each cookie. The result is a bite that starts with a buttery crunch, slides into a creamy strawberry‑kissed heart, and finishes with a melt‑in‑your‑mouth chocolate surprise. It’s like a love triangle in your mouth, and I dare you to taste this and not go back for seconds.
Okay, ready for the game‑changer? The secret ingredient is the melted butter—yes, melted, not softened. When you melt the butter, it coats every flour particle like a silk sheet, creating a cookie that’s crisp on the outside yet tender inside. I’ll also show you a tiny trick with the cream cheese that keeps the dough from becoming gummy, and a method to embed the chocolate kisses so they don’t melt away before the cookies are done. Let me walk you through every single step — by the end, you’ll wonder how you ever made it any other way.
What Makes This Version Stand Out
- Flavor Harmony: The strawberry cake mix provides a bright, fruity backbone while the butter adds a rich, nutty undertone that never overpowers.
- Texture Triple‑Threat: A crisp edge, a soft, cream‑cheese‑infused center, and a hidden chocolate kiss create a mouthfeel that’s simultaneously crunchy, creamy, and melty.
- Simplicity Meets Sophistication: Only six ingredients, yet the result feels like a bakery‑level treat—no fancy equipment required.
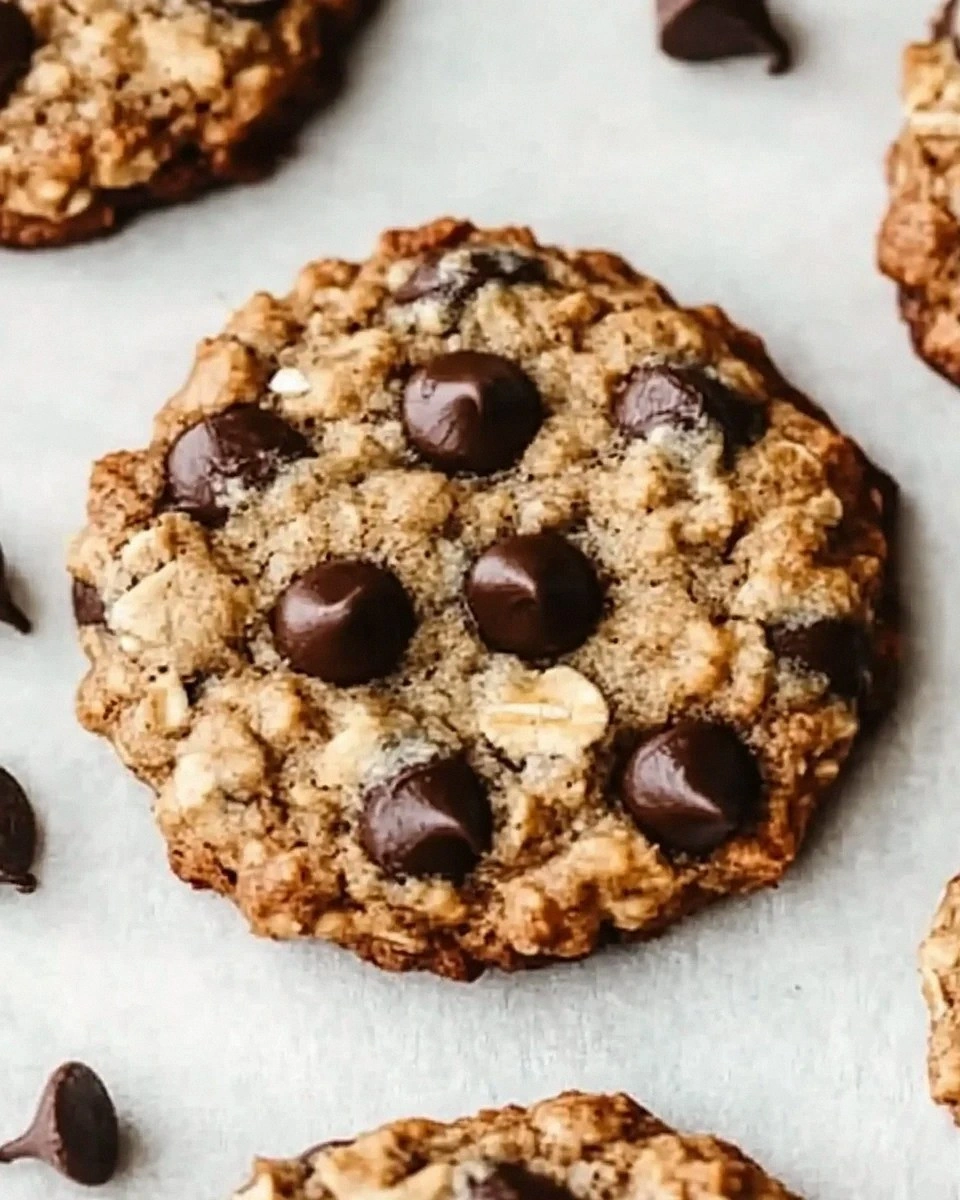
- Unexpected Chocolate Touch: The Hershey’s Kisses don’t just sit on top; they’re baked inside, releasing a burst of cocoa that balances the strawberry’s acidity.
- Crowd‑Pleaser Factor: Kids love the pink hue and chocolate surprise, while adults appreciate the buttery depth and nostalgic flavor profile.
- Make‑Ahead Magic: The dough can be refrigerated for up to 24 hours, allowing flavors to meld and making last‑minute baking a breeze.
- Ingredient Quality: Using real butter (not margarine) and full‑fat cream cheese ensures a richer, more satisfying bite.
- Cooking Method: Baking at a moderate 350°F creates that perfect balance of golden edges and a soft, pink interior.
Inside the Ingredient List
The Flavor Base
The Strawberry Cake Mix is the heart of this cookie. It carries the sweet, slightly tangy strawberry flavor that makes the cookies instantly recognizable. If you skip it, you’ll lose that iconic pink hue and the bright fruit note that cuts through the butter’s richness. Look for a mix that contains real strawberry powder rather than just artificial flavor, and give the box a quick sniff before you buy—if it smells like fresh strawberries, you’re good to go. As a swap, you could use a vanilla cake mix and add 2 teaspoons of freeze‑dried strawberry powder for a similar effect.
The Texture Crew
Butter, melted is the secret weapon. Melted butter coats each flour particle, creating a cookie that spreads just enough for a crisp edge while staying tender inside. If you use softened butter, the dough will be too soft and the cookies may spread too thin, losing that coveted bite‑size thickness. Choose unsalted, high‑quality butter and melt it slowly over low heat to avoid browning. For a dairy‑free version, try a 1:1 swap with coconut oil, but expect a subtle coconut flavor to emerge.
Cream Cheese, softened adds a luxurious creaminess that turns the interior into a velvety pillow. It also contributes a slight tang that balances the sweetness of the cake mix. If you omit it, the cookies become dense and lose their melt‑in‑your‑mouth quality. When selecting cream cheese, go for the full‑fat version; low‑fat options turn the dough gummy. A good tip is to cut the cheese into cubes and let it sit at room temperature for 15 minutes before mixing.
The Unexpected Star
Chocolate Hershey's Kisses are the surprise element that makes each bite unforgettable. Their smooth milk chocolate melts just enough to create a gooey center without overtaking the strawberry flavor. Unwrap them before folding into the dough; this prevents the foil from sticking to the cookies and ensures an even distribution. If you prefer a deeper cocoa punch, swap half of the milk kisses for dark chocolate Kisses.
The Final Flourish
Powdered Sugar or Pink Granulated Sugar is used for a final dusting that adds a sparkle and a gentle sweetness without overwhelming the palate. Powdered sugar dissolves quickly, giving a smooth finish, while pink granulated sugar adds a subtle crunch and a festive look. If you’re watching sugar, feel free to reduce the amount by a tablespoon; the cookies will still be deliciously sweet thanks to the cake mix. When dusting, use a fine mesh sieve to avoid clumps and achieve an even coating.
Everything's prepped? Good. Let's get into the real action…
The Method — Step by Step
Preheat your oven to 350°F (175°C) and line two baking sheets with parchment paper. The moment the oven clicks on, you’ll hear that comforting hum that signals the start of something delicious. While the oven warms, take a moment to admire the glossy sheen of the melted butter in its saucepan—this is the first sign that magic is about to happen.
In a large mixing bowl, combine the strawberry cake mix with the melted butter. Use a wooden spoon to stir until the mixture looks like a thick, pink‑orange dough. You’ll notice the butter coating the dry mix, turning it into a cohesive mass that feels slightly sticky but manageable.
Crack the egg into the bowl and beat it lightly before folding it into the dough. This is the moment where the dough starts to come alive; you’ll hear a faint “whoosh” as the egg emulsifies with the butter, creating a glossy texture that’s a pleasure to work with.
Now, the cream cheese enters the stage. Drop the softened cubes into the bowl and gently fold them in with a spatula. This step is pure magic. The cream cheese should melt just enough to create ribbons through the dough without turning the whole thing into a soupy mess. If you see lumps, give it a few more gentle turns.
Unwrap the 30 Hershey’s Kisses and set them aside. This is where the “kiss” part truly comes into play. Take a small scoop of dough—about the size of a walnut—flatten it slightly, and press a kiss into the center. Then, roll the dough around the kiss, sealing it inside. Repeat until all kisses are hidden. Watch Out: If the dough is too warm, the kisses may melt prematurely, turning the centers into a chocolate puddle.
Using a cookie scoop or a tablespoon, portion out the dough onto the prepared baking sheets, spacing them about 2 inches apart. The dough will spread slightly, so give it room. The tops should look slightly domed; this is the perfect shape for an even bake.
Place the trays in the oven and bake for 12‑15 minutes, or until the edges turn a light golden brown and the centers still look soft. The scent that fills your kitchen at this point is nothing short of intoxicating—strawberry, butter, and chocolate mingling in a fragrant dance. Resist the urge to open the oven too early; the cookies need that steady heat to set the outer crust.
When the timer dings, remove the trays and let the cookies cool on the sheet for 5 minutes before transferring them to a wire rack. This brief rest allows the cookies to firm up just enough to handle without breaking. As they cool, you’ll see the pink hue deepen, and the chocolate kisses will start to peek through the surface.
Finally, dust the cooled cookies with powdered sugar or pink granulated sugar for that final sparkle. This step adds a delicate sweet finish and makes the cookies look like they belong on a boutique pastry case. Serve them warm for maximum melt‑in‑your‑mouth effect, or store them airtight for later indulgence.
That's it — you did it. But hold on, I've got a few more tricks that'll take this to another level…
Insider Tricks for Flawless Results
The Temperature Rule Nobody Follows
Never bake these cookies straight from the fridge unless you’ve pre‑warmed the dough for at least 10 minutes. Cold dough spreads too quickly, resulting in thin, crispy edges that lose that soft pink center. Letting the dough rest at room temperature gives the butter a chance to re‑soften, ensuring an even spread and a perfect texture. I once tried skipping this step and ended up with “pancake‑like” cookies—definitely not the goal.
Why Your Nose Knows Best
Your sense of smell is the most reliable indicator that the cookies are done. When the butter starts to caramelize, you’ll catch a faint nutty aroma that signals the edges are ready. If you rely solely on time, you risk over‑baking and turning that soft interior into a dry crumb. Trust the nose, not the clock.
The 5‑Minute Rest That Changes Everything
After scooping the dough onto the sheet, let it rest for exactly five minutes before sliding it into the oven. This short pause lets the gluten relax and the butter solidify just enough to prevent excessive spreading. The result is a cookie that holds its shape and showcases a proud, rounded dome.
Chocolate Seal Technique
When you encase each Hershey’s Kiss, press the dough around it firmly, then gently roll it between your palms to seal any gaps. This ensures the chocolate stays inside and doesn’t ooze out, preserving the surprise element. A friend once tried a loose seal and ended up with chocolate speckles on the cookie surface—messy and less elegant.
The Sugar Dust Finish
Use a fine mesh sieve to dust powdered sugar while the cookies are still warm. The residual heat helps the sugar adhere, creating a subtle sheen that catches the light. For a festive twist, swap in pink granulated sugar for a crunchy sparkle.
Creative Twists and Variations
This recipe is a playground. Here are some of my favorite ways to switch things up:
White Chocolate Raspberry Dream
Swap the milk Hershey’s Kisses for white chocolate chips and add a teaspoon of raspberry puree to the dough. The result is a pastel‑pink cookie with a tangy raspberry bite that pairs beautifully with the creamy base.
Mocha Madness
Replace half of the chocolate kisses with dark chocolate espresso‑infused Kisses. Add a pinch of instant coffee granules to the dry mix for a subtle mocha undertone that will wow any caffeine lover.
Nutty Strawberry Crunch
Fold in ½ cup of finely chopped toasted almonds or pistachios. The nutty crunch adds texture contrast and elevates the flavor profile, making the cookies feel more sophisticated.
Vegan Velvet
Swap butter for coconut oil, use a plant‑based cream cheese alternative, and choose a vegan strawberry cake mix. The cookies stay buttery and soft, and the chocolate kisses can be replaced with vegan dark chocolate pieces.
Holiday Red Velvet
Add a tablespoon of cocoa powder to the dry mix and a splash of red food coloring. Dust with powdered sugar mixed with a pinch of cinnamon for a festive twist that works beautifully for winter gatherings.
Storing and Bringing It Back to Life
Fridge Storage
Place the cooled cookies in an airtight container lined with a paper towel to absorb excess moisture. They’ll stay fresh for up to 5 days. If you notice any condensation, simply open the container for a minute to let the humidity escape.
Freezer Friendly
For longer keeping, arrange the cookies on a parchment‑lined tray and freeze them flat for 2 hours. Transfer the frozen cookies to a zip‑top bag or a vacuum‑sealed container. They’ll keep for up to 3 months. When you’re ready to eat, let them thaw at room temperature for 15 minutes.
Best Reheating Method
To revive that fresh‑out‑of‑the‑oven softness, preheat your oven to 300°F (150°C), place the cookies on a baking sheet, and add a tiny splash (about a teaspoon) of water to the sheet before covering loosely with foil. Heat for 5‑7 minutes. The steam created by the water brings back the melt‑in‑your‑mouth interior without drying out the edges.