I was standing in my kitchen, staring at a bowl of overripe bananas that looked like they were auditioning for a compost heap, when a daring friend texted me, “Make something that will make me forget I’m on a diet.” I laughed, grabbed the bananas, and thought, “If I’m going to ruin a perfectly good piece of fruit, it might as well become the star of the show.” The smell of butter melting in the pan, the soft rustle of rolled oats, and the faint whisper of chocolate chips in the pantry created a symphony that begged for a remix. I tossed the bananas into a bowl, added a splash of vanilla, and the whole kitchen filled with a sweet, caramel‑like aroma that made my stomach do a happy dance.
Most cookie recipes either drown you in sugar or leave you with a dry, crumbly mess that feels like chewing on cardboard. I’ve tried the “quick fix” versions that promise a 10‑minute miracle, only to end up with flat, flavorless discs that could double as coasters. This version, however, balances the natural sweetness of bananas with the comforting chew of oats, while chocolate chips melt into pockets of molten bliss. The secret? A tiny dash of cinnamon that adds depth, and a gentle bake that lets the edges crisp just enough to crackle under your teeth without turning the center into a soggy pancake.
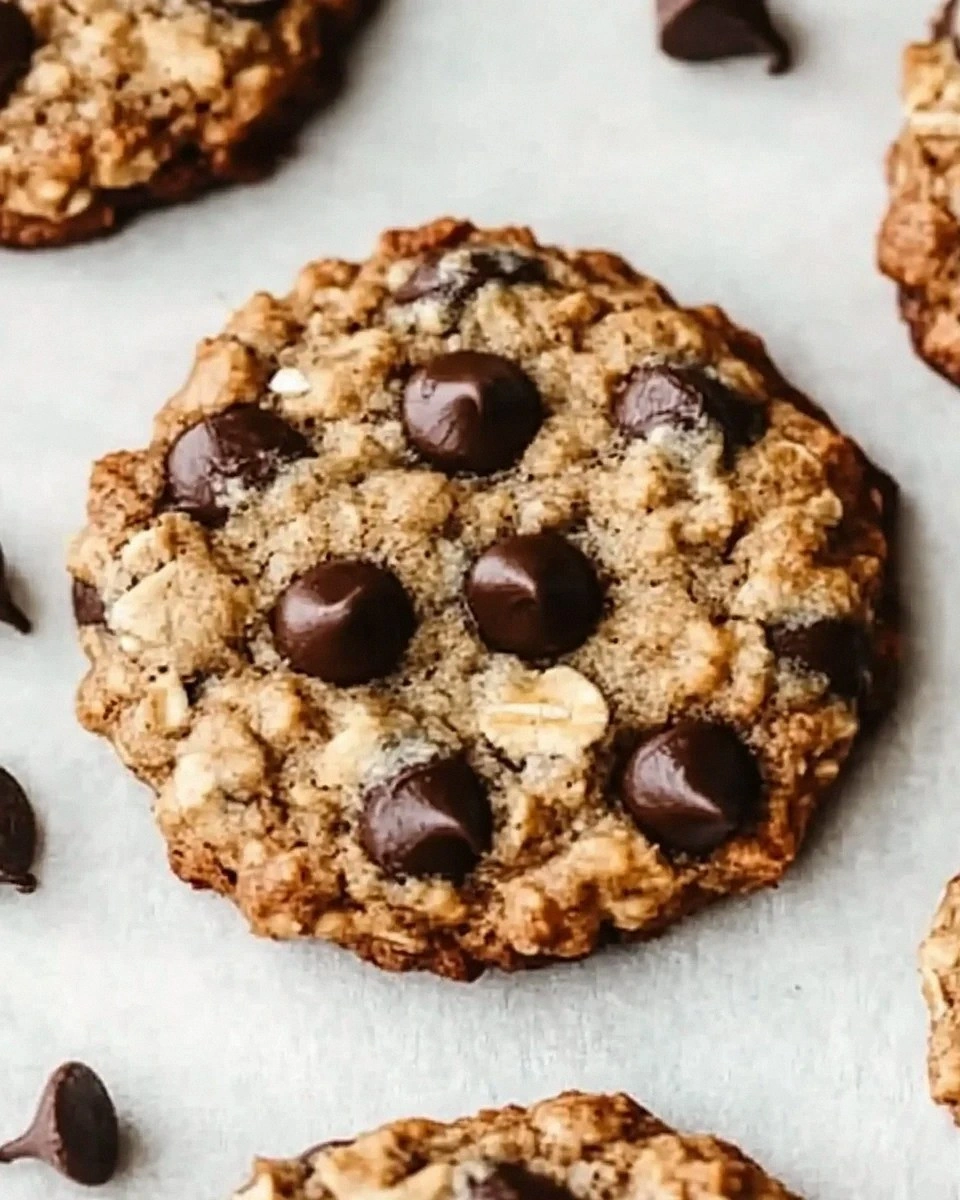
I’ll be honest — I ate half the batch before anyone else got a chance to try them, and that’s because the first bite is pure, unapologetic joy. Imagine a cookie that smells like a warm kitchen on a rainy afternoon, with a texture that’s soft and chewy in the middle, yet has a golden, slightly crunchy rim that shatters like thin ice. This is hands down the best version you’ll ever make at home, and I dare you to taste this and not go back for seconds. Most recipes get the moisture balance completely wrong; here, the banana does the heavy lifting, keeping each bite moist while the oats provide structure.
Okay, ready for the game‑changer? I’m about to reveal a technique that most bakers overlook: chilling the dough for exactly 30 minutes before baking. This simple step prevents the cookies from spreading too thin, ensuring they stay thick, fluffy, and perfectly shaped. Picture yourself pulling these out of the oven, the whole kitchen smelling incredible, the golden tops glistening with melted chocolate, and a soft steam rising as you set them on the cooling rack. Let me walk you through every single step — by the end, you’ll wonder how you ever made it any other way.
What Makes This Version Stand Out
- Taste: The natural sweetness of ripe bananas pairs with brown sugar for a deep, caramel‑like flavor that beats plain sugar any day.
- Texture: Oats give a hearty chew, while the banana keeps the interior moist, and the edges crisp up just enough to add a satisfying snap.
- Simplicity: Only ten ingredients, all pantry staples, and no fancy equipment—just a mixing bowl and a trusty oven.
- Uniqueness: A pinch of cinnamon and the optional chill‑the‑dough step elevate this from ordinary to unforgettable.
- Crowd Reaction: Friends claim these cookies are “addictive” and “the best thing they’ve ever tasted,” often asking for the recipe before the batch is even finished.
- Ingredient Quality: Using ripe bananas and good‑quality dark chocolate chips makes a world of difference in flavor depth.
- Cooking Method: Baking at a moderate 350°F ensures even cooking, while the short chill time prevents over‑spreading.
- Make‑Ahead Potential: These cookies freeze beautifully, so you can bake a big batch and keep them ready for any snack attack.
Inside the Ingredient List
The Flavor Base
Ripe bananas are the hero here. Their natural sugars caramelize during baking, creating a buttery, almost toffee‑like backdrop that makes additional sugar feel like a subtle accent rather than the main event. If you skip the bananas, you’ll lose that moist, tender crumb and end up with a cookie that’s more biscuit than cookie. For the best flavor, choose bananas that are speckled with brown spots; the enzymes have done their work, turning starches into sugars.
Brown sugar adds a molasses‑rich depth that pairs perfectly with the banana’s sweetness. It also contributes to the chewy texture because of its moisture content. If you’re watching your sugar intake, you can reduce it by a quarter and still retain the flavor, though the chew might be slightly less pronounced. A good tip: sift the brown sugar with the flour to avoid clumps and ensure an even distribution.
The Texture Crew
Rolled oats are the backbone of the chew. They soak up the banana moisture, expanding during bake time to create that satisfying bite. If you swap them for quick oats, the texture will become denser and less airy. For a gluten‑free version, use certified gluten‑free oats and a blend of almond flour and oat flour in place of wheat flour.
Whole wheat flour adds structure without making the cookie heavy. It’s lighter than all‑purpose flour, which means the cookies stay tender. If you prefer a softer crumb, you can replace half of the whole wheat flour with oat flour, but keep an eye on the dough’s consistency—too much oat flour can make it crumbly.
The Unexpected Star
A pinch of cinnamon might seem minor, but it adds a warm, spicy undertone that lifts the banana flavor from plain to sophisticated. This subtle spice is the secret sauce that makes the cookies feel autumn‑ready even in the middle of summer. If you’re not a fan of cinnamon, try a dash of nutmeg or even a hint of espresso powder for a different depth.
Chocolate chips are, of course, the crowd‑pleaser. Using semi‑sweet or dark chips gives a balanced bitterness that cuts through the sweetness of the banana and sugar. For a twist, mix in white chocolate chunks or chopped toasted nuts for added texture.
The Final Flourish
Butter, melted and cooled slightly, adds richness and helps the cookies spread just enough to create that coveted golden edge. If you want a lighter version, substitute half the butter with unsweetened applesauce; the cookies will be slightly less crisp but still deliciously soft. A single large egg binds everything together, providing structure without making the dough too dense.
Baking soda is the leavening agent that gives the cookies a gentle rise, while a modest amount of salt amplifies every flavor note, preventing the sweetness from becoming cloying. Skipping the salt is a common mistake that leads to flat, one‑dimensional cookies. Always use fine sea salt for even distribution.
Everything's prepped? Good. Let’s get into the real action…
The Method — Step by Step
-
Preheat your oven to 350°F (175°C) and line two baking sheets with parchment paper. While the oven warms up, take a moment to appreciate the quiet hum of the heating elements—this is the sound of anticipation. The parchment ensures the cookies won’t stick and makes cleanup a breeze, which is always a win after a cookie binge.
Kitchen Hack: If you’re short on parchment, lightly grease the sheet with a brush of melted butter; this adds a subtle buttery crust to the edges. -
In a large bowl, mash the ripe bananas with a fork until they’re almost liquid, leaving a few small lumps for texture. The mash should be smooth enough to blend easily but not so pureed that it becomes gummy. Add the melted butter, brown sugar, and vanilla extract, then whisk until the mixture is glossy and fragrant. That sweet, buttery scent? Absolute perfection.
-
Add the egg to the banana mixture, beating gently until fully incorporated. The egg acts as a binder, giving the dough structure without making it rubbery. If the mixture looks too thick, add a splash of milk—just a tablespoon—to loosen it slightly. This is the moment of truth: the batter should look thick but pourable, like a hearty pancake batter.
Watch Out: Over‑beating at this stage can incorporate too much air, leading to cookies that puff up then collapse, losing that perfect chewy center. -
In a separate bowl, whisk together the whole wheat flour, rolled oats, baking soda, salt, and cinnamon. The dry ingredients should be evenly combined to avoid pockets of flour that could create uneven texture. Sprinkle the dry mix over the wet mixture and fold gently with a spatula until just incorporated—don’t over‑mix. Over‑mixing activates the gluten in the flour, making the cookies tough instead of tender.
-
Stir in the chocolate chips, ensuring they’re evenly distributed throughout the dough. Feel free to add a handful of chopped walnuts or pecans if you love a nutty crunch. The dough will be thick and slightly sticky; this is exactly how it should feel—like a thick, sweet oatmeal batter.
-
Cover the bowl with plastic wrap and place it in the refrigerator for 30 minutes. This chilling step is the secret weapon that prevents the cookies from spreading too far, giving them a thick, pillowy interior. While the dough chills, you can clean up the workspace, set the table, or simply daydream about the first bite.
Kitchen Hack: If you’re in a rush, a quick 10‑minute chill in the freezer works almost as well—just keep an eye on it so the dough doesn’t freeze solid. -
Scoop the chilled dough onto the prepared baking sheets using a 2‑tablespoon cookie scoop or a rounded ice‑cream scoop. Space the mounds about 2 inches apart; the cookies will spread modestly, creating that coveted edge‑to‑edge caramelization. Gently flatten each mound with the back of a spoon for a uniform shape, but don’t press them too thin.
-
Bake for 12‑15 minutes, or until the edges turn a light golden brown and the tops look set but still soft. The cookies will continue to firm up as they cool, so pull them out just before they look completely firm. A good visual cue: the centers should still look slightly undercooked, giving you that gooey middle once they rest.
Watch Out: Leaving them in the oven for too long will dry out the banana, turning the interior into a rubbery texture. Trust the timer and the visual cues. -
Allow the cookies to cool on the baking sheet for 5 minutes before transferring them to a wire rack. This short rest lets the cookies set without breaking, and the steam that escapes helps keep the interior moist. As they cool, the chocolate chips will harden just enough to give you that satisfying snap with each bite. And now the fun part—taste testing!
That's it — you did it. But hold on, I've got a few more tricks that'll take this to another level. These insider tips are the difference between good and legendary, and they’ll make your next batch even more unforgettable.
Insider Tricks for Flawless Results
The Temperature Rule Nobody Follows
Most bakers set the oven to 350°F and forget to preheat properly, resulting in uneven baking. I always use an oven thermometer to verify the exact temperature; even a 10‑degree variance can affect how quickly the edges set. If you notice your cookies spreading too fast, lower the temperature by 15°F on the next batch. This small adjustment gives the interior more time to set before the edges become too crisp.
Why Your Nose Knows Best
Your sense of smell is a more reliable indicator than a timer when the cookies are ready. When the edges start to emit a toasted, nutty aroma and you can detect a faint caramel scent, the cookies are at the perfect stage. Trust that nose cue, especially if you’re using a convection oven that may bake faster.
The 5‑Minute Rest That Changes Everything
After you scoop the dough, let the balls sit at room temperature for five minutes before baking. This short rest lets the butter soften just enough to create a glossy surface, leading to a slightly crispier edge. Skipping this step can result in a dull top and uneven browning.
Chocolate Chip Distribution Mastery
If you want every bite to deliver a chocolate surprise, toss the chips with a teaspoon of flour before folding them into the dough. The flour coats the chips, preventing them from sinking to the bottom of the cookie during bake. I tried this once and the result was a perfect, even melt throughout.
The Banana Moisture Balance
Over‑ripe bananas can sometimes be too watery, especially if they’re very soft. To counteract excess moisture, add an extra tablespoon of rolled oats or a splash of oat flour. This adjustment keeps the dough from becoming overly sticky while preserving the banana flavor.
Creative Twists and Variations
This recipe is a playground. Here are some of my favorite ways to switch things up:
Nutty Banana Crunch
Swap half the chocolate chips for chopped toasted walnuts or pecans. The nuts add a buttery crunch that contrasts beautifully with the soft banana interior, making each bite a textural adventure.
Coconut‑Lime Dream
Add ¼ cup unsweetened shredded coconut and a teaspoon of lime zest. The coconut brings a tropical aroma, while the lime zest adds a bright, citrusy pop that lifts the overall flavor.
Double Chocolate Delight
Replace half the rolled oats with cocoa‑powder (unsweetened) and use dark chocolate chunks instead of chips. This creates a richer, more indulgent cookie that satisfies serious chocolate cravings.
Spiced Autumn Version
Introduce a pinch of nutmeg, allspice, and a drizzle of maple syrup in place of half the brown sugar. The warm spices and maple’s caramel notes make these perfect for a cozy fall afternoon.
Gluten‑Free Freedom
Use a blend of certified gluten‑free oats, almond flour, and rice flour in place of wheat flour. The texture stays delightfully chewy, and the flavor profile shifts subtly toward a nuttier base.
Storing and Bringing It Back to Life
Fridge Storage
Place cooled cookies in an airtight container with a paper towel at the bottom to absorb excess moisture. They’ll stay fresh for up to five days, and the fridge keeps the chocolate from melting on warm days.
Freezer Friendly
Layer cookies between parchment sheets in a zip‑top freezer bag, then freeze for up to three months. When you’re ready to enjoy, let them thaw at room temperature for 10 minutes, then pop them in a 300°F oven for three minutes to revive the crisp edges.
Best Reheating Method
Add a tiny splash of water (about a teaspoon) to the cookie before microwaving for 10‑15 seconds. The steam re‑hydrates the interior, while the outer layer regains a slight crunch—perfect for that just‑out‑of‑the‑oven feel.