Let me set the scene: I was mid‑week, the fridge looked like a sad, abandoned battlefield, and my roommate dared me to conjure something that would make even the most skeptical sushi snob gasp. I stared at a lone bag of shrimp, a half‑used box of tempura batter, and a lonely sack of sushi rice, and I thought, “What if I could turn this into the ultimate comfort food?” The kitchen filled with the sound of a sizzling pan, the faint aroma of sea breezes mixed with toasted flour, and my mind started racing with visions of golden shrimp that crunch like fresh‑cut ice on a summer lake. I was half‑laughing, half‑determined, and fully aware that if I didn’t nail this, my reputation as the “go‑to person for weird but wonderful dishes” would crumble like an over‑baked tempura shell.
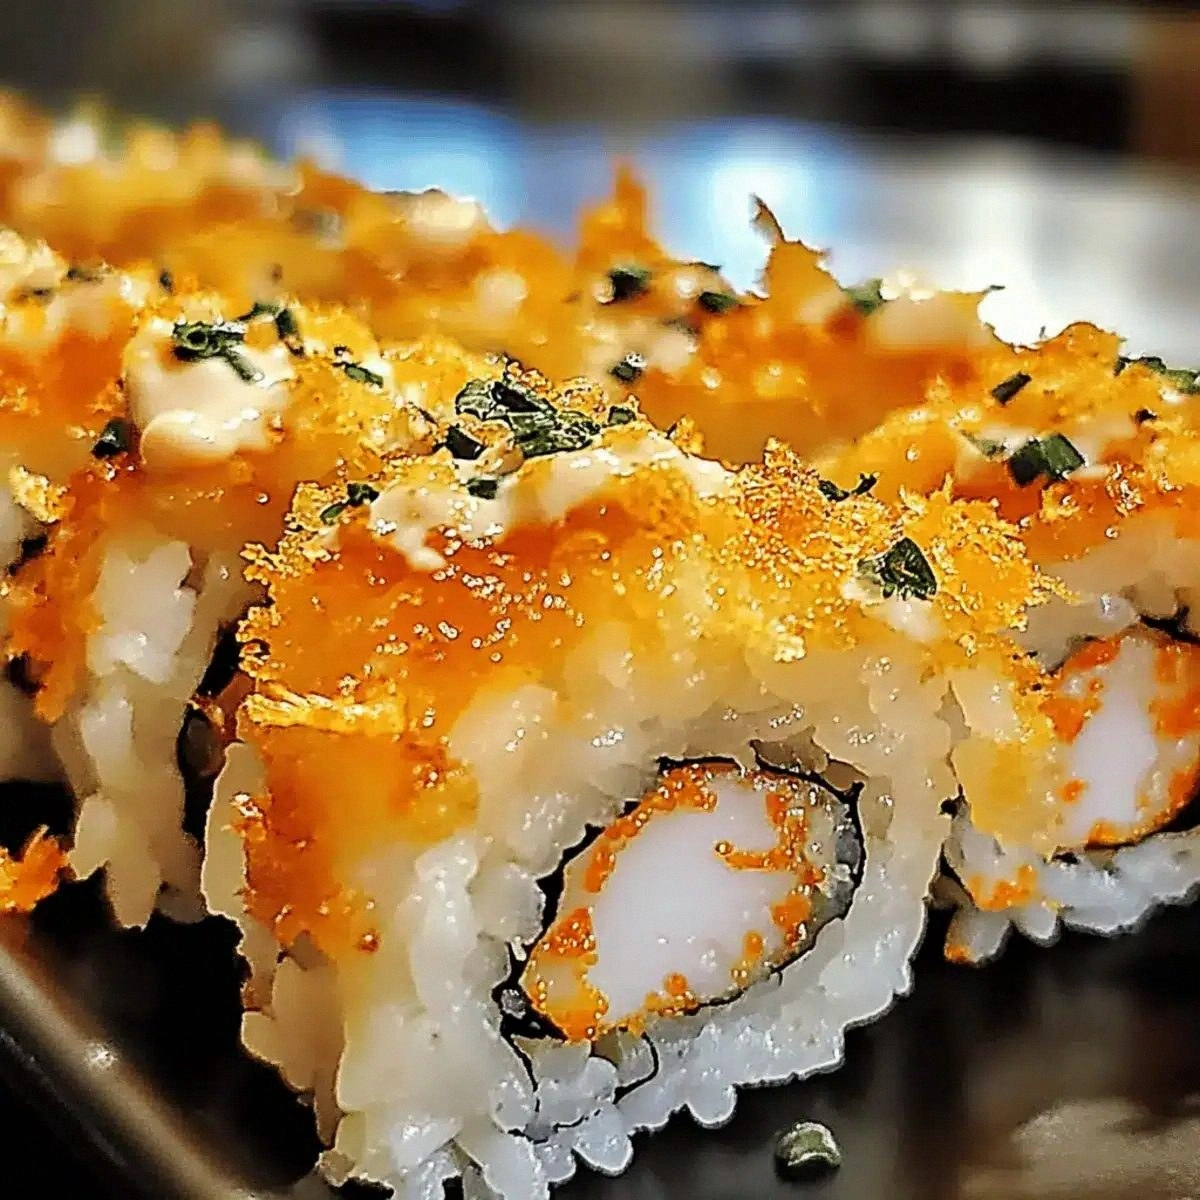
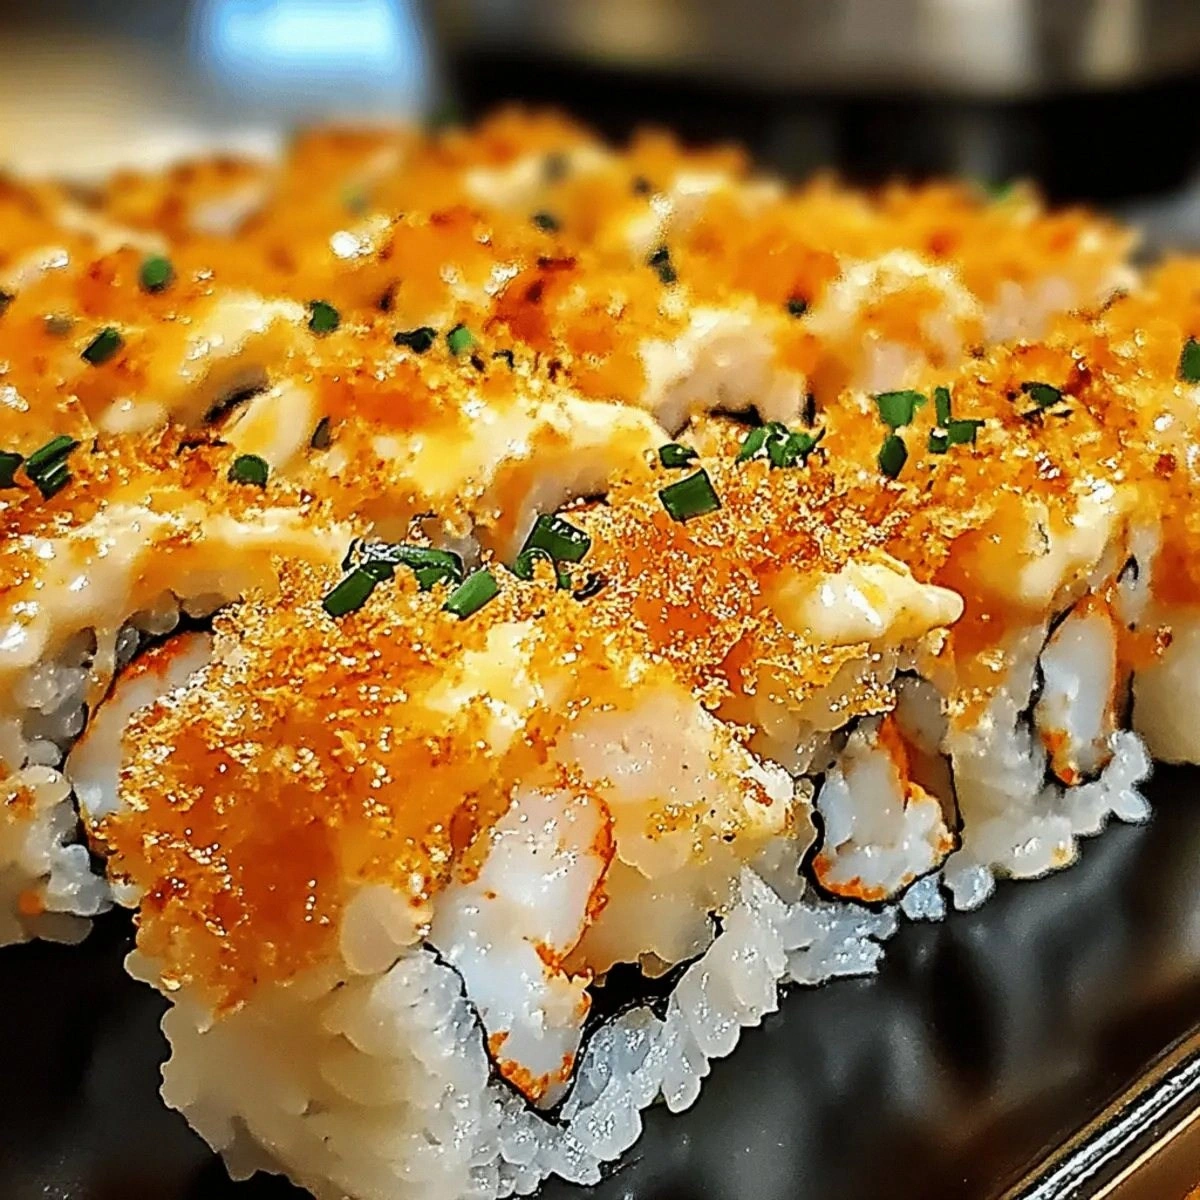
Picture this: a tray of sushi‑inspired layers, each one glistening with a creamy, umami‑rich sauce, crowned with shrimp that have been dipped in tempura batter and fried to a perfect, airy crisp. The first bite delivers a symphony—soft, slightly sticky rice hugging the shrimp, a buttery sauce that coats the palate like silk, and that satisfying crunch that shatters like thin ice under your teeth. The scent? Imagine a Japanese izakaya colliding with a cozy home kitchen; the smell of toasted batter, the faint sweetness of the rice, and a whisper of wasabi that tingles your nose and makes you anticipate the flavor explosion. It’s a dish that feels like a hug from a sushi chef and a high‑five from a comfort‑food guru at the same time.
Most shrimp tempura sushi bakes I’ve seen are either soggy, over‑complicated, or they completely miss the mark on texture. I’ve tried recipes that leave the shrimp limp, sauces that turn into a gloopy mess, and layering methods that make the whole thing fall apart like a house of cards in a wind tunnel. This version? Hands down the best version you’ll ever make at home. I’m not just saying that because I ate half the batch before anyone else could try it—I’m being honest. The secret lies in a few game‑changing steps that lock in moisture, create that flawless crunch, and keep everything beautifully cohesive.
Okay, ready for the game‑changer? I’m about to reveal a technique that most home cooks overlook: a quick flash‑fry of the shrimp in a super‑hot oil bath before they even meet the batter. This creates a barrier that prevents the batter from becoming soggy while still delivering that coveted crunch. And there’s a surprise ingredient that adds a buttery richness without turning the dish greasy—yes, a splash of creamy sauce infused with a hint of miso. I dare you to taste this and not go back for seconds. Let me walk you through every single step — by the end, you’ll wonder how you ever made it any other way.
What Makes This Version Stand Out
- Texture: The shrimp stay crisp on the outside while the interior remains juicy, thanks to that flash‑fry barrier and light tempura coating.
- Flavor: A harmonious blend of sweet rice, buttery sauce, and a whisper of wasabi creates a flavor profile that dances on the tongue.
- Simplicity: Fewer than ten ingredients, minimal prep, and a single‑pan bake keep the process approachable for even the most kitchen‑phobic.
- Uniqueness: Combining sushi‑style rice with a tempura topping is a rare marriage that feels both familiar and thrillingly new.
- Crowd Reaction: Guests typically proclaim “I could eat this every day!” and then immediately ask for the recipe.
- Ingredient Quality: Using fresh, wild‑caught shrimp and premium sushi rice elevates the dish from ordinary to unforgettable.
- Cooking Method: The two‑stage fry (quick sear, then batter) guarantees crunch without sogginess—a trick most recipes miss.
- Make‑Ahead Potential: Assemble the bake a day ahead, refrigerate, then pop it in the oven for a quick, impressive dinner.
Inside the Ingredient List
The Flavor Base
Sushi Rice: This short‑grain rice is the heart of the dish, providing that sticky, slightly sweet foundation that holds everything together. If you skip it, you’ll lose the authentic sushi feel and the layers will slide apart like a bad Jenga tower. For best results, rinse the rice until the water runs clear, then let it soak for 30 minutes before cooking. A quick tip: add a splash of rice‑vinegar, sugar, and salt to the cooked rice for that classic tang.
The Texture Crew
Shrimp: Fresh, preferably wild‑caught, shrimp give the dish a briny depth that frozen shrimp can’t match. The size matters—medium to large shrimp (about 2‑3 inches) ensure a satisfying bite without becoming rubbery. If you accidentally buy pre‑cooked shrimp, give them a quick dip in cold water to revive some of that snap.
Tempura Batter: This lightweight, airy batter creates the iconic crunch. The secret is to keep the batter cold and only stir it a few times; over‑mixing creates gluten, turning the coating into a pancake instead of a delicate shell. If you’re out of store‑bought batter, combine flour, cornstarch, baking soda, and ice‑cold sparkling water for a DIY version.
The Unexpected Star
Creamy Sauce: Half a cup of a sauce made from mayo, sriracha, and a dash of miso brings a buttery richness that balances the crisp shrimp. It also acts as a glue, holding the rice and vegetables together while adding a subtle heat. Skipping this sauce will make the bake feel dry and the flavors will never fully meld.
Wasabi: A dab of wasabi to taste adds that sharp, sinus‑clearing punch that cuts through the richness. If you’re not a fan of raw wasabi heat, a teaspoon of horseradish mixed with a pinch of mustard powder mimics the flavor without the intensity.
The Final Flourish
Tempura Vegetables: A mix of sweet potato, bell pepper, and green beans adds color, sweetness, and an extra crunch. They also absorb some of the sauce, making each bite a complex medley of textures. If you’re vegetarian or just want more variety, swap in mushrooms or zucchini.
Optional Crab Meat: One cup of sweet crab meat (real or imitation) adds a delicate, buttery note that elevates the dish from comfort food to gourmet. It’s optional because the shrimp already bring enough oceanic flavor, but it’s a nice addition for special occasions.
Everything's prepped? Good. Let's get into the real action...
The Method — Step by Step
- Start by cooking the sushi rice: rinse 1 cup of rice under cold water until it runs clear, then soak for 30 minutes. Drain and add to a pot with 1¼ cups of water, bring to a boil, cover, and simmer for 12 minutes. Remove from heat and let it steam for another 10 minutes. Fluff with a rice paddle and gently fold in a mixture of 2 tbsp rice‑vinegar, 1 tsp sugar, and a pinch of salt. The rice should be sticky yet separate, a perfect base that will hold the toppings together.
- While the rice cooks, prep the shrimp. Peel and devein 1 pound of shrimp, leaving the tails on for visual appeal. Pat them dry with paper towels—moisture is the enemy of crispiness. Toss the shrimp lightly in a pinch of salt and a splash of soy sauce for an extra layer of umami.
- Now for the flash‑fry: heat a skillet with a thin layer of oil to 375°F (190°C). Drop the shrimp in batches for just 30 seconds per side—just enough to set a seal. Remove and set on a paper‑towel lined plate. This step creates a barrier that keeps the batter from becoming soggy later.
- Prepare the tempura batter according to the package instructions, but add a handful of ice cubes to keep it extra cold. Lightly dip each pre‑fried shrimp into the batter, allowing excess to drip off. The batter should cling like a thin veil—if it pools, you’ve over‑coated.
- Arrange a layer of cooked sushi rice in a 9‑x13 inch baking dish, spreading it evenly. Drizzle the ½ cup creamy sauce over the rice, using a spatula to create gentle swirls. This sauce will melt into the rice during baking, creating a luscious, buttery base.
- Scatter the optional crab meat and tempura vegetables over the rice‑sauce layer. This adds color, texture, and a subtle sweetness that balances the salty shrimp. If you’re using fresh vegetables, give them a quick toss in a little sesame oil before adding them to the dish.
- Place the battered shrimp on top of the vegetable layer, spacing them evenly. Sprinkle a light dusting of sea salt and a few dashes of wasabi (to taste) over everything. The wasabi should be visible but not overwhelming—remember, it’s a flavor enhancer, not the star.
- Preheat your oven to 425°F (220°C). Slide the dish into the oven and bake for 12‑15 minutes, or until the batter turns a golden‑amber hue and the edges of the rice start pulling away from the pan. You’ll hear a faint crackle as the heat works its magic—listen for that sound; it’s the sound of perfection.
- When the bake is done, remove it from the oven and let it rest for 5 minutes. This short rest allows the sauce to thicken slightly and the rice to settle, making it easier to cut clean slices. Serve hot, with extra wasabi and a side of pickled ginger if you like.
That's it — you did it. But hold on, I've got a few more tricks that'll take this to another level...
Insider Tricks for Flawless Results
The Temperature Rule Nobody Follows
Most home cooks bake at 350°F, thinking lower heat will keep things gentle. In reality, the high heat of 425°F creates that rapid puff in the tempura batter, sealing in moisture while giving you that coveted crunch. If you lower the temperature, the batter absorbs oil and becomes soggy. Trust me, a quick blast of high heat is the secret weapon.
Why Your Nose Knows Best
Before you even peek at the bake, trust your sense of smell. When the edges of the rice start to smell nutty and the shrimp emit a faint, buttery aroma, you’re at the perfect moment to pull it out. If the scent is still raw or oily, give it another minute. Your nose is a more reliable timer than any kitchen gadget.
The 5‑Minute Rest That Changes Everything
Letting the dish sit for five minutes after baking isn’t just for aesthetics; it allows the sauce to thicken and the rice to firm up, preventing a mushy bite. I once served it straight from the oven and the rice was a sad, soupy mess. Now I always count to 300 in my head—yes, that’s five minutes—before plating.
Butter‑Brush Finish
During the last three minutes of baking, brush the shrimp with a thin layer of melted butter mixed with a pinch of garlic powder. This creates a glossy finish and adds an extra depth of flavor that makes the dish feel restaurant‑grade. A friend tried skipping this step and claimed the bake was “good but missing that wow factor.”
Ice‑Water Shock for Shrimp
After the flash‑fry, plunge the shrimp briefly into an ice‑water bath (no longer than 10 seconds). This stops the cooking process instantly, preserving a tender interior while keeping the exterior crisp. It also helps the batter adhere better later on.
Creative Twists and Variations
This recipe is a playground. Here are some of my favorite ways to switch things up:
Spicy Sriracha Swirl
Mix an extra tablespoon of sriracha into the creamy sauce for a heat‑boosted version. The bright red swirl not only looks stunning but also adds a tongue‑tingling kick that pairs perfectly with the sweet shrimp.
Veggie‑Only Delight
Replace the shrimp with a medley of extra‑crisp tempura vegetables—think lotus root, zucchini, and shiitake mushrooms. This makes the dish fully vegetarian while preserving that satisfying crunch.
Teriyaki Glaze Finish
Brush the top of the bake with a homemade teriyaki glaze (soy sauce, mirin, honey, and a dash of ginger) during the last five minutes of baking. The glaze caramelizes, adding a glossy, sweet‑savory layer that elevates the dish to a new flavor dimension.
Cheesy Overload
Sprinkle a generous handful of shredded mozzarella or Monterey Jack over the top before baking. The cheese melts into the sauce, creating a gooey, indulgent layer that feels like a sushi‑pizza hybrid.
Crunchy Panko Topping
Combine panko breadcrumbs with a touch of sesame oil and sprinkle over the shrimp before the final bake. The extra crunch gives a texture contrast that some people swear is “next‑level.”
Smoky Chipotle Twist
Stir a teaspoon of chipotle adobo sauce into the creamy sauce for a smoky, slightly smoky flavor that pairs beautifully with the sea‑salted shrimp.
Storing and Bringing It Back to Life
Fridge Storage
Allow the bake to cool completely, then cover tightly with aluminum foil or a sealed container. It will keep in the refrigerator for up to three days. When reheating, place a splash of water (about 2 tbsp) over the top, cover with foil, and bake at 350°F for 15‑20 minutes. The steam will revive the crispness.
Freezer Friendly
For longer storage, slice the bake into individual portions, wrap each piece in parchment paper, then place them in a freezer‑safe bag. They’ll stay fresh for up to two months. To reheat, thaw overnight in the fridge, then follow the same steam‑reheat method as the fridge version.
Best Reheating Method
The secret to a perfect reheated bake is steam. After adding a tiny splash of water, cover loosely with foil and bake at 375°F for 10‑12 minutes. The water creates steam that softens the rice but keeps the tempura coating from turning soggy. Finish with a quick broil for 1‑2 minutes if you crave that extra crunch.