I was standing in my kitchen at 2 a.m., half‑asleep, scrolling through a million pumpkin‑spiced recipes, when a friend texted me, “Dare you make a cheesecake without turning on the oven?” I laughed, grabbed a can of pumpkin puree, and thought, “What if I could skip the heat entirely and still get that cloud‑like, melt‑in‑your‑mouth texture?” The result? A no‑bake pumpkin cheesecake that turned my late‑night cravings into a fluffy masterpiece that even my skeptical roommate begged for seconds. I’m going to be honest — I ate half the batch before anyone else got a taste, and that’s the kind of confession that tells you just how addictive this dessert is.
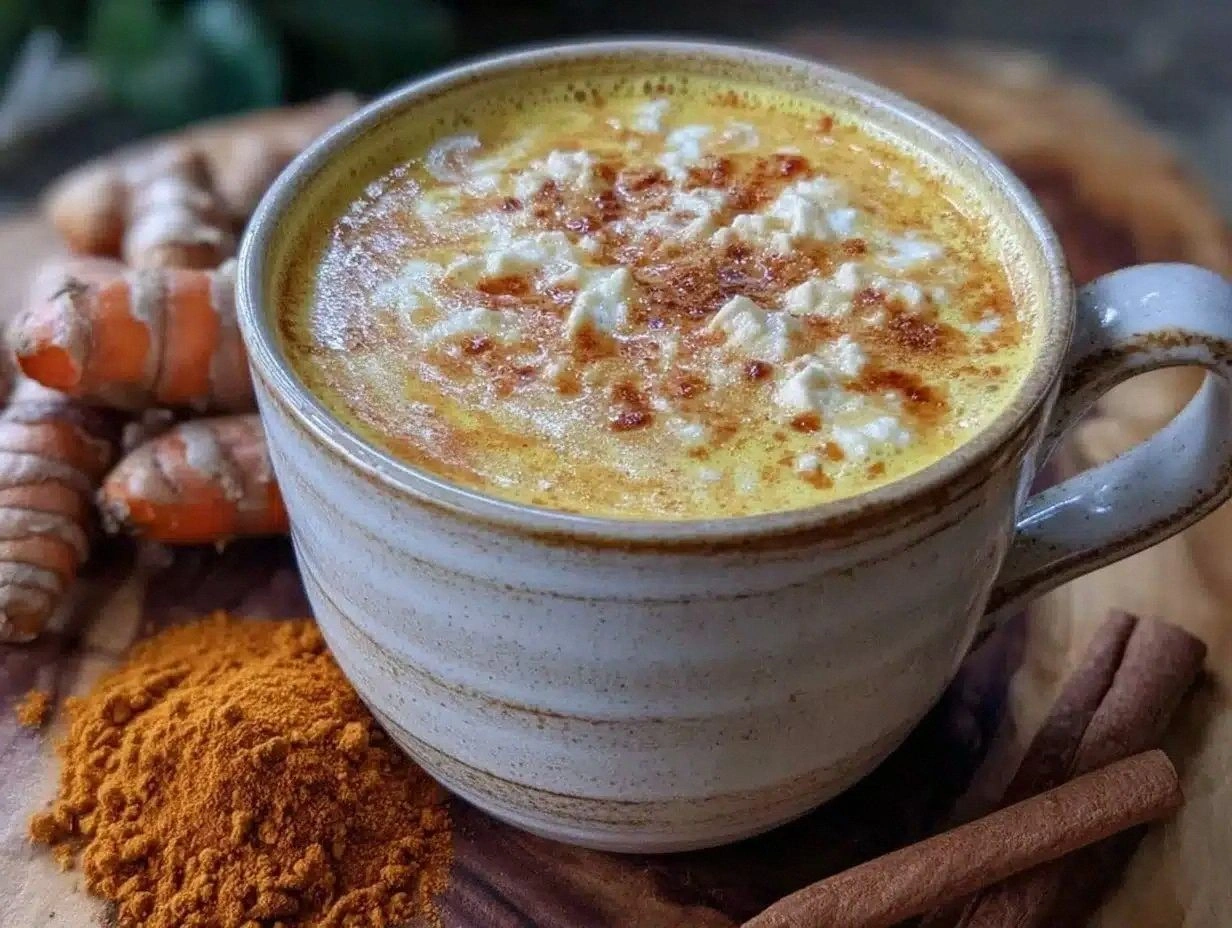
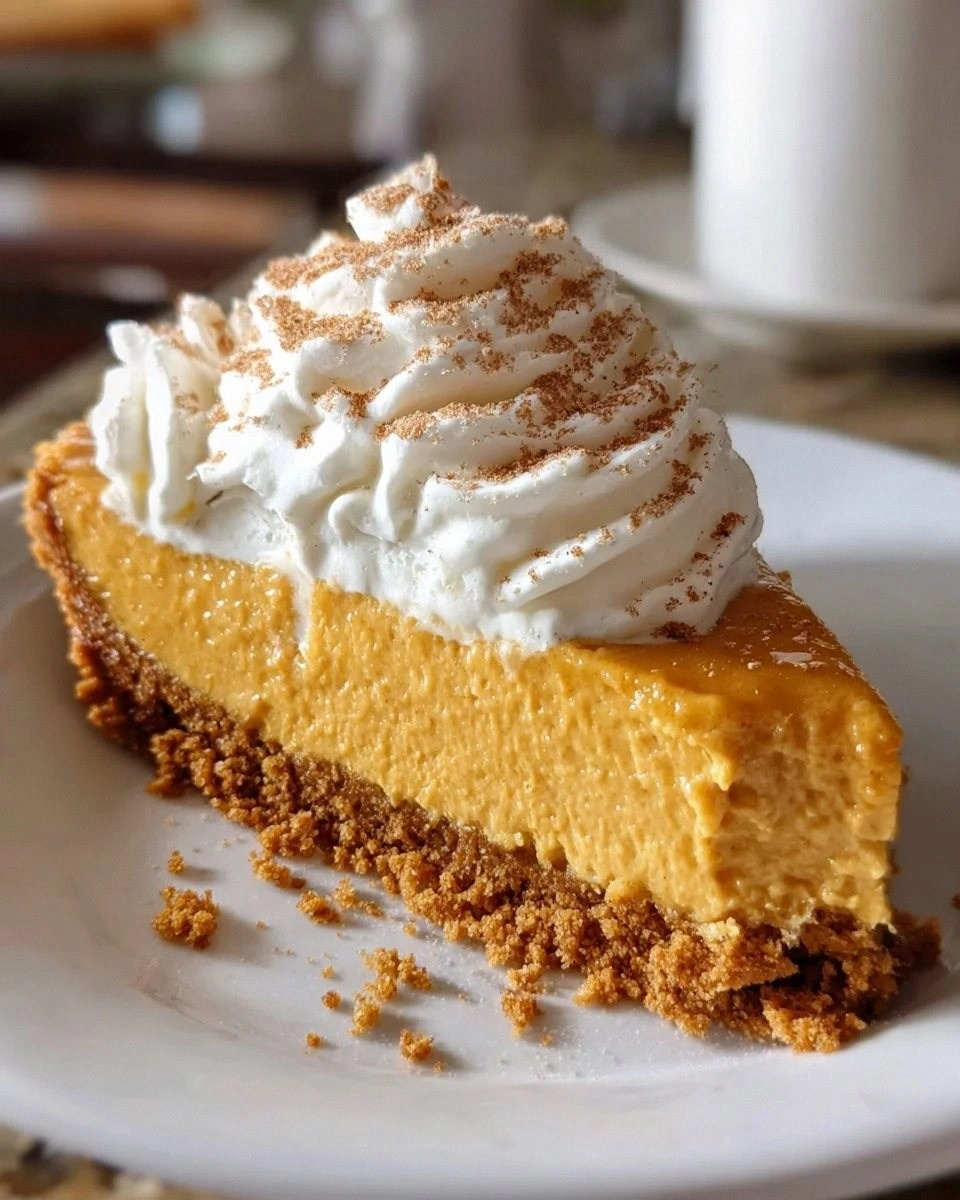
Imagine the moment you pull this cake out of the fridge: the aroma of pumpkin pie spice swirling with a hint of vanilla, the crust cracking ever so slightly under the weight of a silky, airy filling that looks like a sunrise over a pumpkin field. You can almost hear the gentle sigh of the whipped cream as it settles, and you feel the cool, buttery crust against your fingertips. The first forkful is a revelation: the crumbly base gives way to a velvety, cloud‑soft interior that practically melts on your tongue, leaving behind a lingering warmth that makes you think of crisp autumn evenings by the fire. This isn’t just dessert; it’s an experience that awakens every sense and makes you question why you ever bothered with baked cheesecakes at all.
Most pumpkin cheesecake recipes out there either demand a hot oven, a long chill time, or a confusing list of obscure ingredients that make you wonder if you’re actually baking a cake or conducting a chemistry experiment. I’ve tried the “no‑bake” versions that turned out grainy, the “quick‑set” ones that tasted like a dairy‑filled frosting, and the “pumpkin‑pie‑in‑a‑cheesecake” hybrids that were so sweet they could give you a toothache. What sets this version apart is a simple, three‑step method that guarantees a flawless texture, a perfectly balanced flavor profile, and a finish that’s as smooth as a polished marble countertop. The secret? A strategic combination of whipped cream and pumpkin puree that creates a light, airy structure without any baking, plus a buttery graham cracker crust that adds just the right amount of crunch.
I’m about to spill the beans on the one ingredient most people overlook: high‑quality canned pumpkin puree. Not the sugary, spiced pumpkin pie filling you find in the aisle, but the pure, unsweetened kind that brings an authentic, earthy depth to the cake. Pair that with a dash of pumpkin pie spice, a splash of vanilla, and you’ve got a flavor foundation that sings louder than any store‑bought mix. Let me walk you through every single step — by the end, you’ll wonder how you ever made it any other way. Okay, ready for the game‑changer?
What Makes This Version Stand Out
- Flavor: The pumpkin puree is pure, not sugary, letting the natural earthiness shine through while the spice blend adds a warm, comforting backdrop.
- Texture: Whipping the heavy cream to stiff peaks creates a cloud‑like body that keeps the cheesecake feather‑light without any baking.
- Simplicity: Only eight ingredients, no fancy gadgets, and a total hands‑on time under 20 minutes.
- Uniqueness: The crust is a buttery graham cracker base that stays crisp even after chilling, unlike many no‑bake recipes that get soggy.
- Crowd Reaction: Guests often claim it’s “the best pumpkin dessert they’ve ever tasted,” and they’ll be asking for the recipe before the first slice even disappears.
- Ingredient Quality: Using real vanilla extract and unsweetened pumpkin puree elevates the flavor from “good” to “wow‑factor.”
- Method: No oven, no water bath, just a fridge and a whisk—perfect for summer evenings or when the oven is already occupied.
- Make‑Ahead Potential: This cheesecake can be prepared a day ahead, making it ideal for holiday parties or a stress‑free dessert after a long workday.
Inside the Ingredient List
The Flavor Base
The canned pumpkin puree is the heart‑beat of this cheesecake. It provides a natural sweetness, a vibrant orange hue, and a subtle earthy note that pairs beautifully with the spice blend. If you skip the puree, you’ll lose that signature pumpkin flavor and end up with a bland, overly sweet filling. Look for a can that lists only pumpkin and water on the label; avoid anything that mentions added sugars or spices. As a swap, you could use homemade pumpkin puree—just roast a small pumpkin, scoop out the flesh, and puree it until smooth, but the canned version saves time and guarantees consistency.
The Texture Crew
Heavy whipping cream is whisked to stiff peaks, creating an airy scaffold that lifts the entire filling. This step is crucial: under‑whipped cream yields a dense, heavy cake, while over‑whipping turns it into butter. If you’re dairy‑free, try whipped coconut cream, but remember it will add a faint coconut flavor. Cream cheese adds richness and tang; softened to room temperature, it blends seamlessly with the pumpkin and sugar, preventing lumps. Using Neufchâtel cheese cuts the fat slightly, making the texture a tad lighter without sacrificing creaminess.
The Unexpected Star
Granulated sugar does double duty—sweetening the crust and balancing the pumpkin’s natural earthiness. Too much sugar can mask the spice, while too little leaves the cake tasting flat. The key is precision: a 1/3‑cup measure (about 65 g) hits the sweet spot. If you prefer a less sweet version, you can reduce it to 1/4 cup, but remember the crust may become a bit crumbly. Vanilla extract adds depth; a single teaspoon of pure vanilla elevates the entire flavor profile, turning a good cheesecake into a great one.
The Final Flourish
Pumpkin pie spice is a warm blend of cinnamon, nutmeg, ginger, and cloves that rounds out the pumpkin’s flavor. If you don’t have a pre‑made blend, mix 1 tsp cinnamon with ½ tsp nutmeg and a pinch of ginger for a homemade version. The spice should be added after the cream cheese and pumpkin are fully combined; this prevents the spices from clumping and ensures an even distribution. Finally, the unsweetened butter melts into the graham cracker crumbs, binding them into a sturdy yet tender crust that holds up during refrigeration. Melt the butter gently on low heat to avoid browning, which could introduce a bitter note.
Everything’s prepped? Good. Let’s get into the real action…
The Method — Step by Step
First, gather your graham cracker crumbs, sugar, and melted butter in a large mixing bowl. I like to use a food processor for the crumbs; a quick pulse gives them a fine, sand‑like texture. Add the 1/3 cup granulated sugar and pour in the melted butter, stirring until the mixture resembles wet sand. Watch the crumb size—if they’re too coarse, the crust won’t hold together; if they’re too fine, it may become gummy. Press the mixture firmly into the bottom of a 9‑inch springform pan, using the back of a measuring cup to flatten it evenly.
Kitchen Hack: Chill the crust for 10 minutes before adding the filling; this helps it set faster and prevents it from cracking.While the crust chills, soften the cream cheese. Place the 16 oz block in a large bowl and beat with an electric mixer on medium speed for about 2 minutes, until it’s smooth and free of lumps. Add the 1 cup pumpkin puree and the 1 tsp vanilla extract, mixing until fully incorporated. The mixture should be a uniform orange‑pink color, glossy and slightly thick.
Now sprinkle in the 2 tsp pumpkin pie spice and the remaining 1/3 cup granulated sugar (if you prefer a less sweet cake, you can reduce this to 1/4 cup). Beat for another minute; the spices will bloom, releasing their aromatic oils, and the sugar will dissolve into the creamy base. Watch Out: Over‑mixing can incorporate too much air, making the filling collapse once chilled.
In a separate chilled bowl, whip the 1 cup heavy whipping cream. Start on low speed, then increase to high, adding a pinch of sugar if desired. Whip until stiff peaks form—this means when you lift the whisk, the peaks stand up straight without drooping. This stage is pure magic; the cream’s air bubbles are what give the cheesecake its fluffy, cloud‑like texture.
Kitchen Hack: Chill the bowl and whisk for at least 15 minutes beforehand; cold tools whip faster and achieve stiffer peaks.Gently fold the whipped cream into the pumpkin‑cheese mixture. Use a spatula and a gentle, folding motion—cut through the center, lift the mixture, and turn it over. This technique preserves the air bubbles you just created, ensuring the final cheesecake stays light. The mixture should become noticeably fluffier and lighter in color, resembling a mousse.
Pour the airy filling over the chilled crust, spreading it evenly with a spatula. Tap the pan lightly on the counter three times; this releases any large air pockets that might have formed during folding. Smooth the top with a gentle swirl motion, creating a subtle ripple that will look gorgeous once you slice it.
Cover the springform pan with plastic wrap and refrigerate for at least 4 hours, but ideally overnight. The longer it chills, the firmer the cheesecake becomes, and the flavors meld together beautifully. Picture this: You wake up the next morning, the kitchen smelling faintly of pumpkin spice, and you’re greeted by a perfectly set cake that’s ready to wow your guests.
When you’re ready to serve, run a thin knife around the edge of the pan before releasing the springform. This prevents the crust from cracking and makes a clean release. Slice with a warm knife—dip it in hot water, wipe dry, and glide through the cheesecake for smooth, pristine slices. Serve chilled, optionally topped with a dollop of whipped cream or a drizzle of caramel for extra decadence.
That’s it — you did it. But hold on, I’ve got a few more tricks that’ll take this to another level…
Insider Tricks for Flawless Results
The Temperature Rule Nobody Follows
Never, ever use room‑temperature cream cheese and butter together. The temperature mismatch creates tiny pockets of moisture that can make the crust soggy and the filling grainy. I always chill the butter for at least 15 minutes and let the cream cheese sit out just long enough to soften—about 30 minutes. This way, when you beat them together, they emulsify perfectly, resulting in a smooth, homogenous base. A friend once tried to skip this step, and the cheesecake ended up with a “curdled” texture that was impossible to rescue.
Why Your Nose Knows Best
When you whisk the pumpkin and cream cheese together, pay attention to the scent. The moment you smell the warm, spicy perfume of the pumpkin pie spice, you know the flavors have melded. If the aroma is faint, it means the spices haven’t fully released their oils—keep mixing for another 30 seconds. Trusting your nose is a faster gauge than a timer, and it ensures every bite is packed with that comforting pumpkin punch.
The 5‑Minute Rest That Changes Everything
After folding the whipped cream into the filling, let the mixture sit for five minutes before pouring it onto the crust. This short rest allows the air bubbles to stabilize, preventing them from collapsing when the cheesecake is spread. The result is a noticeably fluffier final product—think cloud versus cotton candy. I used to skip this step, and the cheesecake felt a bit denser; now I never forget it.
Crust Crunch Boost
Add a tablespoon of finely chopped toasted pecans or walnuts to the crust mixture for an extra crunch that contrasts beautifully with the silky filling. Toast the nuts in a dry skillet over medium heat for 3‑4 minutes, stirring constantly until fragrant. This tiny addition adds texture without overpowering the pumpkin flavor, and it’s a great way to impress guests who love a bit of nutty surprise.
The Secret Whip‑In‑a‑Bag
If you don’t have a stand mixer, you can achieve stiff peaks using a simple zip‑top bag. Fill the bag with the heavy cream, seal it tightly, and whip by shaking vigorously for 2‑3 minutes. The bag keeps the cream cold and prevents splatters, and the result is surprisingly consistent. This hack saved me during a power outage, and the cheesecake turned out just as airy as any mixer‑made version.
Creative Twists and Variations
This recipe is a playground. Here are some of my favorite ways to switch things up:
Chocolate Swirl Delight
Melt 1/4 cup dark chocolate and swirl it into the pumpkin filling before folding in the whipped cream. The bitter chocolate contrasts the sweet pumpkin, creating a sophisticated flavor that’s perfect for adult gatherings. Use high‑cocoa chocolate for a richer taste, and garnish with a dusting of cocoa powder.
Maple‑Pecan Crunch
Replace the plain graham cracker crust with a mixture of crushed pecans, a drizzle of pure maple syrup, and a pinch of sea salt. The nutty, caramel notes amplify the autumn vibe, and the subtle crunch adds texture that makes each bite interesting. This variation is a hit at Thanksgiving brunches.
Spiced Chai Infusion
Add 1 tsp chai tea powder to the pumpkin‑cheese mixture for a fragrant twist that evokes cozy coffee shop vibes. The cardamom and black tea notes elevate the spice profile, making the cheesecake feel exotic yet familiar. Pair with a cup of chai for a matching dessert‑drink combo.
Vegan Coconut Dream
Swap the cream cheese for a vegan cream cheese alternative, use coconut cream instead of heavy whipping cream, and replace butter with coconut oil in the crust. The result is a dairy‑free version that still boasts a fluffy texture, though it will carry a faint coconut aroma that pairs nicely with pumpkin.
Caramel Apple Topping
Top each slice with a thin layer of caramel sauce and a few slivered sautéed apples. The sweet‑tart apple contrast adds a fresh dimension, turning the cheesecake into a mini‑pie on a plate. This is the perfect finish for a fall dinner party.
Storing and Bringing It Back to Life
Fridge Storage
Cover the cheesecake tightly with plastic wrap or store it in an airtight container. It will stay fresh for up to 5 days, though the crust may soften slightly after the third day. For maximum freshness, place a sheet of parchment paper directly on the surface before sealing.
Freezer Friendly
Wrap the entire springform pan in a double layer of aluminum foil, then place it inside a freezer‑safe bag. The cheesecake freezes beautifully for up to 2 months. When you’re ready to enjoy it, transfer it to the fridge to thaw overnight. Tip: Add a tiny splash of water (about 1 tbsp) to the surface before reheating; this creates a gentle steam that revives the fluffy texture.
Best Reheating Method
Although this is a no‑bake dessert, a quick warm‑up can enhance the flavors for serving. Place a slice on a microwave‑safe plate and heat for 10‑12 seconds, just enough to take the chill off without melting the filling. Alternatively, let a slice sit at room temperature for 15 minutes before serving; the flavors open up, and the texture becomes even more luxurious.