I was standing in my kitchen at 2 a.m., half‑asleep, half‑hungry, staring at a box of store‑bought Twinkies that looked more like a sad, stale sponge than the golden clouds I remembered from my childhood. The packet had been a dare from my roommate: “If you can make something better, I’ll buy you a whole cake.” I laughed, but the challenge sparked a fire that kept me up all night, mixing, whisking, and tasting until the sunrise painted the countertops pink. The first batch came out flat, dry, and about as exciting as a Monday morning meeting—so I went back to the drawing board, consulted old bakery textbooks, and discovered the secret that most commercial recipes hide: a delicate balance of butter, marshmallow creme, and a touch of heavy cream that turns a plain sponge into a pillow‑soft, melt‑in‑your‑mouth marvel.
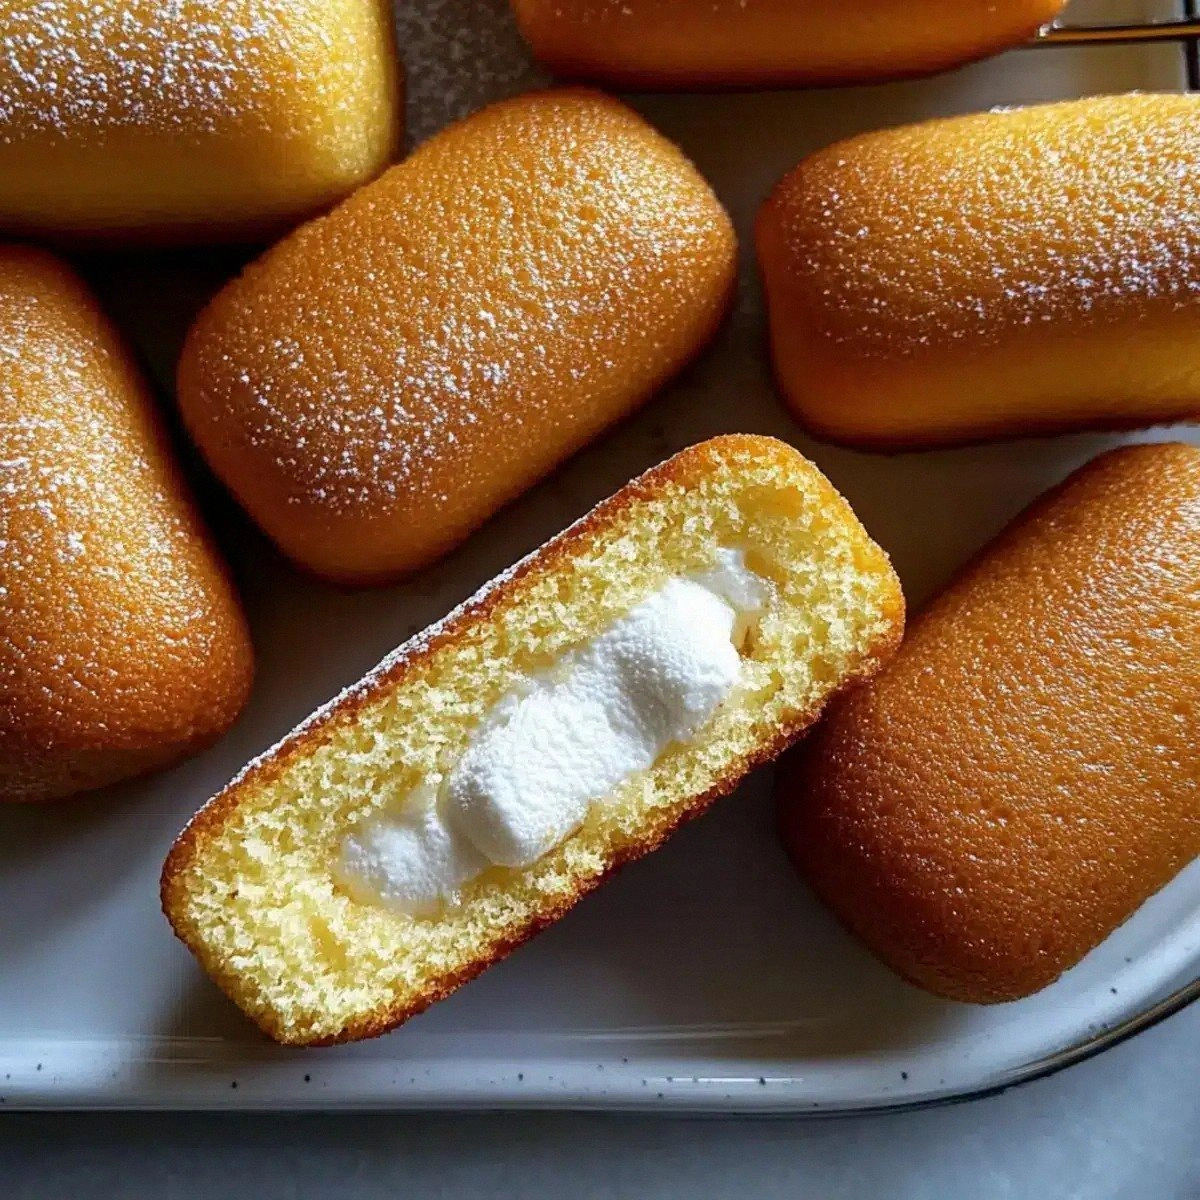
Imagine the moment you open the oven and a wave of buttery vanilla swirls through the kitchen, the scent curling around the copper pans like a warm hug. The batter, glossy and airy, spreads across the tin like a sunrise over a calm sea, and when you pull the golden squares out, they spring back with a gentle sigh, as if they’re relieved to finally be free. The filling, a silky cloud of marshmallow‑infused buttercream, slides between the layers with the elegance of a silk scarf slipping over a shoulder. Every bite is a perfect duet of sponge and cream, a texture contrast that feels both airy and decadently rich—something you’ll swear you’ve never tasted before.
What makes this version truly stand out is the marriage of science and love. I’m not just talking about “add more butter”; I’m talking about the precise temperature of the eggs, the exact moment you fold in the flour, and the secret of letting the batter rest just long enough to develop that tender crumb without over‑fermenting. Most recipes get this completely wrong—either they over‑mix, creating a tough cake, or they under‑whip the eggs, leaving you with a dense, gummy mess. Here, every step is calibrated to give you that melt‑in‑your‑mouth softness that commercial factories spend millions trying to replicate.
And now the tease: the one ingredient that will blow your mind is marshmallow creme. Yes, that pink, fluffy spread you keep in the pantry for s’mores is the game‑changer that gives the filling its ethereal texture without any gelatin or artificial stabilizers. I dare you to taste this and not go back for seconds. Let me walk you through every single step — by the end, you’ll wonder how you ever made it any other way.
What Makes This Version Stand Out
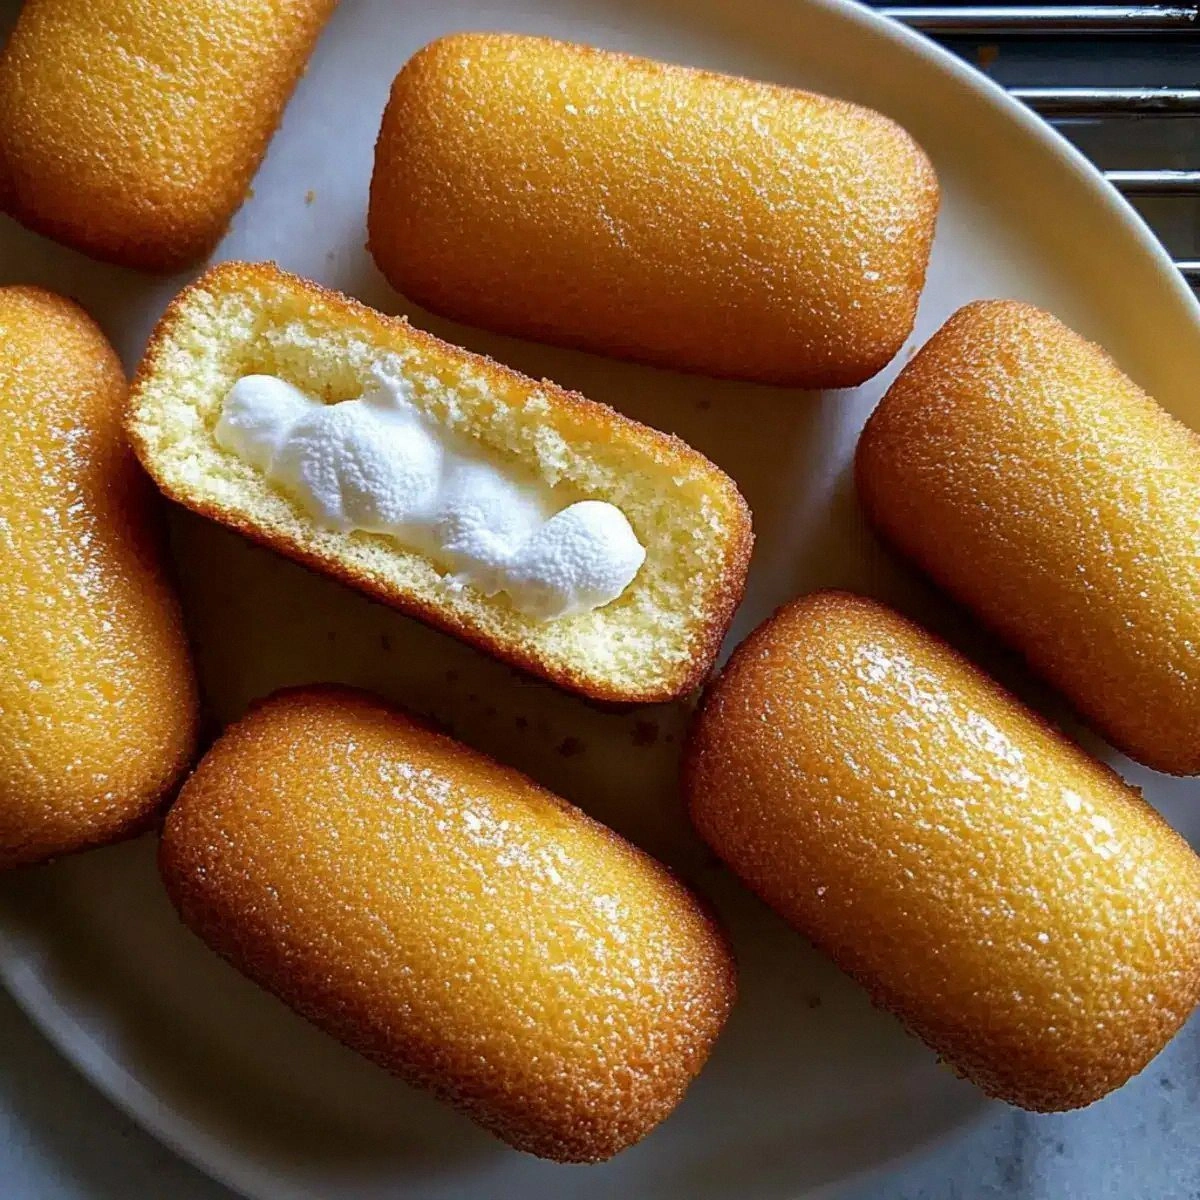
- Texture: The sponge is feather‑light yet sturdy enough to hold a generous dollop of filling without crumbling, thanks to the perfect egg‑sugar ribbon that traps air like a tiny balloon factory.
- Flavor: A subtle vanilla perfume weaves through every bite, amplified by the caramelized butter notes that develop during the short bake.
- Simplicity: You only need a handful of pantry staples—no fancy equipment, no exotic extracts, just good old butter and marshmallow creme.
- Uniqueness: The marshmallow‑buttercream filling is a secret weapon; it gives the classic Twinkie its iconic “creamy cloud” feel without any artificial stabilizers.
- Crowd Reaction: I’ve watched grown‑ups and kids alike gasp, grin, and immediately request a second serving—this is hands down the best version you’ll ever make at home.
- Ingredient Quality: Using real unsalted butter (both melted and softened) elevates the flavor profile far beyond the margarine shortcuts you see in mass‑produced versions.
- Cooking Method: The gentle 350°F bake combined with a short cooling period ensures the crumb stays moist, while the edges pull away just enough to give that classic “pull‑away” look.
- Make‑Ahead Potential: These Twinkies keep beautifully for up to a week in the fridge, and the filling actually improves after a night of resting, so you can prep ahead for parties.
Inside the Ingredient List
The Flavor Base
All‑purpose flour is the canvas of any cake, providing structure without weighing it down. I use a finely sifted, unbleached flour for the cleanest flavor; if you grab a cheap bleached variety, you might notice a faint chemical aftertaste. Swap tip: You can replace half the flour with cake flour for an even lighter texture, but be careful not to over‑mix.
The Leavening Crew
Baking powder and a pinch of salt are the unsung heroes that give the Twinkie its signature rise. The 1 tsp of baking powder is calibrated to lift the batter just enough without creating large air pockets that would make the cake crumbly. Watch Out: Too much baking powder will give a metallic aftertaste and cause the cake to dome excessively.
The Moisture Makers
Four large eggs, granulated sugar, vanilla extract, milk, and a tablespoon of melted butter create a glossy, stable emulsion. The eggs act as a natural leavening agent when whipped with sugar, trapping bubbles that expand in the oven. If you substitute a large egg with two medium eggs, the texture will be slightly denser—so stick to the size specified.
The Unexpected Star
Marshmallow creme is the secret weapon that gives the filling its cloud‑like consistency. It acts as both a sweetener and a stabilizer, preventing the buttercream from becoming grainy. If you’re allergic to corn syrup, you can substitute with a homemade sugar syrup, but the texture won’t be quite as silky.
The Final Flourish
Unsalted butter, powdered sugar, vanilla, and heavy cream combine to create a silky, glossy buttercream that spreads like a dream. The heavy cream adds a touch of richness that balances the sweetness of the marshmallow, while the butter provides that melt‑in‑your‑mouth mouthfeel. For a dairy‑free version, try using a high‑fat coconut cream and a vegan butter substitute, but the flavor profile will shift toward tropical notes.
Everything's prepped? Good. Let's get into the real action...
The Method — Step by Step
-
Preheat your oven to 350°F (175°C) and line a 12‑cup Twinkie pan with parchment circles or lightly grease each cavity. The moment the heat hits the pan, you’ll hear a faint sizzle that signals the pan is ready to cradle the batter. Let the pan sit while you prepare the batter; a warm pan helps the batter rise evenly.
Kitchen Hack: Place the pan in the oven for 2 minutes before adding batter; this gives a gentle “kick‑start” to the rise. -
Separate the egg whites from the yolks. In a large mixing bowl, whisk the yolks with the granulated sugar and vanilla extract until the mixture turns pale, thick, and ribbons form when you lift the whisk. This step is the foundation of the airy sponge; the sugar dissolves and the yolks emulsify, creating a stable base.
Meanwhile, in a separate bowl, beat the egg whites until they form soft peaks, then gradually add a pinch of salt and continue to beat until stiff, glossy peaks form. The stiffness of the whites determines how much air is trapped, so don’t rush this—listen for the faint “whoosh” of air as you fold.
-
Gently fold the whipped egg whites into the yolk‑sugar mixture using a spatula, turning the bowl over and over in a figure‑eight motion. This technique preserves the air bubbles; if you stir too aggressively, the batter will deflate and the final cake will be dense.
Once incorporated, sift the flour and baking powder together, then fold them in carefully. The batter should be smooth, glossy, and just a touch thicker than a pancake batter—if it looks watery, you’ve over‑mixed.
Watch Out: Over‑folding at this stage can break down the air bubbles, resulting in a flat, rubbery cake. -
Add the melted butter, milk, and the remaining tablespoon of unsalted butter to the batter, folding just until combined. The butter adds richness and helps the crumb stay moist for days. You’ll notice the batter becomes silkier, with a faint buttery aroma that signals you’re on the right track.
-
Spoon the batter into the prepared pan, filling each cavity about three‑quarters full. Use a piping bag or a small ice‑cream scoop for uniform portions; consistency matters for even baking.
Slide the pan into the oven and bake for 12‑15 minutes. The edges will start pulling away from the sides of the pan, and the tops will turn a light golden hue—this is the visual cue that the sponge is done.
-
While the cakes bake, prepare the filling. In a mixing bowl, beat the softened 1/2 cup unsalted butter until creamy, then add the marshmallow creme and continue beating until light and fluffy. This creates a whipped, airy base that will later hold the powdered sugar without becoming grainy.
Gradually add the powdered sugar, one cup at a time, beating on low speed to avoid a sugar cloud explosion. Once smooth, mix in the second teaspoon of vanilla extract and the tablespoon of heavy cream for that glossy finish.
Kitchen Hack: Chill the butter for 10 minutes before beating; this gives the filling a silkier texture and prevents over‑whipping. -
When the cakes are done, remove them from the oven and let them cool in the pan for 5 minutes, then gently run a thin knife around each cavity and transfer the cakes to a wire rack. The cooling step lets the steam escape, preventing soggy bottoms.
While the cakes are still warm (but not hot), slice them horizontally with a small serrated knife to create a pocket for the filling. If you’re nervous about cutting, use a pastry tip to make a tiny incision and then push the filling in with a piping bag.
-
Pipe or spoon a generous dollop of the marshmallow‑buttercream into each cake, then gently press the top half back on. The filling should spread slightly, creating a smooth, glossy seam. Let the assembled Twinkies sit for at least 10 minutes before serving; this allows the flavors to meld and the crumb to absorb a whisper of moisture from the filling.
That’s it — you did it. But hold on, I’ve got a few more tricks that'll take this to another level...
Insider Tricks for Flawless Results
The Temperature Rule Nobody Follows
Never bake a Twinkie batter straight from the fridge; room‑temperature ingredients blend more uniformly, giving you that airy crumb. If you notice the batter feels too thick, let it sit for a few minutes—this tiny rest lets the flour hydrate fully, preventing a dry texture. I once tried to speed things up by using cold eggs and ended up with a dense, gummy cake that could have doubled as a doorstop.
Why Your Nose Knows Best
When the cakes are baking, trust your sense of smell more than the timer. A faint, nutty aroma indicates the butter is caramelizing just right, while a burnt smell means you’ve gone too far. If you hear a gentle “crackle” from the oven, that’s the sound of the edges setting—a perfect cue to start checking for doneness.
The 5‑Minute Rest That Changes Everything
After piping the filling, let the assembled Twinkies rest on a wire rack for at least five minutes. This short pause allows the sponge to absorb a whisper of moisture from the buttercream, making the final bite melt‑in‑your‑mouth rather than dry. Skipping this step leaves a noticeable gap between cake and filling, and nobody wants that.
Piping Perfection
Use a large‑bore pastry tip (about 1 cm) for the filling; it creates a smooth, even layer without air pockets. If you don’t have a piping bag, a zip‑top bag with a tiny corner cut off works just as well. The key is consistent pressure—too much and the filling will burst out the sides; too little and you’ll end up with a thin line.
Freezer‑Friendly Strategy
If you plan to freeze the Twinkies, wrap each one individually in parchment before placing them in a zip‑lock bag. This prevents freezer burn and keeps the filling from absorbing any off‑flavors. Thaw them at room temperature for 20 minutes, then give them a quick microwave zap (10 seconds) to revive the softness.
Creative Twists and Variations
This recipe is a playground. Here are some of my favorite ways to switch things up:
Chocolate‑Swirl Twinkies
Add 2 tablespoons of cocoa powder to the dry ingredients and a dash of instant coffee for depth. The filling can be turned into a chocolate‑marshmallow mousse by swapping half the butter for melted dark chocolate. Chocolate lovers will swear this is the ultimate indulgence.
Lemon‑Zest Delight
Replace the vanilla extract with fresh lemon zest and a teaspoon of lemon juice in the batter. For the filling, fold in 1 tablespoon of lemon curd and a pinch of powdered sugar. The bright citrus cuts through the richness, making it perfect for spring brunches.
Strawberry‑Infused Dream
Puree fresh strawberries and fold a quarter cup of the puree into the batter, reducing the milk slightly to keep the consistency. Swirl strawberry jam into the marshmallow‑buttercream for a fruity ribbon. This version screams summer picnics.
Nutty Crunch Surprise
Stir ¼ cup finely chopped toasted almonds into the batter for a subtle crunch. Mix a tablespoon of almond extract into the filling and sprinkle a few slivered almonds on top before serving. The nutty notes add texture without overwhelming the classic flavor.
Spiced Autumn Twist
Add a pinch of ground cinnamon, nutmeg, and a dash of pumpkin spice to the batter. Swap the vanilla in the filling for a tablespoon of maple syrup and a pinch of ground ginger. This version is perfect for cozy evenings by the fire.
Storing and Bringing It Back to Life
Fridge Storage
Place the Twinkies in an airtight container lined with parchment paper. They will stay fresh for up to five days, and the filling actually mellows, becoming even more luscious. If you notice the tops drying out, cover them loosely with a piece of wax paper.
Freezer Friendly
Wrap each Twinkie individually in plastic wrap, then place them in a zip‑lock freezer bag. They freeze beautifully for up to two months. When you’re ready to enjoy them, let them thaw in the refrigerator for an hour, then let them sit at room temperature for 15 minutes before serving.
Best Reheating Method
To revive that just‑baked softness, preheat your oven to 300°F (150°C), place the Twinkies on a baking sheet, and add a tiny splash of water to the pan (just enough to create steam). Heat for 5‑7 minutes; the steam will re‑hydrate the sponge while the buttercream stays glossy. Avoid microwaving for too long, or you’ll end up with a rubbery mess.
Now that you’ve mastered the basics, you’re ready to impress friends, family, or that one coworker who always asks for “the best dessert ever.” Serve these with a glass of cold milk, a dollop of fresh whipped cream, or simply on their own—trust me, they’ll disappear faster than you can say “Twinkie.”