I was standing in my kitchen, staring at a half‑baked cheesecake that looked more like a sad, flat pancake than the towering masterpiece I’d promised my friends. The timer had gone off, I opened the oven, and the top was a dull, pale gray instead of the caramelized, almost‑charred crown I’d seen in those glossy Instagram posts. I swear I heard my oven sigh in disappointment, and in that moment I made a bold vow: I would not settle for a bland, boring dessert again. I grabbed a fresh lemon, a handful of raspberries, and a mischievous grin, because I was about to turn that failure into a triumph that would make even the most skeptical palate sing.
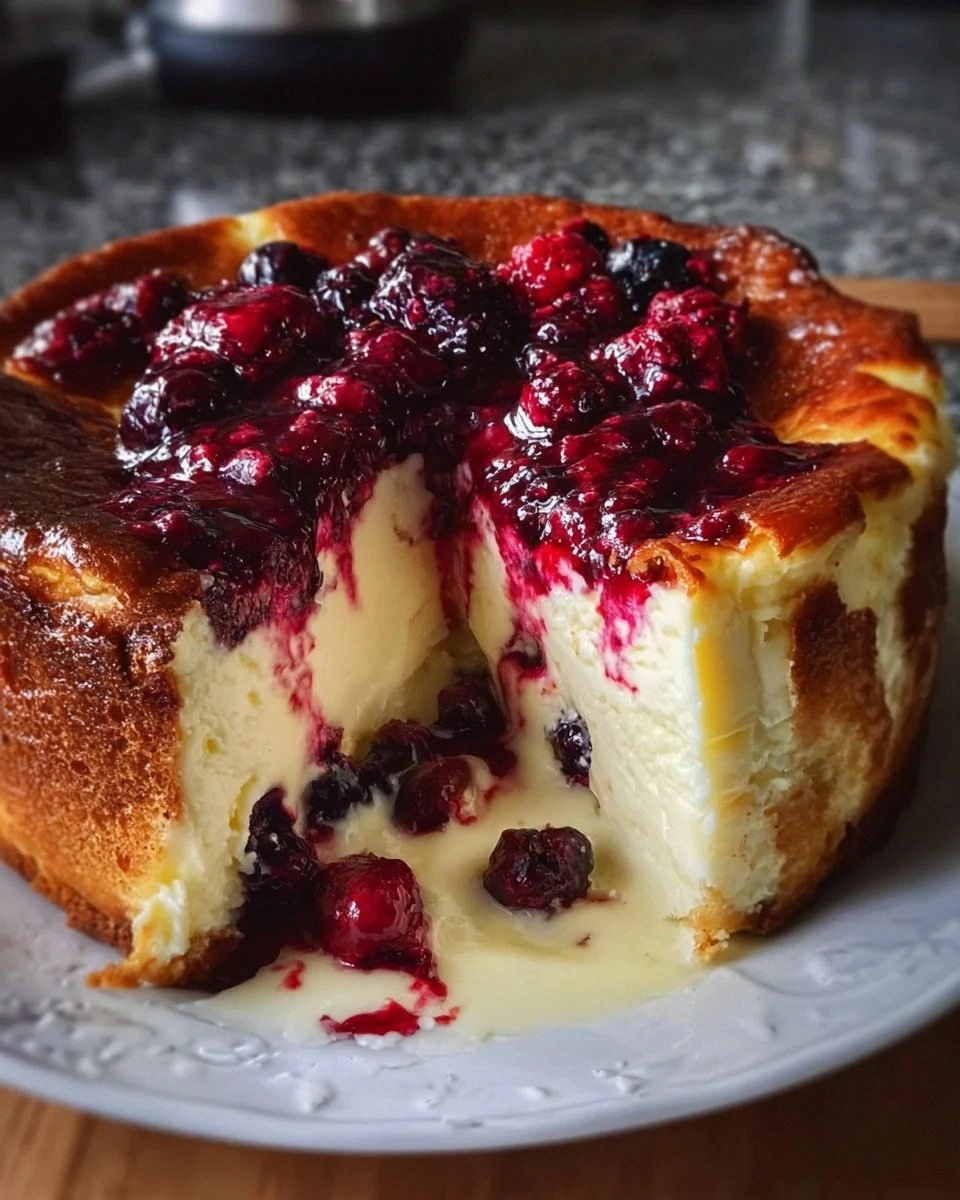
Picture this: the kitchen filled with the sweet scent of melted cream cheese mingling with the bright, citrusy perfume of zest, while the faint crackle of the caramelizing top whispers promises of a perfect crunch. The oven’s heat radiates like a warm hug, and the batter bubbles gently, sending tiny steam clouds that dance across the counter. When you finally pull the cheesecake out, the surface is a deep amber, speckled with tiny caramelized bubbles that look like a star‑studded night sky. The interior? Silky, buttery, and just the right amount of tangy, with fresh berries peeking through like ruby jewels. It’s a sensory overload that makes you want to shout, “I dare you to taste this and not go back for seconds!”
What makes this version truly stand out is the daring burnt top—yes, you read that right, burnt! Most recipes shy away from that golden‑brown edge because they fear it will turn bitter, but I’ve cracked the code: a brief, high‑heat blast creates a toasty crust that’s crisp on the outside yet still creamy inside. The citrus zest adds a zing that cuts through the richness, while the fresh berries provide a burst of natural sweetness and a pop of color that would make any Instagram feed jealous. And here’s the kicker: I’m using a touch of all‑purpose flour, a secret weapon that stabilizes the batter without making it dense, delivering a texture that’s both airy and satisfying.
Okay, ready for the game‑changer? I’m about to walk you through every single step—by the end, you’ll wonder how you ever made a cheesecake any other way. I’ll spill the beans on the exact temperature tricks, the timing that turns a simple batter into a caramelized marvel, and the little hacks that keep the crust from cracking. So grab your mixing bowls, preheat that oven, and let’s dive into a dessert adventure that will have you bragging to anyone who’ll listen. This is hands down the best version you’ll ever make at home.
What Makes This Version Stand Out
- Texture: The burnt top creates a crisp, caramelized crust that shatters like thin ice, while the interior stays luxuriously smooth and velvety.
- Flavor Balance: Bright citrus zest cuts through the richness, and fresh berries add a sweet‑tart contrast that keeps every bite exciting.
- Simplicity: Fewer steps than a traditional New York cheesecake, yet the result feels like a bakery‑level masterpiece.
- Uniqueness: The intentional “burnt” finish is a bold departure from the usual pale tops, giving you that Instagram‑worthy wow factor.
- Crowd Reaction: Guests often gasp at the caramelized surface before diving in, leading to endless compliments and repeat requests.
- Ingredient Quality: Using full‑fat cream cheese and heavy cream ensures richness, while high‑quality fresh berries provide natural sweetness without added sugar.
- Cooking Method: A water‑bath (bain‑marie) keeps the center gentle, while a brief high‑heat blast at the end gives that coveted burnt finish.
- Make‑Ahead Potential: The cheesecake can be prepared a day ahead, allowing the flavors to meld, and it reheats beautifully.
Inside the Ingredient List
The Flavor Base
Cream Cheese: This is the star of the show! It gives the cheesecake its rich, creamy texture that melts in your mouth. If you skimp on quality, you’ll notice a watery, less decadent result. Opt for a full‑fat, block‑style cream cheese and let it sit at room temperature for 30 minutes before mixing—this ensures a smooth, lump‑free batter. Swap: For a lighter version, you can blend half cream cheese with ricotta, but expect a slightly less dense mouthfeel.
Granulated Sugar: This sweetens the cheesecake and balances the tanginess of the citrus. Using superfine sugar helps it dissolve completely, preventing a grainy texture. If you prefer a deeper caramel note, try a mix of half white and half brown sugar, but watch the color shift.
The Texture Crew
Heavy Cream: This ingredient adds richness and creaminess, making your cheesecake utterly decadent. The fat content coats the protein strands from the cream cheese, creating that luxurious mouthfeel. When the cream is too cold, it can cause curdling, so gently warm it before adding it to the mix. Swap: Full‑fat coconut milk can be used for a dairy‑free twist, though the flavor will lean tropical.
All‑Purpose Flour: A small amount helps stabilize the cheesecake, preventing it from collapsing during the bake. It acts like a silent guardian, absorbing excess moisture and giving the batter a slight structure. Too much flour will make the crumb dense, so stick to the recommended 2‑3 tablespoons. Swap: Cornstarch works in a pinch, but you’ll lose a bit of the buttery mouthfeel.
The Unexpected Star
Citrus Zest: You can use lemon or orange zest. It adds a fresh, zesty kick to the filling that brightens every bite. The oils in the zest are volatile, so add them at the very end of mixing to preserve their aroma. If you’re feeling adventurous, try a blend of lemon and orange for a complex citrus profile.
Fresh Berries: Raspberries or blackberries add a burst of flavor and visual appeal. Feel free to mix it up with your favorite berries! They also bring a subtle acidity that cuts through the richness. When folding them into the batter, do it gently to avoid crushing the berries and turning the mixture pink.
The Final Flourish
Vanilla Extract: A splash of vanilla elevates the flavor profile, providing warmth to each bite. Use pure extract, not imitation, for that deep, aromatic backbone. Swap: A teaspoon of almond extract adds a nutty nuance, but use it sparingly.
Eggs: Vital for structure, they create that delightful creamy consistency when baked. The proteins coagulate, giving the cheesecake its lift and stability. Be sure to add the eggs one at a time, fully incorporating each before the next, to avoid a curdled batter.
Salt: Just a pinch! It enhances flavors and balances the sweetness. Skipping it will make the cheesecake taste flat, no matter how much sugar you add.
Everything's prepped? Good. Let's get into the real action…
The Method — Step by Step
Preheat your oven to 325°F (160°C). While it warms up, line a 9‑inch springform pan with parchment paper at the bottom and wrap the outside with a double layer of foil to prevent water from seeping in during the water‑bath. This step might sound like overkill, but trust me—no soggy bottom here. The foil also helps distribute heat evenly, which is crucial for that perfect burnt top later.
In a large mixing bowl, beat the softened cream cheese until it’s silky smooth—think cloud‑like, no lumps in sight. Add the granulated sugar and continue beating until the mixture lightens, turning a pale ivory. This is where the magic starts; the sugar dissolves and the batter becomes airy, setting the stage for a fluffy interior. Watch Out: If you over‑mix after adding the eggs, the batter can become too thin, leading to a cracked surface.
Add the eggs one at a time, beating just until each is incorporated. Then stir in the vanilla extract, a pinch of salt, and the citrus zest. The zest should be added last so its aromatic oils stay vibrant. At this point, the batter should look glossy and slightly thick, like a smooth custard.
Gently fold in the heavy cream and the flour using a rubber spatula. The goal is to combine without deflating the air you’ve already incorporated. Once the flour disappears, gently fold in the fresh berries, distributing them evenly but carefully to avoid turning the batter purple. This is the moment where the cheesecake starts to look like a work of art—tiny ruby specks suspended in a creamy sea.
Place the springform pan inside a larger roasting pan. Pour hot water into the larger pan until it reaches about halfway up the sides of the springform pan. This water‑bath (bain‑marie) provides gentle, even heat, preventing the edges from overcooking while the center stays silky. Bring the water to a gentle simmer before placing the whole assembly in the oven.
Bake for 30‑35 minutes, or until the edges are set and the center still has a slight wobble when you jiggle the pan. The surface should be a pale gold, not yet burnt. This is the moment of truth—if you open the oven too early, the top won’t caramelize properly; too late, and you risk a dry crumb.
Now for the show‑stopper: switch the oven to broil (high) and let the cheesecake sit for 2‑3 minutes. You’ll hear a faint sizzle as the sugars on the surface begin to caramelize. Keep a close eye—once the edges turn a deep amber and the surface cracks just a touch, pull it out. That burnt top should look like a glossy, caramel‑kissed crater, with a faint perfume of toasted sugar filling the kitchen. That sizzle when it hits the pan? Absolute perfection.
That’s it — you did it. But hold on, I've got a few more tricks that'll take this to another level. The cheesecake will continue to set as it cools, and the flavors will deepen, especially the citrus zing and berry bursts. Let it cool completely on a wire rack before refrigerating for at least 4 hours, preferably overnight. When you finally slice it, you’ll see a glossy, burnt top that cracks delicately, revealing a creamy, slightly wobbly interior dotted with jewel‑like berries. Trust me, the first bite will have you shouting, “I’ll be honest — I ate half the batch before anyone else got to try it!”
Insider Tricks for Flawless Results
The Temperature Rule Nobody Follows
Never bake a cheesecake at a scorching 450°F. A moderate 325°F gives the batter time to set without cracking, while the final broil adds the coveted burnt finish. If your oven runs hot, lower the temperature by 10‑15 degrees and extend the bake by a few minutes. I once tried a high‑heat method and ended up with a cracked, rubbery mess—lesson learned.
Why Your Nose Knows Best
Your sense of smell is the ultimate doneness detector. When the edges start smelling nutty and the top emits a faint caramel perfume, you’re right on cue. If you’re uncertain, open the oven a crack and take a whiff; the aroma will tell you if you need that extra minute under the broiler.
The 5‑Minute Rest That Changes Everything
After removing the cheesecake from the oven, let it sit in the turned‑off oven with the door ajar for 5 minutes. This gentle cooling prevents a sudden temperature shock, which can cause the surface to crack. Then transfer it to a wire rack to cool completely before refrigerating. Skipping this step is a common mistake that leads to a cracked top—trust me, you don’t want that.
Berry Swirl Secret
If you love a marbled effect, gently swirl a spoonful of berry puree into the batter after it’s in the pan. The key is to do it lightly; you want ribbons of color, not a fully blended purple mess. I tried a full blend once, and the cheesecake lost its visual appeal—still tasty, but not as Instagram‑ready.
The Crust‑Free Myth
Many think a crust is mandatory for cheesecake, but this burnt version shines without one. The caramelized top provides enough texture contrast. If you still crave a crust, a thin layer of almond flour and butter baked for 8 minutes works, but it’s optional.
Creative Twists and Variations
This recipe is a playground. Here are some of my favorite ways to switch things up:
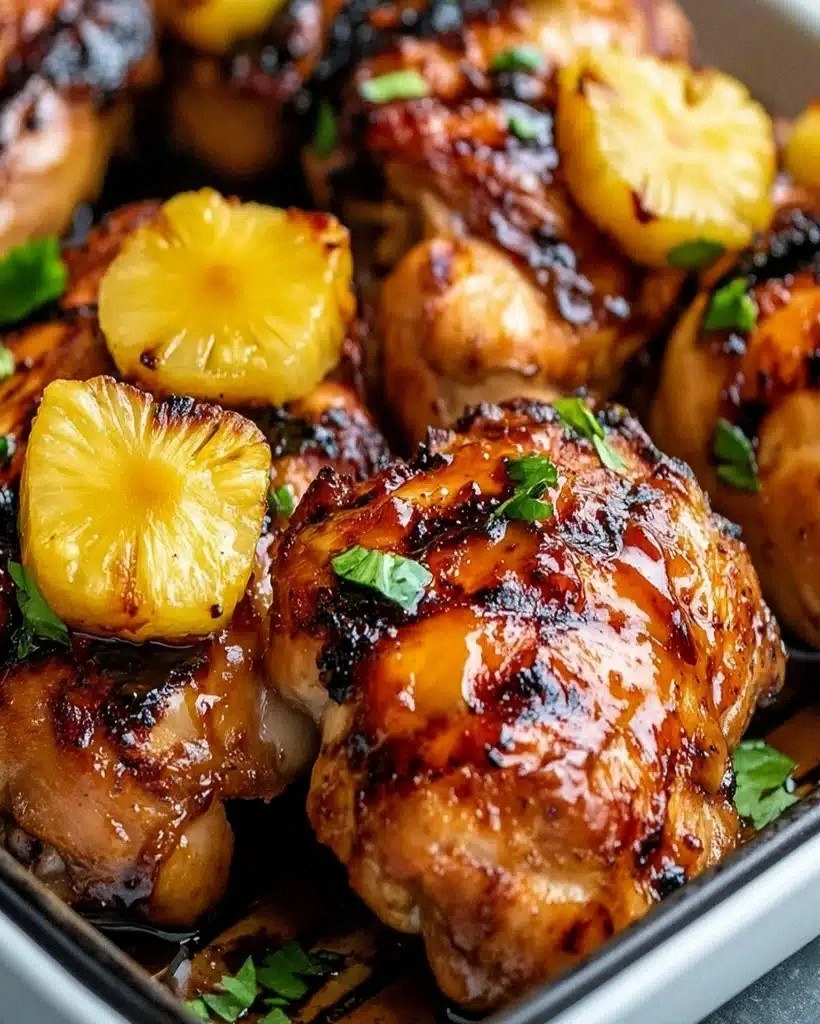
Tropical Burn
Swap lemon zest for lime zest, and use pineapple chunks instead of berries. The tropical acidity pairs beautifully with the burnt caramel, making it a perfect summer treat for beach‑themed parties.
Chocolate‑Swirl Delight
Melt ¼ cup dark chocolate and swirl it into the batter before baking. The bitter chocolate contrasts with the sweet caramelized top, creating a sophisticated flavor duo that will wow coffee‑shop enthusiasts.
Nutty Crunch
Fold in toasted chopped pistachios or almonds just before the final bake. The nuts add a satisfying crunch that complements the crisp burnt crust and adds a pop of color.
Spiced Autumn
Add a pinch of ground cinnamon and nutmeg to the batter, and use orange zest instead of lemon. Pair it with fresh figs for a cozy, autumn‑ready dessert that feels like a warm hug.
Vegan Velvet
Replace cream cheese with a blend of soaked cashews, coconut oil, and lemon juice, and use aquafaba in place of eggs. The result is a plant‑based version that still delivers that burnt caramel top—proof that you don’t need dairy to achieve decadence.
Storing and Bringing It Back to Life
Fridge Storage
Cover the cheesecake loosely with plastic wrap or a dome lid and refrigerate for up to 5 days. The burnt crust stays crisp for the first 24 hours, then softens slightly—still delicious. When serving, let it sit at room temperature for 15 minutes to bring back that creamy melt.
Freezer Friendly
Slice the cheesecake into wedges, wrap each piece tightly in parchment paper, then place them in a zip‑top freezer bag. They’ll keep for up to 2 months. To thaw, move the slice to the fridge overnight, then let it sit at room temperature for 10 minutes before serving.
Best Reheating Method
To revive that burnt crunch, preheat your oven to 300°F (150°C), place the slice on a parchment‑lined tray, and add a tiny splash (about a teaspoon) of water to the side of the plate. The steam will gently re‑moisturize the interior while the oven’s dry heat restores the caramelized top. Heat for 8‑10 minutes, and you’ll have a cheesecake that tastes fresh‑out‑of‑the‑oven.