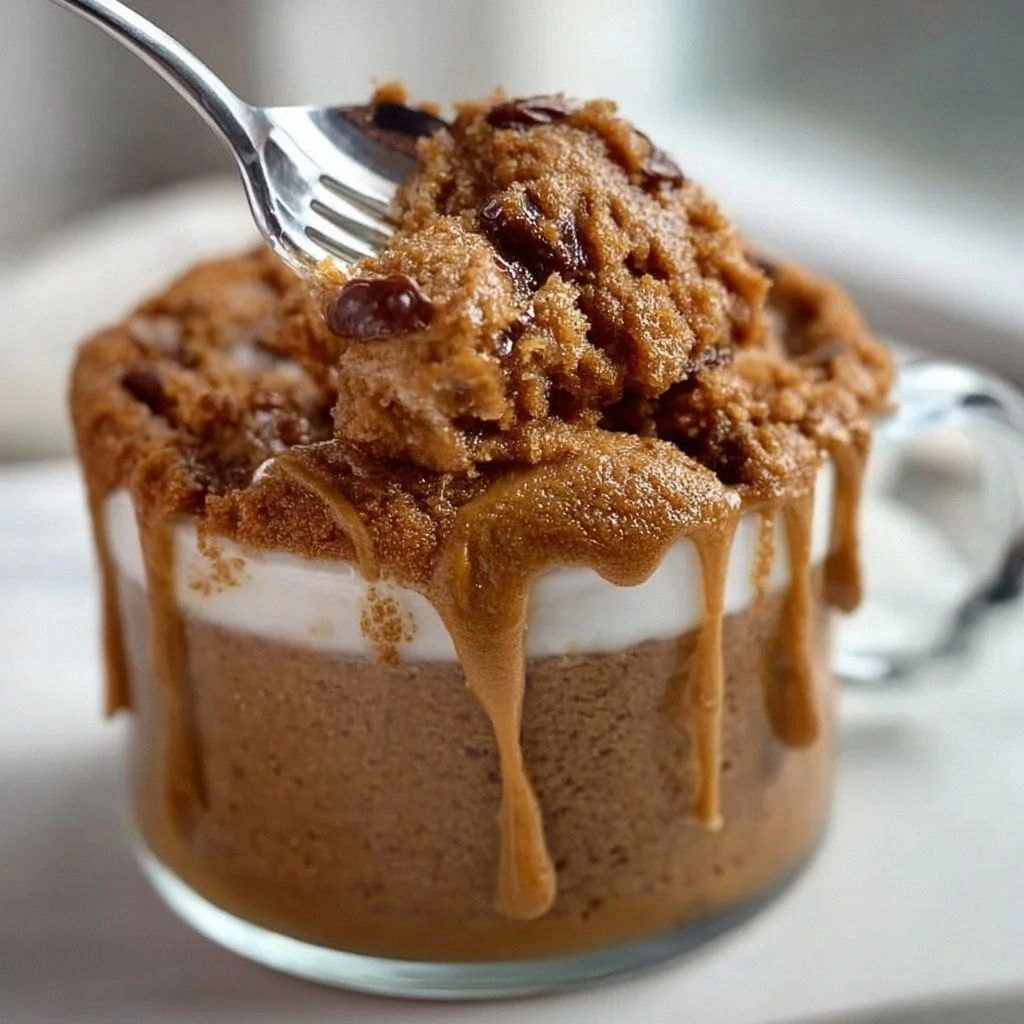
Ever been halfway through a midnight snack, only to find yourself staring at a single mug, a jar of Biscoff cookie butter, and a stubborn urge that can’t be silenced? That night, I was a culinary wanderer, armed with a microwave and a dream of caramelized sweetness that would make my taste buds do a happy dance. The kitchen lights flickered, the timer buzzed, and the aroma of toasted sugar and spice wafted through the air like a mischievous ghost. I didn’t know then that I was about to discover a mug cake that would become my go-to comfort food, a single-serving marvel that delivers a full‑blown dessert experience in the span of a few minutes.
Picture the moment the mug hits the microwave: a gentle hiss, a faint pop, and then the subtle crackle of butter melting into a glossy, caramelized sauce that coats the batter like velvet. The steam rises, carrying a scent that feels like a hug from your grandma’s kitchen, but with a modern, instant twist. The sound of the timer ticking down is almost hypnotic, and you can’t help but imagine the first bite: a warm, gooey center that melts into a buttery, spiced explosion, followed by a crisp, slightly crisped edge that shatters like thin ice.
What sets this version apart is not just the simplicity of a mug but the boldness of flavor that Biscoff cookie butter brings. It’s a creamy, caramel‑spiced cookie butter that carries the essence of a freshly baked cookie, yet it melts into a silky batter that transforms into a cake in under five minutes. I dare you to taste this and not go back for seconds—once you’ve had the first bite, you’ll be craving that sweet, spiced richness again and again. The best part? You can whip this up in a mug, a bowl, or even a silicone cupcake liner—no fancy pans required.
The secret sauce is the Biscoff cookie butter spread, which not only sweetens the batter but also adds a depth of flavor that would make even the most seasoned dessert lover swoon. The batter is airy, thanks to the baking powder, and the final product has a moist interior that feels like a cloud, while the exterior develops a slightly caramelized crust that adds a delightful crunch. Most recipes get this completely wrong by overmixing or using too much flour, but here we keep it light and simple, preserving the buttery, caramel notes that make each bite unforgettable.
If you’ve ever struggled with a mug cake that turns out dry or lumpy, you’re not alone—and I’ve got the fix. The trick is to use a high‑quality cookie butter that’s thick enough to stay in the mug without spilling, and to whisk the batter just until the flour is incorporated—no more, no less. This ensures a tender crumb that’s not dense, but still firm enough to hold its shape. I’ve tested this recipe on both glass and ceramic mugs, and it performs consistently, delivering a cake that’s both fluffy and richly flavored.
I’ll be honest—when I first made this, I ate half the batch before anyone else got to try it. The moment the first spoonful hit my tongue, I was hooked, and my friends begged for the recipe. Since then, I’ve shared this with anyone who needs a quick dessert, and the reactions have been nothing short of enthusiastic. Picture yourself pulling this out of the oven, the whole kitchen smelling incredible, and the aroma of caramel and spices filling the room like a comforting blanket.
This is hands down the best version you’ll ever make at home. It’s simple, it’s quick, and it’s delicious enough to satisfy your sweet tooth without the need for a full kitchen. The best part? The method is so straightforward that even a novice can master it, and the result is a cake that looks like it came straight from a bakery, yet it’s made in a single mug. I’ve experimented with variations, and the possibilities are endless, from adding chocolate chips to swapping the milk for a dairy-free alternative.
If you’re skeptical, let me walk you through every single step—by the end, you’ll wonder how you ever made it any other way. From the first stir to the final microwave blast, every moment is a chance to create something sweet and comforting. So grab your mug, your Biscoff cookie butter, and let’s dive into the world of instant dessert mastery.
What Makes This Version Stand Out
- Taste: The Biscoff cookie butter delivers a caramelized, spiced flavor that mimics a freshly baked cookie, elevating the cake beyond ordinary mug cakes. The sweet, buttery notes linger on the palate, leaving you craving more.
- Texture: The batter is silky and airy, thanks to the baking powder and careful whisking. The result is a moist interior that feels like a cloud, while the exterior develops a slightly caramelized crust.
- Simplicity: Only eight ingredients, all pantry staples, make this recipe accessible to anyone. No need for fancy equipment—just a mug and a microwave.
- Uniqueness: Using Biscoff cookie butter as the primary sweetener is a game‑changer that sets this recipe apart from the typical sugar‑laden mug cakes. It brings depth and richness.
- Crowd Reaction: Friends rave about the flavor and the convenience. I’ve seen people ask for the recipe after just one bite.
- Ingredient Quality: The recipe relies on the quality of the cookie butter; a high‑quality spread ensures the best flavor and texture. Opt for a brand with natural ingredients.
- Cooking Method: Microwaving the batter in a mug is the fastest way to achieve a bakery‑style cake. The heat distribution is even, preventing the dreaded burnt edges.
- Make‑Ahead Potential: You can pre‑mix the batter and store it in the fridge for up to 24 hours. When you’re ready, just microwave and enjoy a fresh cake.
Alright, let's break down exactly what goes into this masterpiece. Each ingredient plays a role, and together they create a symphony of flavor and texture that will have you coming back for more.
Inside the Ingredient List
The Flavor Base
The star of this recipe is the Biscoff cookie butter spread. Its caramelized, spiced flavor is the backbone of the cake, giving it a depth that ordinary sugar simply can’t match. The spread is thick and buttery, which adds moisture and richness to the batter. If you’re in a pinch, you can use any nut butter—almond or peanut—for a different twist, but the flavor profile will shift noticeably. The key is to keep the spread at room temperature so it blends smoothly into the batter.
Using Biscoff cookie butter also means you’re adding a subtle caramel undertone that pairs beautifully with the vanilla‑infused milk. The butter’s natural sweetness allows you to reduce the added sugar, keeping the cake lighter while still satisfying your sweet cravings. The spread’s texture is crucial; if it’s too thick, the batter may become clumpy, but if it’s too runny, the cake may collapse. Find that sweet spot, and you’ll have a cake that’s both fluffy and flavorful.
The Texture Crew
All‑purpose flour is the structural backbone of the cake. It provides the necessary gluten development to support the rise while keeping the crumb tender. For those who prefer a gluten‑free option, almond flour or a gluten‑free all‑purpose blend works well, but the texture will be slightly denser. The flour’s fine texture ensures that the batter remains smooth and free of lumps.
Sugar is the sweetener that balances the caramel notes of the Biscoff spread. While 2 tablespoons of sugar are enough to sweeten the cake without overpowering the cookie butter, you can experiment with coconut sugar or a sugar substitute for a healthier option. Sugar also helps the batter set and gives the cake a slightly crisp exterior when microwaved. If you skip the sugar, the cake will be less sweet and may lack the caramelized finish.
Baking powder is the leavening agent that gives the cake its airy lift. Only 1/8 teaspoon is needed because the batter is already moist and the microwave heats quickly. If you’re out of baking powder, you can use baking soda with a dash of vinegar to create the same effect, but the rise may be less pronounced. A fresh batch of baking powder ensures the best rise and a light crumb.
The Unexpected Star
Milk (or a dairy‑free alternative) hydrates the dry ingredients and creates a smooth batter. The 3 tablespoons of milk are enough to bring the mixture together without making it too runny. If you prefer a richer taste, half‑and‑half works wonderfully, but the cake will be slightly heavier. Milk also helps activate the baking powder, contributing to the rise.
Vegetable oil is the moisture enhancer that keeps the cake tender and prevents it from drying out during microwaving. The 1 tablespoon of oil adds a subtle buttery flavor and helps the cake rise evenly. You can substitute melted coconut oil or butter for a different flavor profile, but the texture may change slightly. The oil’s role is essential for a moist, tender crumb.
The Final Flourish
Optional chocolate chips or nuts add a delightful crunch and a burst of flavor. Sprinkle a handful of chocolate chips on top before microwaving for a gooey, chocolatey finish. Nuts like walnuts or pecans add a nutty crunch that complements the caramel notes. These toppings are optional but highly recommended for those who love a little extra texture and flavor.
The combination of these ingredients creates a cake that is both simple and sophisticated. Each component plays a vital role, from the buttery sweetness of the Biscoff spread to the airy lift of the baking powder. The result is a cake that’s as indulgent as it is convenient.
Everything's prepped? Good. Let's get into the real action. The next steps will guide you through the process of transforming these ingredients into a mouth‑watering mug cake.
The Method — Step by Step
- Step 1: Prep the Mug – Start by choosing a 12-ounce mug. Wash it thoroughly and pat it dry to ensure no excess moisture interferes with the batter. This step may seem trivial, but a clean mug guarantees even cooking and prevents sticking. If you’re using a silicone cupcake liner, line the mug before adding the batter.
- Step 2: Add the Cookie Butter – Scoop 2 tablespoons of Biscoff cookie butter into the mug. Gently stir with a spoon until the spread is evenly distributed. The butter should be warm enough to pour, but not so hot that it melts too quickly. This creates a uniform base for the batter.
- Step 3: Mix Dry Ingredients – In a small bowl, whisk together 4 tablespoons of all‑purpose flour, 2 tablespoons of sugar, 1/8 teaspoon of baking powder, and a pinch of salt. The dry mix should be light and airy. This step ensures that the leavening agent is evenly distributed, preventing uneven rising.
- Step 4: Combine Wet Ingredients – Add 3 tablespoons of milk and 1 tablespoon of vegetable oil to the mug. Stir until the mixture is smooth and free of lumps. The wet ingredients hydrate the dry mix and create a silky batter. The oil adds a subtle buttery flavor that complements the cookie butter.
- Step 5: Whisk the Batter – Using a fork or a small whisk, combine the wet and dry ingredients until just smooth. Do not overmix; the batter should be slightly lumpy for a tender crumb. Overmixing can cause the cake to become dense. This is the moment of truth—watch the batter’s consistency.
- Step 6: Add Optional Toppings – If you’re using chocolate chips or nuts, sprinkle them on top of the batter now. The toppings will melt slightly during microwaving, creating pockets of gooey chocolate or crunchy nuts. This step adds texture and flavor complexity.
- Step 7: Microwave the Cake – Place the mug in the microwave and cook on high for 1 minute and 30 seconds. The cake should rise and the top will start to look set. The edges will begin to pull away from the mug, indicating a firm structure. Keep a close eye to avoid overcooking.
- Step 8: Let It Rest – Remove the mug carefully (it may be hot) and let the cake rest for 2 minutes. This allows the steam to finish cooking the interior, resulting in a moist, fluffy crumb. While it rests, the flavors meld together, creating a harmonious taste.
- Step 9: Serve and Enjoy – Once the cake has cooled slightly, serve it straight from the mug or transfer to a plate. Add a drizzle of extra Biscoff spread, a splash of milk, or a scoop of vanilla ice cream for an extra indulgent touch. The cake is best enjoyed warm, but it can also be stored for a few hours.
That’s it—you did it. But hold on, I've got a few more tricks that'll take this to another level. These insider tips will help you achieve the perfect mug cake every time, ensuring that each bite is as delightful as the first.
Insider Tricks for Flawless Results
The Temperature Rule Nobody Follows
Microwave power can vary dramatically between models, so always adjust the cooking time accordingly. If your microwave is on the high side, reduce the cooking time by 10-15%. Conversely, if it’s a low‑power unit, add a few extra seconds. The goal is to achieve a risen, slightly set cake without overcooking. I’ve found that a quick test run on a new microwave helps calibrate the timing for future batches.
Why Your Nose Knows Best
The aroma is your best indicator of doneness. When the cake starts to smell like caramel and toasted sugar, it’s almost ready. A faint, sweet scent signals that the batter has risen and the sugars are caramelizing. If the aroma is too sweet or burnt, you’ve overcooked it. Trust your nose; it’s a reliable guide.
The 5‑Minute Rest That Changes Everything
Letting the cake rest for at least five minutes after microwaving allows the steam to finish cooking the interior. This step ensures that the crumb stays moist and tender. If you skip this rest, the cake can feel dry or gummy. A quick rest also lets the flavors meld, giving the cake a deeper, richer taste.
Avoiding the Sticky Mess
If you’re using a mug with a non‑stick coating, the batter may stick to the sides. To prevent this, lightly coat the mug with a thin layer of oil or butter before adding the batter. Alternatively, use a silicone cupcake liner, which makes cleanup a breeze. This simple trick saves time and keeps your mug clean for future recipes.
The Secret to a Crispy Edge
If you love a slightly crispy edge, microwave the cake for an additional 10-15 seconds after the initial 1 minute and 30 seconds. Keep a close eye to avoid burning. The edges will become golden brown and slightly crunchy, adding a delightful contrast to the soft interior. This is the perfect finishing touch for those who crave a bit of texture.
By mastering these insider tricks, you’ll consistently produce a mug cake that’s airy, moist, and bursting with flavor. Each step is designed to elevate the experience, ensuring that you never settle for anything less than perfect.
Creative Twists and Variations
This recipe is a playground. Here are some of my favorite ways to switch things up:
Chocolate Biscoff Explosion
Add a tablespoon of dark chocolate chips to the batter before microwaving. The chocolate melts into pockets of gooey richness that complement the caramel notes. This variation is ideal for chocolate lovers who want an extra indulgent bite.
Nutty Caramel Crunch
Fold in a handful of chopped pecans or walnuts before microwaving. The nuts add a satisfying crunch and a nutty flavor that pairs wonderfully with the Biscoff spread. The combination creates a multi‑textured dessert that’s both sweet and savory.
Coffee‑Infused Delight
Replace 1 tablespoon of milk with brewed espresso or strong coffee. The coffee’s bitterness balances the sweetness, creating a mocha‑like flavor profile. This twist is perfect for coffee enthusiasts who want a dessert with a caffeine kick.
Coconut‑Lemon Twist
Add 1 tablespoon of shredded coconut and a squeeze of fresh lemon juice to the batter. The coconut adds a tropical vibe, while the lemon brightens the flavor. This variation is refreshing and light, ideal for warm evenings.
Spiced Pumpkin Variation
Incorporate a tablespoon of pumpkin puree and a pinch of cinnamon into the batter. The pumpkin adds moisture and a subtle sweetness, while the cinnamon brings warmth. This version is especially cozy during the fall season.
Vegan Delight
Use a vegan Biscoff cookie butter, plant‑based milk, and a vegan butter alternative for a completely plant‑based version. The texture remains tender, and the flavor stays rich. This variation is perfect for those following a vegan lifestyle.
Feel free to experiment with these twists, and let your creativity guide you. Each variation offers a new flavor experience while maintaining the core of the Biscoff mug cake.
Storing and Bringing It Back to Life
Fridge Storage
If you’ve made more than one mug cake, store the extra cakes in an airtight container in the refrigerator for up to 48 hours. Before microwaving, let the cake sit at room temperature for 5 minutes to ensure even heating. Adding a splash of milk or a drizzle of Biscoff spread before reheating can help keep the cake moist.
Freezer Friendly
For longer storage, wrap the cake tightly in plastic wrap and place it in a freezer bag. Freeze for up to one month. When you’re ready to enjoy, thaw the cake at room temperature for 10 minutes, then microwave for 20-30 seconds to reheat. The cake will retain its texture and flavor, almost as fresh as when it was first made.
Best Reheating Method
Reheat the cake in a microwave on low power (50%) for 15-20 seconds to avoid overcooking. The low power allows the cake to warm evenly without drying out. A quick splash of water or a drizzle of milk before reheating helps steam the cake, restoring its moist crumb. Serve immediately for the best experience.