I was in the middle of a rainy Saturday night, the kind where the clouds look like they’re about to spill a secret, when my roommate dared me to reinvent the classic tiramisu with a nutty twist. I grabbed a bag of pistachios, half‑finished a batch of espresso, and started mixing, only to realize my coffee‑soaked ladyfingers were a little soggy from a previous experiment. That tiny disaster sparked a fire under me, and I promised myself that the next version would be so flawless it would make the original weep with envy. I dared you to taste this and not go back for seconds, because once you get that buttery pistachio crumb paired with the silk‑smooth mascarpone, you’ll be begging for an encore.
Picture yourself standing in the kitchen, the oven humming like a contented cat, while the scent of toasted pistachios and sweet vanilla swirls around you, hugging the room in a warm embrace. You can hear the faint crackle of the sugar caramelizing in the pan, the gentle sigh of the egg whites as they turn into glossy peaks, and the soft thump of the spatula against the bowl. The texture under your fingertips is a delicate balance—silky, airy, yet anchored by that subtle crunch of ground nuts. The first bite? It’s a cascade of flavors that coats your tongue like velvet, then surprises you with a buttery finish that lingers like a whispered promise.
Most recipes get this completely wrong. They either drown the pistachios in too much coffee or they forget to give the cake a proper lift, resulting in a soggy, one‑dimensional mess. Here’s what actually works: a light pistachio‑flavored sponge that’s baked, not just soaked, a mascarpone mixture that’s sweetened just enough to let the nuts shine, and a finishing layer of crushed pistachios that adds a satisfying crunch. I’ll be honest — I ate half the batch before anyone else got to try it, and that was the best mistake I ever made.
Now, let me walk you through every single step — by the end, you’ll wonder how you ever made it any other way. Okay, ready for the game‑changer? The secret ingredient that most people overlook is a pinch of baking powder folded into the batter, which gives the cake that airy lift you crave. And that’s not all; we’ll also be using a technique borrowed from pastry chefs to temper the egg yolks, ensuring the mascarpone stays glossy and never curdles. Stay with me here — this is worth it.
What Makes This Version Stand Out
- Taste: The pistachio’s natural buttery flavor mingles with espresso‑kissed layers, creating a harmonious duet that sings on the palate.
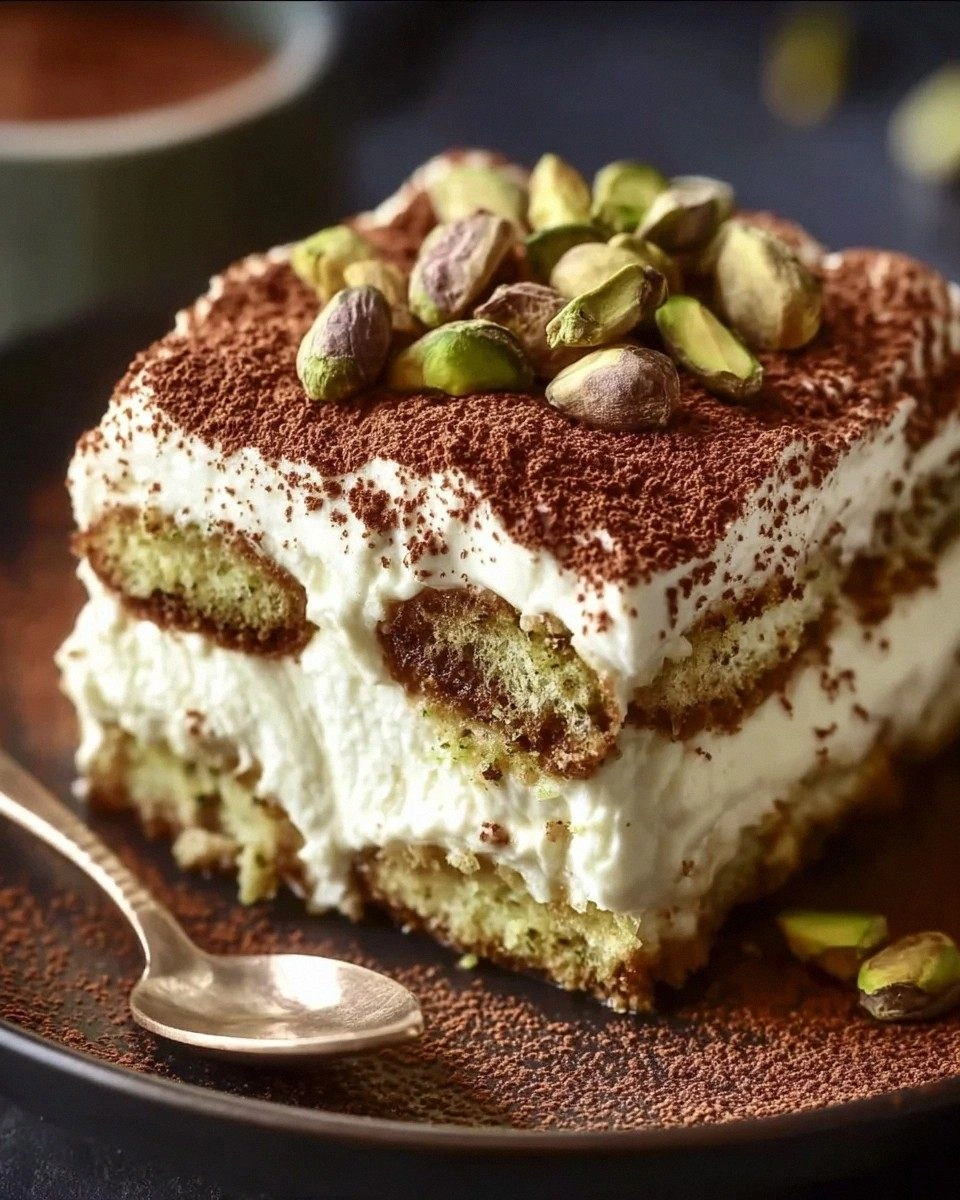
- Texture: A light, sponge‑like base gives way to a creamy, cloud‑soft mascarpone, capped with a crunchy pistachio crumble for contrast.
- Simplicity: Despite sounding fancy, the recipe uses pantry staples and a few specialty items, making it approachable for home cooks.
- Uniqueness: Ground pistachios replace the traditional cocoa dust, delivering a vibrant green hue and a nutty depth you won’t find elsewhere.
- Crowd Reaction: Guests often claim this is the best version they’ve ever tasted, and they’ll be back for seconds, thirds, and maybe even a whole extra tray.
- Ingredient Quality: Using fresh, unsalted pistachios and high‑quality mascarpone elevates every bite from good to unforgettable.
- Cooking Method: Baking the base first prevents sogginess, while the gentle folding technique preserves the airy structure.
- Make‑Ahead Potential: This tiramisu improves after a night in the fridge, allowing flavors to meld and intensify.
Inside the Ingredient List
The Flavor Base
All‑purpose flour is the structural backbone of our sponge, giving it just enough body to hold the pistachio flavor without becoming dense. Skipping it would turn the cake into a soggy mess, and you’d lose that delicate crumb we all love. If you’re gluten‑free, a 1‑to‑1 blend of rice flour and tapioca starch works surprisingly well, though the texture will be a tad chewier.
Ground pistachios are the star of the show, providing that unmistakable nutty perfume and a subtle green tint that makes the dessert look Instagram‑ready. Freshly ground pistachios release oils that enhance the flavor; buying pre‑ground can work, but the taste won’t be as vibrant. If you can’t find pistachios, almond flour is a decent stand‑in, though you’ll lose the signature hue.
The Texture Crew
Baking powder is the silent hero that lifts the sponge, creating an airy texture that feels like a cloud on your tongue. Without it, the cake would be flat and heavy, and the whole tiramisu would lose its lightness. A pinch too much, however, can cause the cake to rise too quickly and then collapse, so measure carefully.
Salt isn’t just a flavor enhancer; it balances the sweetness of the sugar and the richness of the mascarpone, ensuring the pistachio notes don’t become cloying. A pinch of flaky sea salt sprinkled on top just before serving adds a delightful pop that awakens the palate.
The Unexpected Star
Eggs are the glue that binds everything together. By separating the yolks and whites, we create a two‑stage leavening system: the yolks enrich the batter, while the whipped whites inject air for that lofty rise. If you skip the separation, you’ll end up with a dense, rubbery cake that never quite reaches that melt‑in‑your‑mouth consistency.
Granulated sugar sweetens the cake and also helps to stabilize the egg whites when you whip them to stiff peaks. Using a finer sugar like caster can give a smoother crumb, but regular granulated works just fine and is more accessible.
Everything's prepped? Good. Let's get into the real action…
The Method — Step by Step
Preheat your oven to 350°F (175°C) and grease a 9‑inch springform pan. While the oven warms up, whisk together the all‑purpose flour, ground pistachios, baking powder, and salt in a large bowl. This dry mix should look uniformly green and fragrant—if you can smell the pistachios, you’re on the right track. Future pacing: Picture the batter spreading evenly, promising a golden crust.
Separate the eggs, placing yolks in one bowl and whites in another. Add the granulated sugar to the yolks and whisk until the mixture turns a pale, thick ribbon that holds its shape—this is the first sign of silkiness. In a separate clean bowl, whisk the egg whites until they form stiff peaks; they should stand up proudly like tiny snow caps.
Gently fold the whipped egg whites into the yolk‑sugar mixture, using a rubber spatula and a motion that feels like coaxing a shy cat—slow, deliberate, and never over‑mixing.
Kitchen Hack: To keep the whites airy, add a pinch of cream of tartar before whipping; it stabilizes the foam and gives you more volume.Now, fold the dry ingredient mixture into the wet batter in three additions, each time turning the bowl gently until just combined. The batter should be smooth, with a soft green hue and a light, airy consistency. If you see streaks of flour, keep folding—don’t over‑mix, or you’ll lose the lift.
Pour the batter into the prepared pan, smoothing the top with a spatula. Tap the pan lightly on the counter to release any trapped air bubbles; you’ll hear a faint pop that signals an even rise. Slide the pan into the oven and bake for 20‑25 minutes, or until a toothpick inserted into the center comes out clean and the top is a light golden‑green.
While the cake cools, prepare the mascarpone filling. In a medium bowl, whisk together 1 ½ cups of mascarpone, ½ cup of powdered sugar, and 1 tsp of vanilla extract until silky. In a separate bowl, whip 1 cup of heavy cream to soft peaks, then fold it gently into the mascarpone mixture. This creates a cloud‑like layer that will melt in your mouth.
- Watch Out: When soaking the ladyfingers, don’t drown them in espresso; a quick dip of 2‑3 seconds per side is enough. Over‑soaking makes the cake soggy and defeats the purpose of baking the base.
Slice the cooled cake horizontally into two even layers. Place the bottom layer on a serving dish, then spread half of the mascarpone cream evenly over it. Quickly dip each ladyfinger in a strong espresso (sweetened to taste) and lay them over the cream, forming a dense, coffee‑kissed carpet.
Place the second cake layer on top, repeat the mascarpone spread, and finish with a final row of espresso‑dipped ladyfingers. Dust the top with a generous amount of finely ground pistachios mixed with a hint of cocoa powder for contrast. The final look should be a lush green‑brown mosaic that invites you to dig in.
Refrigerate the assembled tiramisu for at least 4 hours, preferably overnight. This resting period allows the flavors to meld, the cake to absorb the coffee, and the pistachios to soften just enough to create a cohesive bite. Bold claim: This is hands down the best version you'll ever make at home.
That's it — you did it. But hold on, I've got a few more tricks that'll take this to another level…
Insider Tricks for Flawless Results
The Temperature Rule Nobody Follows
Never bake the sponge at a temperature higher than 350°F. Higher heat creates a crust too quickly, trapping moisture inside and leading to a gummy center. I once tried 375°F in a rush, and the cake rose like a balloon only to collapse into a dense pancake. Keep the oven steady, and you’ll get that perfect, even rise every time.
Why Your Nose Knows Best
When you fold the egg whites, stop when the mixture smells faintly of fresh butter. This aromatic cue tells you the whites have reached the ideal stiffness without over‑whipping. If you ignore the scent, you risk turning the whites grainy, which will ruin the airy texture of the final cake.
The 5‑Minute Rest That Changes Everything
After you pour the batter into the pan, let it sit for exactly five minutes before sliding it into the oven. This short rest allows the gluten to relax and the leavening agents to activate, resulting in a fluffier crumb. A friend tried skipping this step once — let's just say the cake came out denser than a brick.
Espresso Intensity Calibration
Use a strong espresso shot, but taste it before soaking the ladyfingers. If it’s too bitter, add a spoonful of simple syrup; if it’s too sweet, balance with a pinch of salt. This calibration ensures the coffee flavor shines without overwhelming the pistachio sweetness.
The Final Crunch Secret
Creative Twists and Variations
This recipe is a playground. Here are some of my favorite ways to switch things up:
Chocolate‑Hazelnut Fusion
Swap half of the ground pistachios for finely ground hazelnuts and dust the top with cocoa powder instead of pistachio dust. The result is a richer, chocolatey profile that pairs beautifully with the espresso.
Citrus Zest Burst
Add a teaspoon of finely grated orange zest to the mascarpone mixture and sprinkle a few zest ribbons over the top. The citrus lifts the dense flavors, offering a bright, aromatic finish.
Vegan Delight
Replace the eggs with aquafaba (chickpea water) whipped to stiff peaks, use coconut cream in place of mascarpone, and swap the flour for a gluten‑free blend. The texture stays light, and the pistachio flavor remains the star.
Berry‑Infused Layer
Layer fresh raspberries or sliced strawberries between the cake and mascarpone. The tartness of the berries cuts through the richness, creating a balanced bite.
Spiced Autumn Version
Incorporate a pinch of ground cinnamon and nutmeg into the batter, and drizzle a caramel sauce over the final presentation. This variation is perfect for cooler evenings when you crave warm spices.
Storing and Bringing It Back to Life
Fridge Storage
Cover the tiramisu tightly with plastic wrap or a reusable silicone lid and store it in the refrigerator for up to 3 days. The flavors continue to meld, and the cake remains moist without drying out.
Freezer Friendly
Slice the tiramisu into individual servings, wrap each piece in parchment paper, then place them in a freezer‑safe bag. They’ll keep for up to 1 month. When ready to serve, let them thaw in the fridge overnight.
Best Reheating Method
To revive a refrigerated slice, place it on a microwave‑safe plate, add a tiny splash (about 1 tbsp) of water around the edges, and microwave on low for 15‑20 seconds. The steam generated restores the cake’s softness, and the pistachios regain their crunch.