I’ve always been the kind of person who can’t resist a good dessert, but the moment I tried to make a classic white chocolate fudge, I felt like I’d been handed a recipe that was missing a crucial secret ingredient. The kitchen was a mess of melted chocolate, sticky hands, and a faint scent of vanilla that almost made me question whether I was about to create a culinary masterpiece or a chocolate disaster. That night, after the last spoonful had vanished, a friend dared me to “make something that would make my taste buds dance.” The dare sparked a mission that led me to the ultimate version of this dish, one that is silky, sweet, and just a touch tart from the freeze‑dried raspberries that give it a delightful crunch.
Picture this: the white chocolate chips gleaming like tiny moons in a pan, the condensed milk swirling into a creamy river, and the raspberries popping into place like confetti. The air fills with the sweet aroma of vanilla and the subtle metallic tang of the chocolate, a scent that makes you feel like you’re about to step into a winter wonderland. The texture feels like velvet against the tongue, and the first bite releases a burst of berry sweetness that lingers long after the last crumb. Every element of this recipe is designed to elevate a simple fudge into an indulgent experience that feels like a secret indulgence shared between close friends.
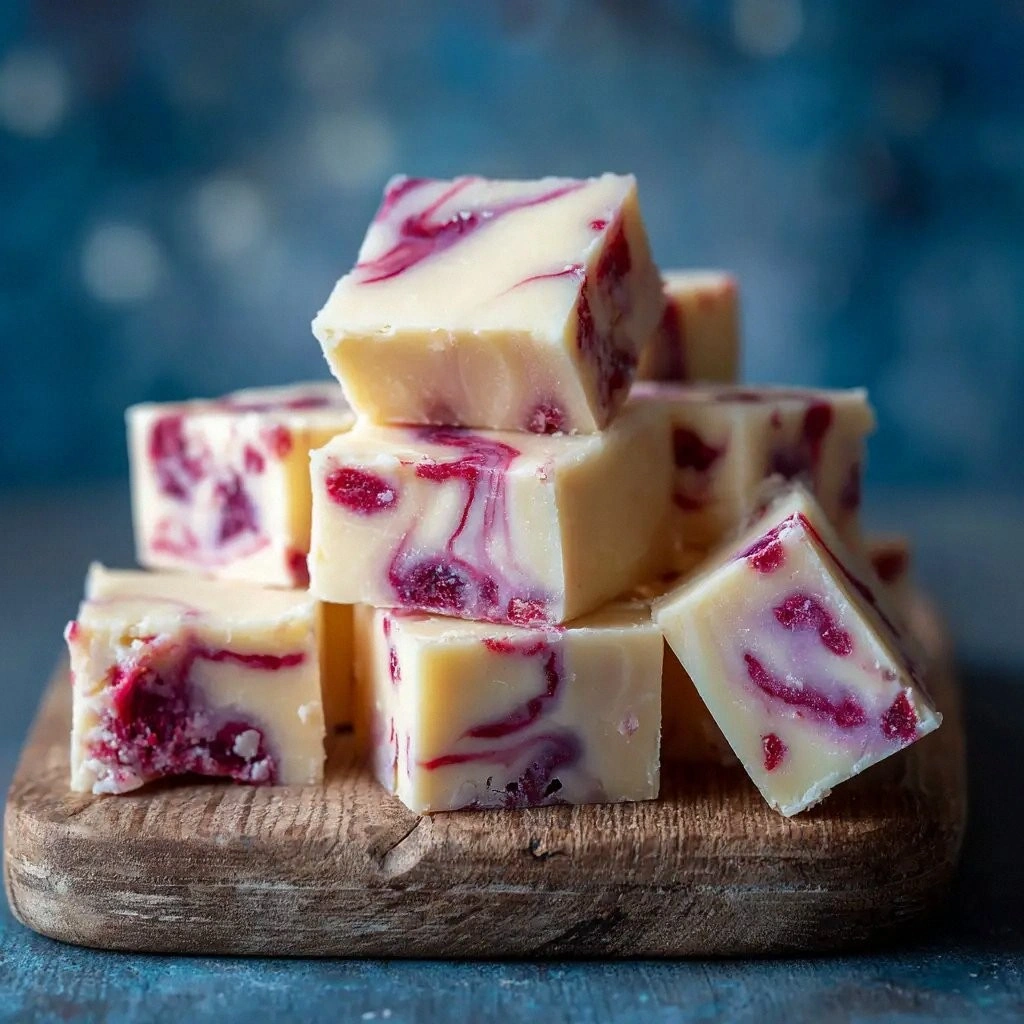
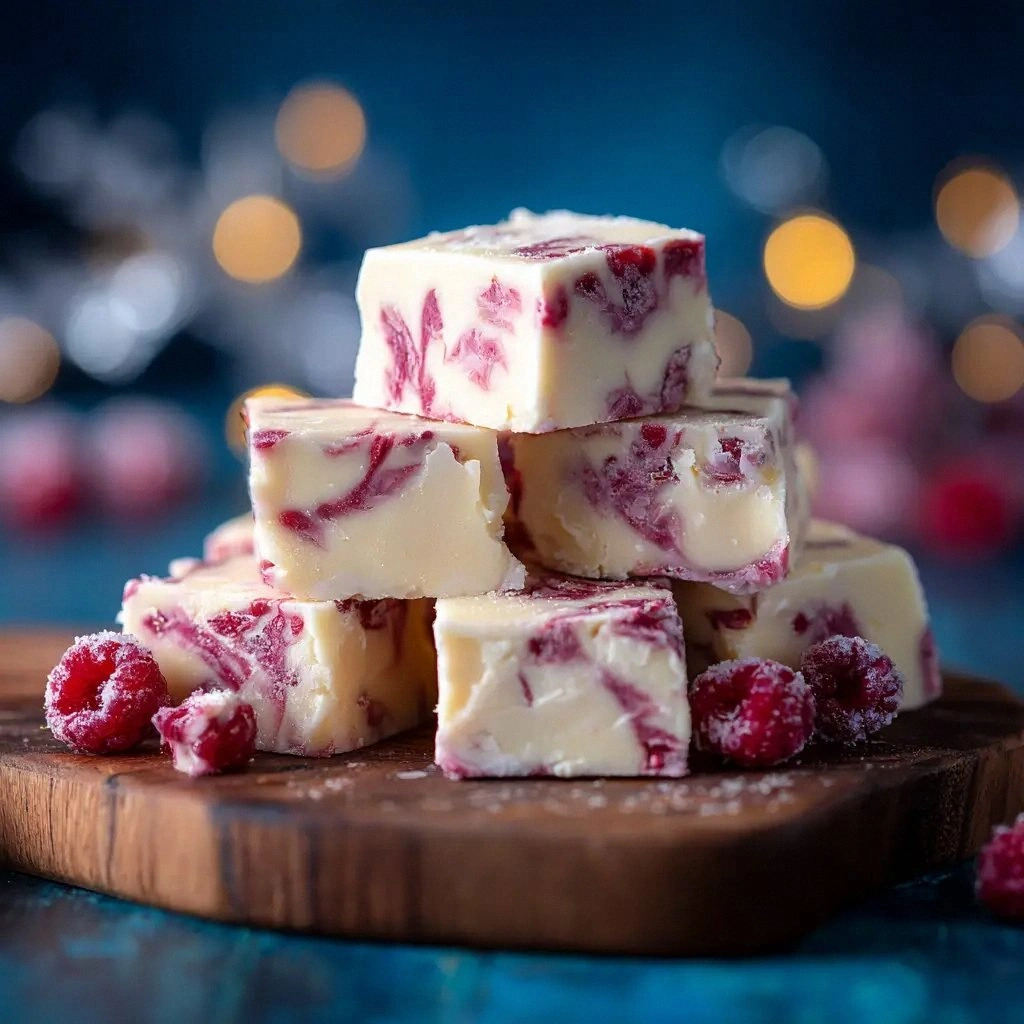
What sets this version apart from the countless others you’ll find online is that it’s not just about melting chocolate and pouring it into a pan. It’s about layering flavors, textures, and timing to create a dessert that’s both luxurious and approachable. The freeze‑dried raspberries add a surprising pop of tartness that cuts through the richness, while the water helps the chocolate melt into a flawless, glossy finish. The result is a fudge that’s as visually stunning as it is delicious, with a glossy sheen that catches the light and a smooth interior that melts in your mouth. I dare you to taste this and not go back for seconds, because once you try it, you’ll never settle for a bland, ordinary fudge again.
If you’ve ever struggled with fudge that turns out too runny or too hard, you’re not alone—and I’ve got the fix. Most recipes get this completely wrong, focusing only on the chocolate or the milk, and forgetting that the final texture is a dance between the two. By adding a teaspoon of water, you’re essentially creating a thin syrup that helps the chocolate set into a perfect, firm yet creamy consistency. The raspberries aren’t just a garnish; they’re a flavor punch that gives the fudge a vibrant, almost edible contrast. This is hands down the best version you’ll ever make at home, and I promise you’ll wonder how you ever made it any other way.
What Makes This Version Stand Out
Taste: The combination of white chocolate and freeze‑dried raspberries creates a balanced flavor profile that’s sweet, creamy, and slightly tart. The raspberries provide a subtle acidity that cuts through the richness, leaving a lingering freshness on the palate.
Texture: The fudge boasts a silky smooth interior with a glossy finish, thanks to the precise ratio of chocolate to condensed milk and the addition of a small amount of water. The freeze‑dried berries add a delightful crunch that contrasts beautifully with the creamy base.
Simplicity: No baking, no complex equipment—just a few ingredients, a saucepan, and a bit of patience. The recipe is straightforward enough for beginners yet delivers a professional‑grade dessert.
Uniqueness: The use of freeze‑dried raspberries instead of fresh or frozen berries gives the fudge a unique texture and a long shelf life, setting it apart from traditional fudge recipes.
Crowd Reaction: Guests are instantly captivated by the glossy sheen and the burst of raspberry flavor. It’s a conversation starter that makes your dessert table the highlight of any gathering.
Ingredient Quality: High‑quality white chocolate chips and a premium can of sweetened condensed milk elevate the flavor profile, ensuring a rich, buttery mouthfeel that’s hard to replicate with lower‑grade ingredients.
Cooking Method: The low‑heat melting technique preserves the chocolate’s integrity, preventing it from seizing or separating, which is a common pitfall in many fudge recipes.
Make‑Ahead Potential: This fudge can be prepared days in advance, making it a perfect dessert for parties, holidays, or a quick treat on a busy weekday.
Alright, let’s break down exactly what goes into this masterpiece…
Inside the Ingredient List
The Flavor Base
High-Quality White Chocolate Chips: They form the creamy backbone of the fudge. Opt for a brand with a high cocoa butter content to achieve a glossy sheen and a buttery mouthfeel. Skipping them would turn the fudge into a bland, milk‑based dessert, lacking the luxurious depth that chocolate brings.
Sweetened Condensed Milk: This thick, sweet liquid balances the bitterness of the chocolate and adds a velvety texture. If you’re looking for a dairy‑free version, try a coconut‑milk condensed milk, but be aware the flavor will shift slightly.
The Texture Crew
Unsalted Butter: Butter not only enriches the fudge but also helps stabilize the chocolate as it sets. If you’re avoiding dairy, a neutral oil can be used, though the final texture may be a touch less smooth.
Vanilla Extract: A teaspoon of vanilla adds depth and counterbalances the sweetness. A high‑quality vanilla bean paste can elevate the flavor further, but it’s optional if you’re short on time.
The Unexpected Star
Freeze‑Dried Raspberries: They’re the star of this recipe, providing a tart burst and a satisfying crunch. The freeze‑dried process preserves the berry’s flavor while giving it a light, airy texture that doesn’t dissolve in the chocolate. If you can’t find freeze‑dried raspberries, fresh raspberries can be used, but the texture will be softer.
The Final Flourish
Water: Adding a teaspoon of water may seem counterintuitive, but it actually creates a thin syrup that helps the chocolate set into a firm yet creamy consistency. Without it, the fudge can become too thick and difficult to cut. If you prefer a slightly firmer fudge, reduce the water to half a teaspoon.
Everything's prepped? Good. Let's get into the real action…
The Method — Step by Step
- In a medium saucepan, combine the white chocolate chips and unsalted butter over low heat; stir constantly until the mixture is completely melted and silky, about 5 minutes. The low heat prevents the chocolate from seizing, a common mistake that leads to a gritty texture. Keep an eye on the pan—once the chocolate starts to bubble, reduce the heat further to avoid scorching. This step is critical for achieving that glossy sheen you’ll see in the final fudge. When the chocolate is fully melted, remove the pan from the heat and let it cool slightly. This cooling period allows the butter to integrate smoothly without forming a skin on the surface.
- Pour the sweetened condensed milk into the melted chocolate mixture, whisking until the mixture is smooth and homogeneous. The condensed milk not only sweetens the fudge but also thickens it, creating a luscious, creamy base. Whisking vigorously ensures there are no lumps, which could ruin the texture. As you stir, notice the mixture becoming more opaque—this is a sign that the chocolate and milk are fully incorporated. If the mixture looks too thin, you can return it to low heat for another minute to reduce it slightly. Once the mixture is smooth, set it aside for the next step.
- Add the vanilla extract and teaspoon of water to the mixture, whisking until fully integrated. The vanilla brings depth and a subtle floral note that balances the sweetness. The water creates a thin syrup that helps the fudge set into a firm yet creamy consistency. If you prefer a firmer fudge, reduce the water to half a teaspoon, but be aware it might become a bit harder to cut. Stir until the mixture is uniform, then remove it from heat. The aroma of vanilla and chocolate will fill your kitchen, making the anticipation almost unbearable. Let the mixture cool to room temperature, which should take about 10 minutes; this cooling period is essential for the fudge to set properly.
- Stir in the freeze‑dried raspberries, ensuring they’re evenly distributed throughout the mixture. The raspberries should be visible and not clumped together, which would create uneven flavor pockets. If the mixture looks too thick after adding the berries, you can stir in an extra teaspoon of water to achieve the desired consistency. Let the mixture sit for a minute so the berries can rehydrate slightly, which enhances their flavor. This step is where the fudge gains its signature tartness and bright color. Once the berries are fully incorporated, the mixture is ready to be poured into the pan.
- Line a 9x9‑inch pan with parchment paper, then pour the fudge mixture into the pan. Gently tap the pan on the counter to release any air bubbles that might have formed during pouring. The parchment paper makes removal easy and ensures the fudge stays intact when you cut it. This step also helps the fudge set evenly, giving it a smooth surface. If you’re using a different pan size, adjust the amount of mixture accordingly. Pour slowly to avoid splattering, and make sure the mixture is spread evenly across the pan. This ensures each bite has a consistent texture and flavor.
- Chill the pan in the refrigerator for at least 3 hours, or until the fudge is firm and set. During this time, the chocolate will continue to harden, creating a firm yet creamy interior. If you’re in a hurry, you can place the pan in the freezer for 30 minutes, but be careful not to over‑chill, as the fudge may become too hard. While the fudge chills, you can prepare any additional toppings or decorations you might want. The refrigerator also helps the flavors meld together, giving the fudge a richer taste. Once the fudge is set, it will have a glossy sheen that’s irresistible.
- Once the fudge is fully set, lift it from the pan using the parchment paper and place it on a cutting board. Cut the fudge into squares or bars with a sharp knife, wiping the knife clean between cuts for neat edges. The cut pieces should be uniform to ensure even melting when served. If you prefer a softer texture, let the fudge sit at room temperature for a few minutes before cutting. This step allows the fudge to become slightly easier to slice, reducing the risk of tearing. Store the cut pieces in an airtight container to maintain freshness.
- Store leftovers in an airtight container at room temperature for up to 3 days, or refrigerate for up to 1 week. The fudge will maintain its texture and flavor when stored properly. If you notice the fudge has dried out, you can drizzle a small amount of melted white chocolate over each piece to restore its glossy finish. For longer storage, keep the fudge in the freezer; it will stay good for up to 3 months. When you’re ready to enjoy it again, let it sit at room temperature for 10 minutes to soften slightly. This step brings back the creamy mouthfeel that makes the fudge so irresistible.
- For extra indulgence, drizzle melted white chocolate over each piece before serving. The additional chocolate adds a rich, decadent layer that enhances the overall flavor profile. Melt the chocolate in a double boiler or microwave, stirring every 15 seconds to prevent burning. Pour the melted chocolate in thin ribbons across the top of each square, then let it set for a minute before serving. This finishing touch transforms the fudge from a simple dessert into a luxurious treat. Your guests will be amazed by the glossy finish and the burst of chocolate with each bite.
That’s it — you did it. But hold on, I’ve got a few more tricks that’ll take this to another level. These insider tips are the difference between a good fudge and a legendary one, and I’ve tested each one in my kitchen to ensure they work every time. Stick with me, and you’ll master this recipe like a pro.
Insider Tricks for Flawless Results
The Temperature Rule Nobody Follows
Keep the heat low: Most people start melting chocolate over medium heat, which often leads to scorching. By maintaining a gentle simmer, you preserve the chocolate’s smoothness and prevent a gritty texture. This simple change means the fudge will have a silky mouthfeel that melts in your mouth. If you’re using a double boiler, let the water come to a gentle boil and then reduce to a low simmer. This method gives you precise control over the temperature.
Why Your Nose Knows Best
Smell the mixture: When the chocolate is melted, the aroma should be sweet and slightly nutty. If you notice a bitter or burnt smell, it’s a sign the chocolate has gone bad. Trust your nose to tell you when the mixture is ready to move on to the next step. A fresh, sweet aroma indicates the chocolate is properly melted and the mixture is on track. If the scent is off, consider starting over with fresh ingredients.
The 5‑Minute Rest That Changes Everything
Let the mixture cool: After adding the condensed milk, allow the mixture to sit for about five minutes before whisking it into a smooth base. This brief rest helps the ingredients integrate and reduces the risk of the mixture separating. During this time, you can also check the consistency; it should be thick but pourable. If it’s too thin, give it a few more minutes to thicken. This small pause makes the final fudge silky and cohesive.
Freeze‑Drying Is Key
Use freeze‑dried raspberries: Fresh berries will release moisture and make the fudge soggy. Freeze‑dried raspberries maintain their tartness and crunch, providing a textural contrast that fresh berries can’t match. If you can’t find freeze‑dried raspberries, use dried raspberries, but be aware the texture will be softer. The freeze‑dried berries also keep the fudge shelf‑stable for longer periods. This trick ensures the fudge stays firm and flavorful.
The Final Touch of Water
Add water strategically: Adding a teaspoon of water creates a thin syrup that helps the fudge set into a firm yet creamy consistency. If you’re looking for a firmer fudge, reduce the water to half a teaspoon, but the texture will be a bit harder. If you add too much water, the fudge will be too runny and difficult to cut. This small adjustment can make the difference between a perfect fudge and a disappointment.
The Cutting Technique
Use a hot knife: Warm your knife in hot water and wipe it dry before cutting. This reduces friction and prevents the fudge from tearing. A sharp, hot knife slices cleanly, giving you neat edges and a professional look. If you’re cutting into bars, use a ruler to measure uniform portions. This ensures each piece is the same size and melts evenly.
Creative Twists and Variations
This recipe is a playground. Here are some of my favorite ways to switch things up:
Chocolate‑Berry Explosion
Swap the white chocolate chips for dark chocolate chips and add a handful of fresh blueberries. The deep cocoa notes pair beautifully with the bright blueberries, creating a flavor profile that’s both bold and refreshing. This version is perfect for chocolate lovers who crave a hint of fruit.
Nutty Crunch
Fold in a cup of chopped toasted almonds or pecans before pouring the mixture into the pan. The nuts add a satisfying crunch and a buttery flavor that complements the creamy base. This variation is ideal for those who love a mix of textures in every bite.
Citrus Zest
Add a tablespoon of lemon zest to the mixture before adding the freeze‑dried raspberries. The citrus brightens the fudge and adds a subtle zing that cuts through the sweetness. This twist is great for summer gatherings or when you want a dessert with a little extra lift.
Salted Caramel Swirl
Drizzle a layer of salted caramel sauce over the set fudge before cutting it into squares. The caramel adds a rich, buttery sweetness and a touch of sea salt that elevates the overall flavor. This indulgent variation is perfect for special occasions or when you want to impress guests.
Vegan Version
Replace the sweetened condensed milk with a plant‑based version made from coconut milk and maple syrup. Use dairy‑free white chocolate chips and a vegan butter substitute. The result is a creamy, dairy‑free fudge that still delivers the same mouth‑watering experience. This version is great for those with dietary restrictions.
Mini Fudge Bites
Pour the mixture into a silicone muffin tin and chill for 2 hours. Once set, pop out the mini fudge bites and store them in a small container. These bite‑sized treats are perfect for parties, gift boxes, or a quick sweet snack. The mini size allows you to enjoy the fudge in smaller, more manageable portions.
Storing and Bringing It Back to Life
Fridge Storage
Store the fudge in an airtight container at room temperature for up to 3 days. The airtight seal prevents moisture from seeping in and keeps the fudge firm. If you notice the fudge has become a bit dry, drizzle a small amount of melted white chocolate over it to restore its glossy finish. This method ensures the fudge stays fresh and flavorful.
Freezer Friendly
For longer storage, place the fudge in a freezer‑safe container or zip‑lock bag. It will stay good for up to 3 months when frozen. When you’re ready to enjoy it, let the fudge thaw at room temperature for 30 minutes before cutting. This thawing period restores the fudge’s creamy texture, making it feel like brand‑new.
Best Reheating Method
If the fudge has hardened, warm it gently in a microwave at 20‑second intervals, stirring between bursts. Add a tiny splash of water before reheating; it steams the fudge back to a silky, melt‑in‑your‑mouth consistency. Avoid overheating, as this can cause the chocolate to separate and become grainy. Once warmed, let it sit for a minute before serving to allow the flavors to meld.