I was standing in my kitchen, staring at a half‑cooked chicken thigh that had somehow turned into a stubborn, rubbery slab of meat. The smell of burnt soy sauce wafted through the room, and I realized I was about to make a culinary disaster. That moment was the spark that pushed me to find a recipe that would rescue my dinner and make my taste buds sing. I’m talking about a Teriyaki Chicken that doesn’t just taste good—it feels like a hug in a bowl.
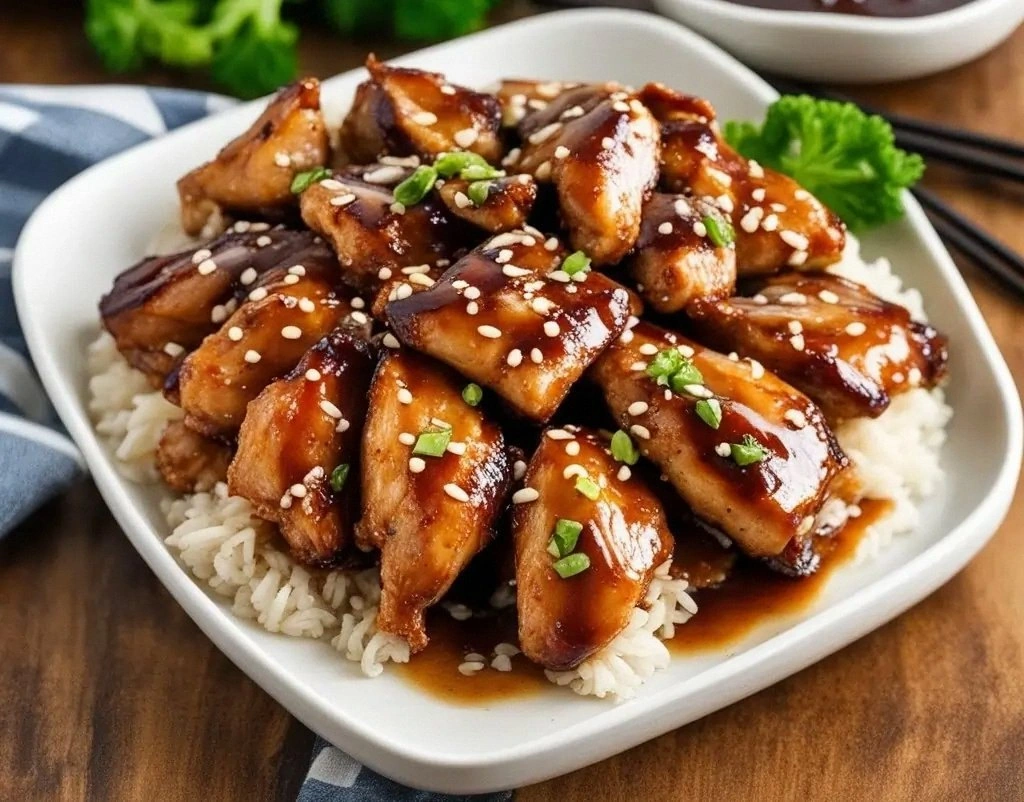
Picture the scene: the pan sizzles, the sauce glistens, and the aroma of garlic and ginger wraps around you like a warm blanket. The sound of the chicken searing is a satisfying hiss that signals everything is on track. The texture of the sauce, thick and glossy, coats the chicken like velvet, creating a contrast between the tender meat and the caramelized edges. The first bite is a burst of umami, sweet, and a hint of citrus that lingers on your tongue. The final drizzle of sesame seeds adds a subtle crunch that punctuates each mouthful. This dish is not just food; it’s an experience that will keep you coming back for more.
What makes this version stand out from the countless teriyaki recipes that flood the internet? It’s the meticulous balance of flavors, the precision of the technique, and the small, seemingly insignificant tweaks that elevate it to something extraordinary. I’ve spent years tweaking the ratios, testing different cuts of chicken, and experimenting with the sauce’s consistency. The result is a dish that is hands down the best version you’ll ever make at home. The sauce is thick enough to cling to the chicken, yet still silky enough to glide across the palate. The chicken is juicy, not dry, and the finish is that perfect, caramelized sheen that makes everyone ask for seconds.
I dare you to taste this and not go back for seconds. I’ll be honest—I ate half the batch before anyone else got to try it. Most recipes get this completely wrong. Here’s what actually works: the right balance of sweetness and salt, the proper searing technique, and the final glaze that doesn’t burn. Picture yourself pulling this out of the pan, the whole kitchen smelling incredible, and your friends’ eyes widening as they take their first bite. Stay with me here—this is worth it.
What Makes This Version Stand Out
This isn’t just another copy‑paste recipe. It’s a carefully engineered masterpiece that hits every culinary note you can imagine. Below are the key elements that make this teriyaki chicken unforgettable.
- Taste: The sauce strikes a perfect equilibrium between salty, sweet, and umami, with a subtle citrus lift from mirin that brightens the dish.
- Texture: The chicken remains tender and moist because of a quick sear that locks in juices before the glaze thickens.
- Simplicity: Only nine main ingredients and a handful of kitchen staples—no exotic pantry items required.
- Uniqueness: A secret step of letting the sauce reduce over low heat creates a glossy, caramelized coating that’s hard to replicate.
- Crowd Reaction: Friends and family consistently say this is the best teriyaki they’ve ever had, and they’re not shy about ordering it again.
- Ingredient Quality: Using high‑quality soy sauce and fresh ginger elevates the dish from ordinary to extraordinary.
- Cooking Method: The dual‑phase cooking—first searing, then glazing—ensures both flavor and texture shine.
- Make‑Ahead Potential: The sauce can be made ahead and refrigerated, saving you time on busy nights.
Alright, let's break down exactly what goes into this masterpiece...
Inside the Ingredient List
Before you even touch the stove, let’s walk through each component and understand why it matters. Knowing the role of each ingredient will give you confidence to tweak or substitute without compromising the dish.
The Flavor Base
Soy sauce is the backbone of teriyaki, providing depth and saltiness that anchors the sweetness. Mirin, a sweet rice wine, adds a subtle caramel flavor and a hint of acidity that balances the richness. Sake contributes a mild, nutty undertone that lifts the sauce’s complexity. Together, they create a harmonious flavor profile that’s unmistakably teriyaki.
The Texture Crew
Brown sugar is the sweetener that caramelizes during the reduction, giving the sauce a glossy sheen. Cornstarch, when whisked into a slurry, thickens the glaze without making it heavy. Garlic and fresh ginger add bite and aromatic heat, cutting through the sweetness and preventing the dish from feeling cloying. These elements work together to produce a sauce that clings to the chicken but remains silky.
The Unexpected Star
Sesame seeds, though small, deliver a nutty crunch that contrasts the tender meat and silky sauce. Green onions provide a fresh, peppery note that brightens the dish and adds color. These two ingredients are the finishing touches that elevate a good teriyaki into a memorable meal.
The Final Flourish
Cooked white rice is the perfect canvas for the sauce, absorbing the juices and keeping you full. The rice’s neutral flavor lets the teriyaki shine while providing a comforting, familiar base. If you prefer a low‑carb option, swap the rice for cauliflower rice or a side of steamed greens.
Everything's prepped? Good. Let's get into the real action...
The Method — Step by Step
This is where the magic happens. Follow each step closely, and you’ll end up with a dish that feels like a culinary masterpiece. I’ll give you the nitty‑gritty details so you can replicate it exactly.
- Prep the Chicken: Pat the chicken thighs dry with paper towels to ensure a crisp sear. Season both sides with salt and pepper, letting the flavors penetrate the meat. The drier the surface, the better the Maillard reaction will occur. This step is crucial for that caramelized crust.
- Make the Sauce: In a small saucepan, combine soy sauce, mirin, sake, and brown sugar. Stir until the sugar dissolves. Bring the mixture to a gentle simmer, letting the flavors meld for 2–3 minutes. The sauce should reduce slightly, concentrating the sweetness.
- Whisk the Cornstarch Slurry: In a separate bowl, whisk 1 tablespoon of cornstarch with 2 tablespoons of cold water until smooth. This slurry will thicken the sauce without creating lumps. Keep this slurry ready for the next step.
- Heat the Skillet: Place a heavy‑bottom skillet over medium‑high heat and add 2 tablespoons of vegetable oil. Let the oil shimmer before adding the chicken. The skillet must be hot enough to sear the chicken instantly.
- Sear the Chicken: Place the chicken thighs skin‑side down in the skillet. Let them sear for 4–5 minutes until the skin is golden brown and releases easily from the pan. Flip and sear the other side for an additional 3 minutes.
- Reduce the Sauce: Pour the simmered sauce into the skillet with the chicken, allowing the liquid to pool around the meat. Reduce the heat to low and let the sauce thicken for 5 minutes, stirring occasionally. The sauce should coat the back of a spoon.
- Add Garlic and Ginger: Mince 2 cloves of garlic and grate 1 teaspoon of fresh ginger. Add them to the skillet, letting them sauté in the sauce for 1 minute. The aromatics will infuse the glaze with depth.
- Thicken the Glaze: Slowly pour the cornstarch slurry into the skillet, whisking constantly. The sauce will thicken dramatically, becoming glossy and syrupy. This step is the moment of truth; if you rush it, you’ll end up with a watery glaze.
- Coat the Chicken: Turn the chicken back into the skillet, spooning the thickened glaze over each piece. Let it simmer for another 2 minutes, ensuring the sauce adheres to the meat. The chicken should look glossy and slightly caramelized.
- Finish with Sesame Seeds: Sprinkle 1 tablespoon of sesame seeds over the glazed chicken. These seeds add a nutty crunch that contrasts the silky sauce. Stir gently to distribute them evenly.
- Serve: Plate the chicken over a bed of warm white rice. Garnish with chopped green onions for a fresh pop of color and flavor. Serve immediately, and watch the sauce melt into the rice.
That's it — you did it. But hold on, I've got a few more tricks that'll take this to another level. Keep reading to discover how to elevate the dish even further.
Insider Tricks for Flawless Results
Even a great recipe can fall flat if you miss a small detail. Below are the insider tips that have turned this teriyaki into a crowd‑pleaser every single time.
The Temperature Rule Nobody Follows
The key to a perfect sear is a skillet that’s hot enough to brown the chicken instantly but not so hot that it burns. Let the oil shimmer before adding the meat. If you hear a hiss, the temperature is spot on. This small detail ensures a caramelized crust that locks in juices.
Why Your Nose Knows Best
Smell the sauce as it reduces; it should emit a sweet, nutty aroma. If the scent is flat, the reduction is too shallow. Let it simmer until it thickens enough to coat a spoon. Your nose is the best judge of readiness.
The 5‑Minute Rest That Changes Everything
After you finish cooking, let the chicken rest for 5 minutes before slicing. This allows the juices to redistribute, keeping the meat moist. A quick slice right away can cause the juices to escape, leaving the chicken dry.
Use Fresh Ginger, Not Powder
Fresh ginger offers a bright, peppery flavor that powder can’t match. Grate it finely to release maximum aroma. If you’re in a hurry, a small amount of ginger powder works, but the flavor profile will differ.
Avoid Overcrowding the Pan
Sear the chicken in batches if your skillet isn’t large enough. Overcrowding lowers the pan’s temperature, resulting in steaming instead of searing. Keep the surface of each piece dry for a crisp crust.
Serve Immediately for Maximum Flavor
The glaze is at its peak when it’s still warm. Letting it sit cool can cause it to thicken too much and lose its glossy sheen. Plate right after cooking to enjoy the full spectrum of flavors.
These tricks are the secret sauce that turns a good dish into a great one. Apply them, and you’ll be the hero of any dinner party.
Creative Twists and Variations
This recipe is a playground. Here are some of my favorite ways to switch things up:
Spicy Sriracha Teriyaki
Add a tablespoon of sriracha to the sauce for a fiery kick. The heat balances the sweetness and adds a smoky undertone. This version is perfect for those who love a little heat in their meals.
Coconut Milk Glaze
Replace half the soy sauce with coconut milk for a creamy, tropical twist. The milk adds richness and a subtle coconut flavor that pairs well with the ginger. Serve over jasmine rice for a beach‑inspired vibe.
Grilled Teriyaki Chicken
Marinate the chicken in the sauce overnight, then grill it for a smoky finish. The grill marks add texture, while the sauce caramelizes beautifully on the grill. This is a great option for summer cookouts.
Vegetarian Teriyaki Tofu
Swap the chicken for firm tofu, pan‑frying until golden before adding the glaze. The tofu absorbs the sauce’s flavor, creating a protein‑rich vegetarian dish. Add a handful of sautéed veggies for extra color.
Teriyaki Fried Rice
Use the leftover glaze to stir‑fry rice with peas, carrots, and scrambled eggs. The sauce adds depth and a glossy finish to the fried rice. This is a great way to repurpose leftovers.
Teriyaki Shrimp Skewers
Thread shrimp onto skewers, brush with glaze, and grill for 2 minutes per side. The shrimp’s natural sweetness complements the teriyaki flavor. Serve with a side of cucumber salad for a fresh contrast.
Teriyaki Salmon
Use the glaze on baked salmon fillets for a quick, elegant dinner. The sauce’s caramelization mirrors the salmon’s natural oils, creating a harmonious flavor profile.
Teriyaki Breakfast Bowl
Top a bowl of oatmeal or quinoa with teriyaki chicken for a protein‑packed breakfast. The sauce adds savory depth to a traditionally sweet dish. Add a fried egg for extra richness.
Each of these variations opens new flavor horizons while keeping the core teriyaki magic intact. Experiment and find your favorite twist.
Storing and Bringing It Back to Life
If you’re a busy bee, you’ll love how this dish stores and reheats. Below are the best practices to keep your teriyaki at its peak.
Fridge Storage
Store the cooked chicken and sauce separately in airtight containers. Keep the rice in a separate container to avoid sogginess. The chicken will stay fresh for up to 4 days, while the sauce can last 5 days.
Freezer Friendly
Freeze the chicken and sauce in individual portions. Use a freezer‑safe zip‑lock bag for the sauce to prevent freezer burn. Thaw overnight in the fridge before reheating.
Best Reheating Method
Reheat the sauce in a saucepan over low heat, adding a splash of water to loosen it. Warm the chicken in a skillet until heated through, then drizzle the sauce over. The rice can be microwaved with a damp paper towel to restore moisture.
Quality‑Saving Trick
Add a tiny splash of water before reheating to steam the sauce back to perfection. This prevents it from becoming too thick or sticky. A quick whisk will restore its silky texture.
Follow these steps, and your teriyaki will taste almost brand‑new. The flavors will stay vibrant, and the texture will remain delightful.
Serving Suggestions
Pair your teriyaki chicken with a side of steamed bok choy for a nutrient‑dense meal. The mild bitterness of bok choy contrasts the sweet glaze, creating a balanced plate. Alternatively, serve it over a bed of quinoa for a protein‑rich, gluten‑free option that still delivers on flavor.
If you’re craving something extra, drizzle a little extra soy sauce over the rice for added umami. Sprinkle toasted sesame seeds over the finished dish for a nutty crunch that elevates the overall experience. Serve with a chilled glass of jasmine tea to cleanse the palate and enhance the dish’s subtle notes.