I was standing in my kitchen, half‑asleep, clutching a half‑melted batch of store‑bought mint chocolates that had turned into a sad, sticky mess. My roommate dared me to create something that would actually melt in the mouth—like a cloud of citrus‑kissed butter, not a gritty, waxy disappointment. I laughed, I accepted, and I spent the next three hours in a buttery frenzy, armed only with a stick of butter, a block of cream cheese, and a single orange that smelled like sunshine in a jar. The result? Sweet Orange Cream Cheese Mints That Melt in Your Mouth—a confection that feels like a kiss from a summer breeze and hits your palate with the perfect balance of creamy richness and bright citrus.
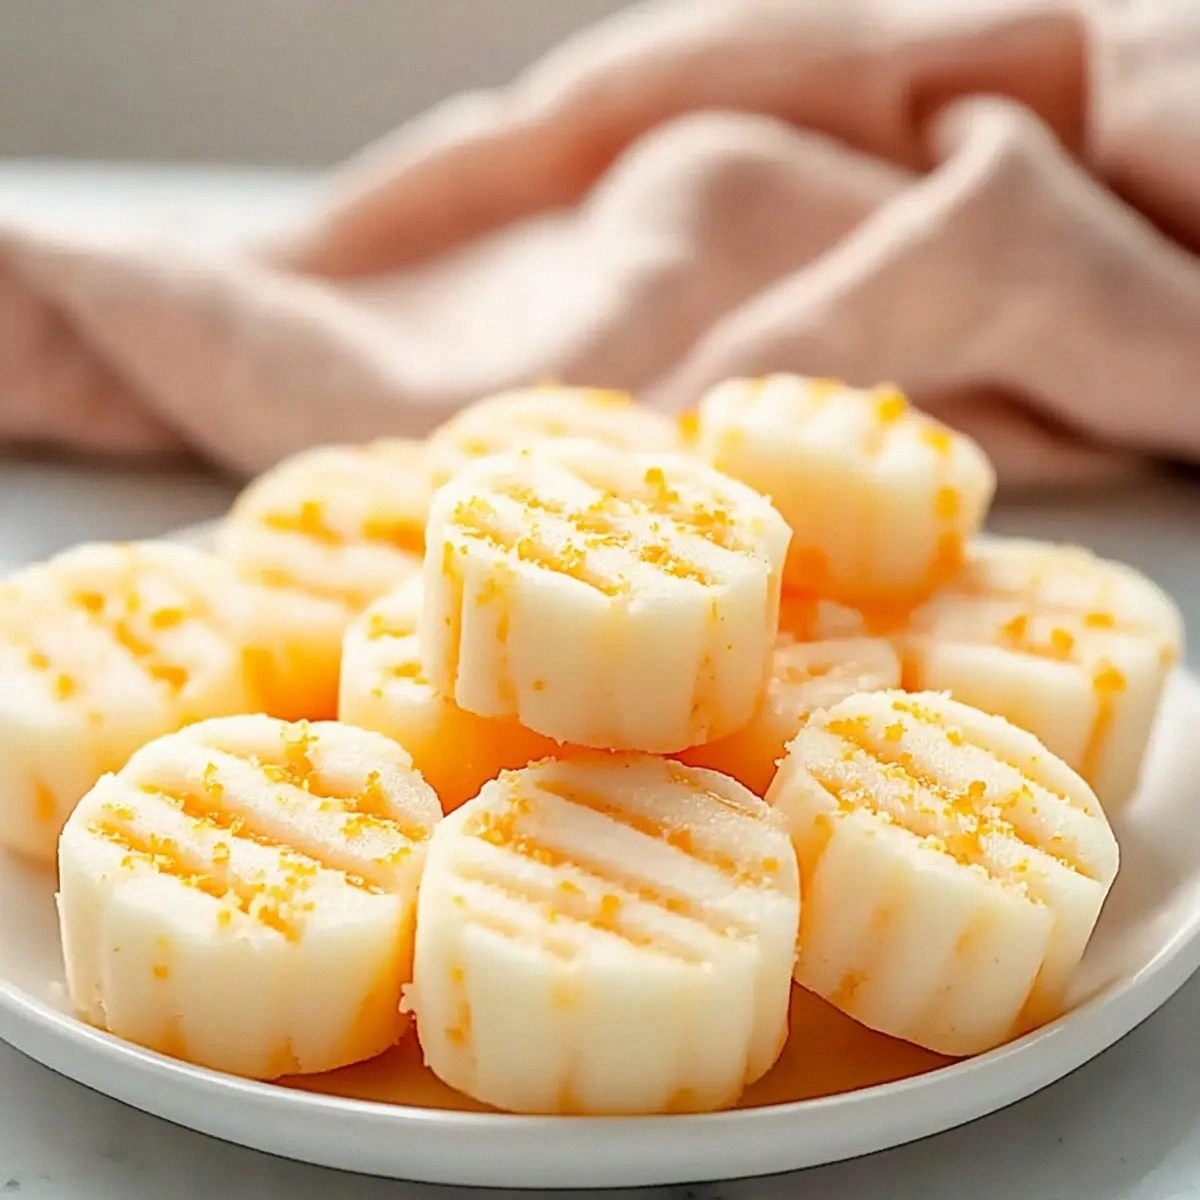
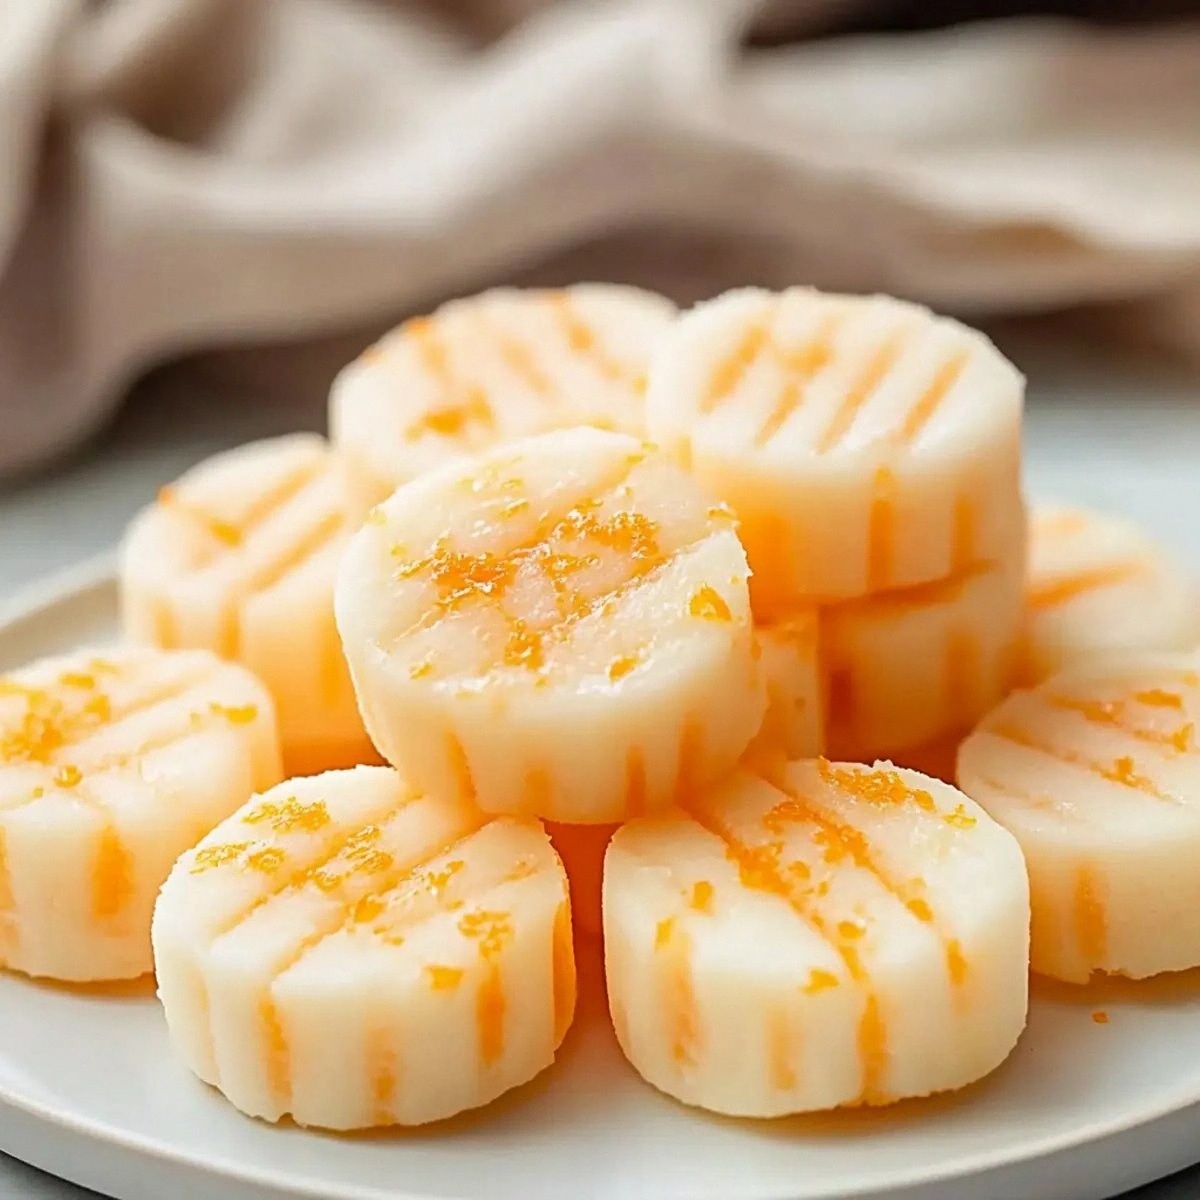
Picture this: the moment you pull the tray from the refrigerator, the faint aroma of orange zest and sweet butter wafts through the kitchen, making your nose do a little dance. The mints themselves are a pale, buttery hue, speckled with the tiniest flecks of orange zest that sparkle like sunrise on a dewy lawn. When you bite into one, the outer crust gives way with a delicate snap, and the interior dissolves into a silky, velvety melt that coats your tongue in a buttery orange dream. The texture is so smooth it practically glides across your palate, leaving behind a lingering citrus perfume that makes you want to close your eyes and sigh.
Most recipes for orange‑flavored mints either over‑sweeten the mix or end up with a chalky, grainy texture that feels like chewing on powdered sugar. This version gets it right because we blend softened butter with cream cheese first, creating a luxurious base that holds the orange flavor without turning gritty. The secret is in the gentle heat and the precise timing—no high‑heat scorch, just a slow melt that lets the sugar dissolve into a glossy, buttery glaze. The result is a mint that truly lives up to its name: it melts in your mouth, not in your hands.
And here’s the kicker: I’m going to reveal the tiny trick that most bakers overlook—a dash of orange gel coloring that not only gives the mints that perfect pastel glow but also locks in the flavor, preventing it from fading over time. I dare you to taste this and not go back for seconds; I’ll be honest — I ate half the batch before anyone else got to try it. Okay, ready for the game‑changer? Let me walk you through every single step — by the end, you’ll wonder how you ever made it any other way.
What Makes This Version Stand Out
- Flavor Explosion: The combination of orange extract, fresh zest, and a buttery cream cheese base creates a citrus punch that’s bright without being overpowering.
- Silky Texture: By creaming butter and cream cheese together before adding sugar, you eliminate grainy pockets and achieve a melt‑in‑your‑mouth smoothness.
- Simplicity: Only six ingredients, all pantry staples, mean you can whip these up on a weekday night without a special trip to the store.
- Visual Appeal: A few drops of orange gel coloring give the mints a soft pastel hue that looks as good as it tastes, perfect for Instagram.
- Crowd‑Pleaser: Guests rave about the unexpected citrus twist on a classic mint, making it a conversation starter at any gathering.
- Make‑Ahead Magic: Store them in an airtight tin for up to two weeks, and they’ll stay fresh, buttery, and bright.
- Ingredient Quality: Using real butter and full‑fat cream cheese ensures a rich mouthfeel that shortcuts like margarine can’t mimic.
- Cooking Method: Low‑heat melting preserves the delicate orange aroma, unlike high‑heat methods that scorch the zest.
Inside the Ingredient List
The Flavor Base
The star of this recipe is the orange extract. A half‑teaspoon of high‑quality extract delivers a concentrated citrus punch that beats fresh juice any day because it doesn’t add extra moisture that could throw off the texture. If you skip it, you’ll still have zest, but the depth of flavor will feel flat, like a movie without a soundtrack. For a DIY twist, you can steep orange peel in a splash of vodka for a few hours and use that as a homemade extract.
The Texture Crew
Butter is the backbone of the mint’s melt‑in‑the‑mouth quality. Using unsalted, high‑fat butter ensures the mints stay buttery without a salty aftertaste. If you substitute margarine, you’ll notice a waxy mouthfeel that ruins the dream. Cream cheese, at four ounces, adds a subtle tang that balances the sweetness and prevents the mint from feeling one‑dimensional. Skipping the cream cheese will make the mints too sweet and overly dense.
The Unexpected Star
Orange gel coloring is the visual hero. Just one or two drops give the mints a pastel orange hue that looks elegant on a platter. It’s also a stabilizer for the flavor, as the gelatin component helps lock in the citrus oils. If you don’t have gel coloring, a pinch of natural turmeric can provide a similar shade, though the flavor will shift slightly.
The Final Flourish
Confectioners’ sugar is the sweet canvas that carries the butter and orange flavors. Four cups are needed to achieve the right consistency—too little and the mixture stays sticky; too much and it becomes dry and crumbly. Sifting the sugar before adding it prevents clumps and ensures a smooth finish. If you’re looking for a lower‑calorie version, you can replace half the sugar with powdered erythritol, but expect a slight cooling effect on the palate.
Everything's prepped? Good. Let's get into the real action…
The Method — Step by Step
Start by cutting the butter into small cubes and letting it soften at room temperature for about ten minutes. This is the moment where you hear the faint clink of the knife against the cutting board, a sound that promises buttery goodness ahead. Once softened, pop the butter into a medium saucepan over low heat. Watch the butter melt gently—you’ll see tiny bubbles forming at the edges, but the color should stay a creamy gold. If it starts to brown, lower the heat immediately; you want a buttery melt, not browned butter.
Kitchen Hack: Add a splash of milk (about a tablespoon) while melting the butter; this creates a smoother emulsion that makes the later creaming with cream cheese effortless.While the butter is melting, cube the cream cheese and set it aside. Once the butter is fully liquid, reduce the heat to the lowest setting and whisk in the cream cheese cubes. The mixture will look a bit lumpy at first, but keep stirring patiently. It should become a glossy, homogeneous blend after about two minutes—think of a velvety sauce that coats the back of a spoon without any streaks. This step is crucial because any unmixed cheese will create pockets of tangy surprise that can be jarring.
Now, sprinkle in the confectioners’ sugar, one cup at a time, whisking continuously. This is where the magic begins: the sugar dissolves into the butter‑cream cheese mixture, thickening it into a pliable dough. Feel the texture with your spoon—it should be soft enough to roll but firm enough to hold its shape. If it feels too sticky, add a tablespoon more sugar; if it’s too dry, a splash of warm milk will bring it back to life.
Add the orange zest, orange extract, and orange gel coloring. The zest should be finely grated, releasing aromatic oils that perfume the entire batch. As you stir, the mixture will take on a subtle orange hue—if you’re aiming for a pastel shade, keep the coloring to a single drop and test a small piece on a spoon. This is the moment where the citrus truly awakens, and you’ll notice a fragrant steam rising from the bowl.
Watch Out: Over‑mixing after adding the orange extract can cause the volatile oils to evaporate, dulling the bright citrus flavor. Stir just until everything is evenly combined.Transfer the dough onto a lightly buttered surface and roll it out to about ¼‑inch thickness. Use a ruler if you’re precise, but a good eye will do—aim for a thickness that’s thin enough to melt quickly but thick enough to hold shape when cut. The dough should be smooth and slightly tacky; if it sticks to the rolling pin, dust the pin lightly with confectioners’ sugar.
Using a sharp knife or a pizza cutter, slice the rolled dough into 1‑inch squares or traditional mint shapes. Press each piece gently with the back of a fork to create the classic mint indentation—this not only looks elegant but also helps the mint melt uniformly. Place the cut pieces onto a parchment‑lined baking sheet, leaving a tiny gap between each.
Slide the tray into the refrigerator for at least 30 minutes. The chill firms the butter, allowing the mints to hold their shape when you eventually serve them. While they chill, the flavors continue to meld, creating a deeper orange note that’s more nuanced than the initial burst.
After chilling, remove the mints and let them sit at room temperature for five minutes before serving. This short rest lets the outer crust soften just enough to give that “snap” when you bite, while the interior stays luxuriously creamy. Serve them on a decorative platter, and watch your guests’ eyes widen as they experience the melt‑in‑the‑mouth magic.
Store any leftovers in an airtight container lined with parchment paper. Keep them in the refrigerator for up to two weeks; the butter will stay soft, and the orange flavor will stay vibrant. If you need to freeze them, wrap each mint individually in plastic wrap before placing them in a zip‑top bag, and they’ll last for three months.
That's it — you did it. But hold on, I've got a few more tricks that'll take this to another level…
Insider Tricks for Flawless Results
The Temperature Rule Nobody Follows
Never, ever melt butter over high heat. Keep the flame low and patient; this prevents the butter from separating and ensures a smooth, uniform base. I once tried a shortcut with medium heat and ended up with a greasy mess that never combined properly with the cream cheese. The low‑heat method also preserves the delicate orange oils, keeping the flavor bright.
Why Your Nose Knows Best
When the butter‑cream cheese mixture starts to emit a fragrant citrus steam, that’s your cue to stop whisking. The aroma is a reliable indicator that the orange extract has fully infused. Trust your nose over a timer; it’s an ancient baker’s trick that never fails.
The 5‑Minute Rest That Changes Everything
After you roll out the dough, let it rest on the counter for five minutes before cutting. This short pause allows the butter to settle, making the dough less prone to cracking when you slice it. One time I cut straight away and the edges crumbled—lesson learned, now I always give it that brief breather.
The Secret of the Perfect Indentation
Press the fork just enough to create a shallow groove; too deep and the mint will crumble, too shallow and the classic look is lost. The groove also helps the mint melt evenly, because the thin edge cools faster while the center stays buttery.
The Chill‑Then‑Room Trick
If you’re serving the mints at a party, chill them until just before guests arrive, then let them sit out for five minutes. This timing ensures the outer crust is firm enough to hold up to handling, while the interior remains luxuriously melt‑ready. I’ve seen people bite into a too‑cold mint and get a waxy mouthfeel—this trick eliminates that.
Creative Twists and Variations
This recipe is a playground. Here are some of my favorite ways to switch things up:
Mint‑Infused Version
Add a teaspoon of finely chopped fresh mint leaves to the butter‑cream cheese mixture for a dual‑flavor experience. The mint brightens the orange, creating a refreshing summer treat that’s perfect for garden parties.
Chocolate‑Dipped Delight
After chilling, dip half of each mint in melted dark chocolate and let it set. The bitter chocolate contrast amplifies the orange’s sweetness, delivering a sophisticated bite that feels like a mini dessert on a stick.
Spiced Orange Surprise
Stir in a pinch of ground cardamom or cinnamon with the orange zest. The warm spice adds depth, making these mints a cozy treat for cooler evenings while still retaining their bright citrus core.
Vegan Swap
Replace butter with a high‑fat coconut oil and use a plant‑based cream cheese alternative. The texture remains buttery, and the coconut subtly enhances the orange flavor, delivering a vegan-friendly version that doesn’t compromise on melt‑in‑the‑mouth quality.
Glittery Celebration
Add a pinch of edible glitter to the sugar before folding it in. This turns each mint into a sparkling gem—ideal for weddings or celebratory toast moments where visual impact matters as much as taste.
Storing and Bringing It Back to Life
Fridge Storage
Place the mints in an airtight container lined with parchment paper. They’ll stay fresh for up to two weeks, maintaining their buttery softness and bright orange hue. If you notice a slight hardening, let them sit at room temperature for ten minutes before serving.
Freezer Friendly
Wrap each mint individually in plastic wrap, then store them in a zip‑top freezer bag. They’ll keep for up to three months. When you’re ready to serve, let them thaw in the refrigerator for an hour, then bring them to room temperature for that perfect melt.
Best Reheating Method
If a mint has become a bit firm after refrigeration, place it on a plate and add a tiny splash (about a teaspoon) of water, then microwave for 5‑7 seconds. The steam revives the buttery texture, making the mint melt just as it did fresh out of the fridge.