I was in the middle of a marathon Zoom call when my stomach started growling like a freight train on a Sunday morning. I tried to ignore it, but the craving was a stubborn, salty whisper that kept getting louder. Then my roommate dared me to create a snack that would make us both forget about the endless bag of chips we always reach for. I accepted the challenge, rummaged through the pantry, and discovered a dusty bag of gluten‑free flour, a tub of Greek yogurt, and a lone scoop of vanilla whey protein that had been hiding behind the cereal boxes. The result? A bite‑sized revelation that turned my kitchen into a mini‑bakery and my taste buds into a cheering crowd.
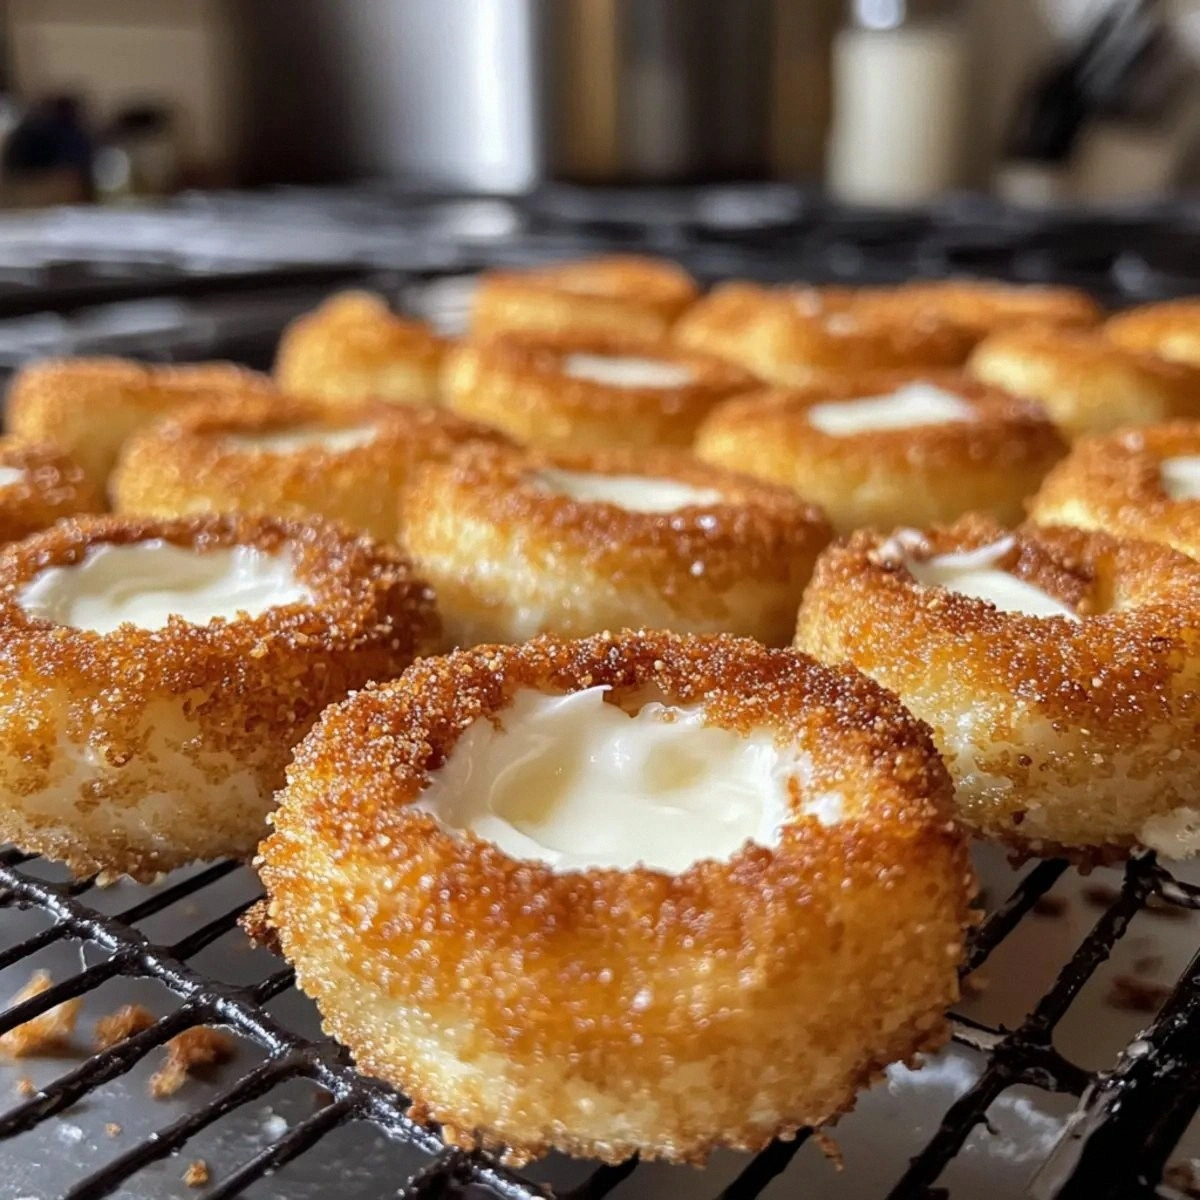
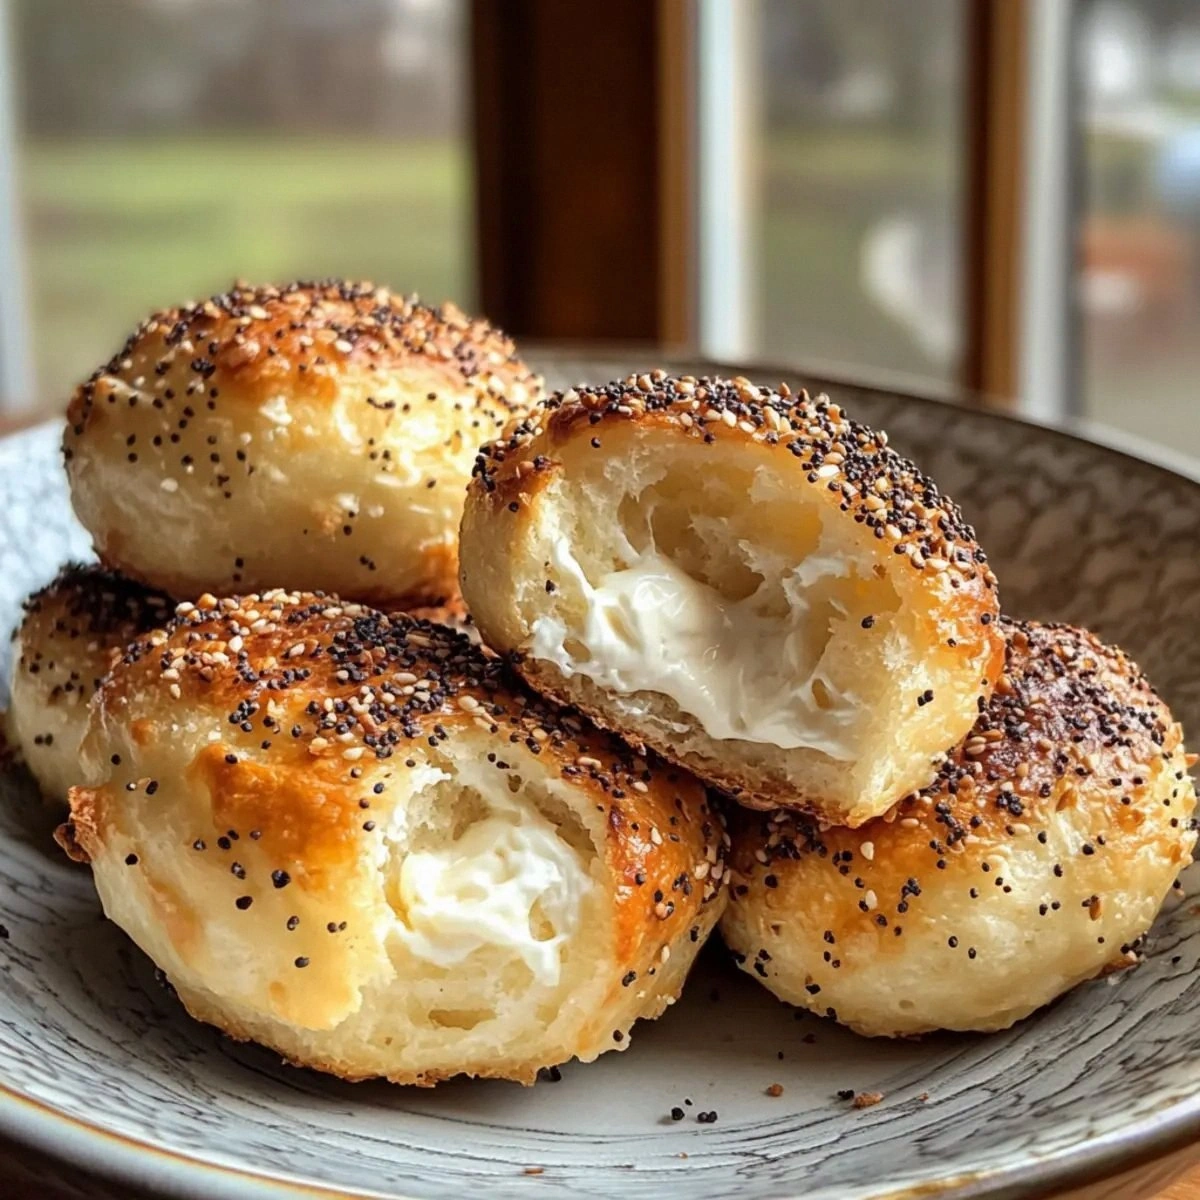
Picture this: the oven door swings open, releasing a warm, yeasty aroma that instantly makes you feel like you’ve just walked into a New York deli at 2 a.m. The bagel bites sit on a parchment sheet, their tops dusted with Everything But The Bagel seasoning, shimmering like tiny edible confetti. When you bite into one, the crust gives way with a satisfying snap, while the interior stays soft, creamy, and surprisingly protein‑packed. You’ll hear that faint “pop” as the edges pull away from the pan, a sound that says, “Yes, you’ve nailed it.” The flavor? A perfect balance of savory, tangy, and just‑the‑right‑cheese‑kick that makes you want to shout, “I dare you to taste this and not go back for seconds.”
Most bagel bite recipes out there either drown you in carbs or skimp on the protein, leaving you with a snack that feels more like a guilt trip than a treat. This version flips the script by using a blend of gluten‑free flour and a scoop of protein powder, giving you a sturdy bite that still feels light enough to eat straight from the pan. The Greek yogurt and cream cheese create a moist, tender crumb that stays fluffy even after cooling, while the Everything But The Bagel seasoning adds that iconic, nostalgic flavor without any extra sodium overload. And the best part? You can whip up a batch in under an hour, making it the ultimate quick, guilt‑free snack for busy mornings or late‑night study sessions.
Now, I’m about to reveal a secret technique that most recipes completely miss: a quick “steam‑finish” in the oven that locks in moisture and gives the bites a pillow‑soft interior without sacrificing that coveted crunch on top. Trust me, this is the game‑changer you’ve been waiting for. Let me walk you through every single step — by the end, you’ll wonder how you ever made it any other way.
What Makes This Version Stand Out
- Protein‑Power: Each bite packs a solid hit of protein thanks to the whey scoop and Greek yogurt, turning a typical snack into a post‑workout refuel that still feels indulgent.
- Gluten‑Free Glory: Using a high‑quality gluten‑free flour blend means you get the same chewy texture as traditional bagels without the wheat, making it safe for sensitive stomachs.
- Flavor Explosion: Everything But The Bagel seasoning delivers that classic sesame‑seed, poppy‑seed, and garlic medley, ensuring every bite is a nostalgic trip to a bustling bagel shop.
- Moisture Magic: The duo of Greek yogurt and cream cheese creates a batter that stays moist, so the bites never dry out, even after reheating.
- Quick & Simple: With just eight ingredients and a 45‑minute total time, this recipe fits into the busiest schedules without sacrificing flavor.
- Make‑Ahead Friendly: Freeze them in a single layer, and you have a ready‑to‑bake snack for any moment you need a protein boost.
- Customizable Canvas: Swap the protein powder flavor, add herbs, or toss in shredded cheese for endless variations that keep the core recipe fresh.
Inside the Ingredient List
The Flavor Base
Greek yogurt is the unsung hero here, providing tangy brightness and a tender crumb. Its acidity reacts with the baking powder, giving the bites a subtle lift without the need for yeast. If you swap it for regular yogurt, expect a thinner batter and a less pronounced rise. For the best texture, choose a full‑fat Greek yogurt; the fat content helps lock in moisture. Pro tip: let the yogurt sit at room temperature for 10 minutes before mixing to avoid a lumpy batter.
The Texture Crew
Gluten‑free flour is the backbone of the structure, but not all blends are created equal. Look for a mix that contains a blend of rice flour, tapioca starch, and xanthan gum for elasticity. Skipping the xanthan gum can lead to crumbly bites that fall apart. If you’re allergic to xanthan, substitute with a teaspoon of psyllium husk powder for similar binding power. The baking powder adds a quick rise, ensuring a light, airy interior that contrasts beautifully with the crisp crust.
The Unexpected Star
Everything But The Bagel seasoning is more than just a garnish; it’s a flavor bomb that carries the essence of a classic bagel shop. The blend typically includes sesame seeds, poppy seeds, dried onion, dried garlic, and a pinch of salt. If you’re feeling adventurous, toast the seasoning lightly in a dry pan for 30 seconds to amplify its nutty notes. For a low‑sodium version, reduce the added salt and rely on the seasoning’s inherent saltiness.
The Final Flourish
Cream cheese adds richness and a slight tang that balances the yogurt’s brightness, while the optional egg acts as an additional binder, making the bites a tad more custardy. If you’re vegan or allergic to eggs, a tablespoon of flaxseed meal mixed with three tablespoons of water works as a solid substitute. The protein powder, whether vanilla or unflavored, boosts the macro profile without altering the savory character—just be mindful of any added sweeteners that could clash with the seasoning.
Everything's prepped? Good. Let's get into the real action…
The Method — Step by Step
Preheat your oven to 375°F (190°C) and line a large baking sheet with parchment paper. While the oven warms, whisk together the gluten‑free flour, baking powder, protein powder, and salt in a large bowl. This dry mix ensures even distribution of leavening and flavor. I like to sift the flour and powder together; it prevents any gritty pockets and gives the batter a silkier texture.
In a separate bowl, combine the Greek yogurt, cream cheese, and the optional egg. Use a hand mixer on low speed until the mixture is smooth and homogenous—no lumps. The moment the cream cheese fully incorporates, you’ll notice a glossy sheen that signals the batter is ready to bind.
Kitchen Hack: Warm the cream cheese slightly (microwave for 10 seconds) before mixing; it blends more easily and prevents a grainy texture.Create a well in the center of the dry ingredients and pour the wet mixture in. Using a spatula, fold the two together until just combined; over‑mixing will develop the starches in the flour and make the bites tough. You’ll see the batter come together in soft, slightly sticky clumps—this is exactly what we want.
Fold in the Everything But The Bagel seasoning, spreading it evenly throughout the batter. The specks of sesame and poppy seeds should be visible, creating a visual cue that each bite will be packed with flavor. If you prefer a milder taste, reserve half of the seasoning for sprinkling on top just before baking.
Spoon the batter onto the prepared baking sheet, using a tablespoon or small ice‑cream scoop to form uniform rounds about 1‑inch in diameter. Leave a tiny gap between each bite; they’ll spread slightly as they bake. This is the moment of truth—watch the batter hold its shape, indicating the right balance of moisture.
Watch Out: If the batter looks too runny, add an extra tablespoon of flour; too thick and the bites will be dense.Slide the sheet into the oven and bake for 12‑15 minutes, or until the tops turn a golden‑brown hue and the edges start to pull away from the parchment. The scent should be intoxicating, a blend of toasted sesame and warm dough. Resist the urge to open the oven door early; the sudden temperature drop can cause the bites to collapse.
For the ultimate “steam‑finish,” turn the oven down to 300°F (150°C) after the initial bake, then let the bites sit inside for an additional 5 minutes with the door slightly ajar. This gentle heat keeps the interior soft while the crust stays crisp—pure magic.
Remove the tray, let the bagel bites cool on a wire rack for 5 minutes, then transfer them to an airtight container. If you’re serving them immediately, drizzle a light drizzle of olive oil and sprinkle a pinch more seasoning for that fresh‑out‑of‑the‑oven feel. That sizzle when it hits the pan? Absolute perfection.
Kitchen Hack: Store the bites in a single layer on a cooling rack before sealing; this prevents steam from making them soggy.
That's it — you did it. But hold on, I've got a few more tricks that'll take this to another level…
Insider Tricks for Flawless Results
The Temperature Rule Nobody Follows
Most home bakers bake at a steady 375°F, but dropping the temperature by 25°F after the first 10 minutes creates a gentler finish that preserves moisture. I discovered this by accident when my first batch turned out a bit dry. The lower heat acts like a slow‑cook, allowing the interior to set without over‑crisping the crust. Trust the process, and you’ll get a bite that’s crunchy on the outside and pillow‑soft inside.
Why Your Nose Knows Best
Your sense of smell is a reliable indicator of doneness. When the bagel bites start releasing that nutty, toasted aroma, you’re only a minute or two away from perfection. If the scent is faint, give them a little more time; if it’s strong and the tops are golden, pull them out now. This sensory shortcut beats any timer, especially when ovens vary.
The 5‑Minute Rest That Changes Everything
Letting the bites rest on a wire rack for just five minutes after baking allows steam to escape evenly, preventing a soggy bottom. I once skipped this step and ended up with a mushy base that ruined the whole batch. Those five minutes are a small price to pay for a consistent texture that holds up during reheating.
Egg‑Free Binding Magic
If you’re avoiding eggs, a chia‑egg (1 tbsp chia seeds + 3 tbsp water) works wonders. It gels up in about five minutes, mimicking the binding power of an egg without altering the flavor. This is perfect for vegans or anyone with an egg allergy, and it adds a subtle nutty undertone that complements the bagel seasoning.
Seasoning Layering Technique
For an extra punch, sprinkle a light dusting of the seasoning on top of the bites right after the initial bake, then return them to the oven for the final five minutes. This double‑layer approach creates a caramelized crust that crackles under your teeth, delivering a burst of flavor with every bite.
Creative Twists and Variations
This recipe is a playground. Here are some of my favorite ways to switch things up:
Cheesy Jalapeño Kick
Add 1 finely chopped jalapeño and ½ cup shredded cheddar to the batter. The heat pairs beautifully with the creamy cheese, and the cheddar melts into little pockets of gooey goodness. Perfect for those who love a little spice with their snack.
Herb‑Infused Sunrise
Swap the Everything seasoning for a blend of fresh chopped rosemary, thyme, and a pinch of lemon zest. The aromatic herbs give the bites a bright, garden‑fresh profile that’s ideal for brunch tables.
Sweet & Savory Breakfast
Replace the savory seasoning with a mixture of cinnamon, nutmeg, and a drizzle of honey after baking. Top with sliced bananas for a sweet‑savory combo that feels like a breakfast treat.
Protein‑Packed Pizza Bites
Stir in ¼ cup pizza sauce and ¼ cup shredded mozzarella before baking, then sprinkle a little extra mozzarella on top. The result is a mini pizza that satisfies cravings without the carb overload.
Asian Fusion
Add 1 tsp toasted sesame oil to the wet mixture and finish with a sprinkle of furikake after baking. The umami‑rich flavor profile transforms the bites into a snack that pairs perfectly with soy sauce for dipping.
Storing and Bringing It Back to Life
Fridge Storage
Place the cooled bagel bites in an airtight container lined with a paper towel to absorb excess moisture. They’ll stay fresh for up to five days. When you’re ready to eat, reheat them in a preheated 350°F oven for 5‑7 minutes, or pop them in a toaster oven for extra crispness.
Freezer Friendly
Arrange the bites in a single layer on a baking sheet and freeze until solid (about 2 hours). Transfer the frozen bites to a zip‑top bag; they’ll keep for up to three months. To bake from frozen, add an extra 3‑4 minutes to the cooking time and enjoy the same texture.
Best Reheating Method
For the ultimate revival, preheat a skillet over medium heat, add a splash (about a teaspoon) of water, and cover with a lid for 2 minutes. The steam re‑hydrates the interior while the uncovered last minute restores the crust’s crunch. This trick works whether the bites are fresh, refrigerated, or frozen.