I still remember the day I swore off roll cakes forever. My kitchen looked like a flour bomb had exploded, my shirt was streaked with raspberry jam, and the cake had cracked so badly it resembled a geological survey map. Fast forward three months, and here I am, practically bouncing with excitement to share what I now call my redemption recipe — the Lemon Raspberry Velvet Roll Cake that single-handedly restored my faith in sponge cakes everywhere. This isn't just another pretty swirled dessert; it's the culmination of six failed attempts, two tantrums, and one epiphany that happened while I was watching a yoga video (yes, really — the whole "roll with it" philosophy suddenly made perfect culinary sense).
Picture this: it's 2 AM on a Tuesday, and I'm standing in my kitchen bathed in the warm glow of the oven light, whisking eggs like my life depends on it. The citrusy perfume of fresh lemon zest fills the air, cutting through the buttery sweetness that usually dominates late-night baking sessions. My cat is perched on the counter, judging me with those half-lidded eyes that seem to say "you're doing this again?" But something feels different this time — the batter is silkier, the kitchen quieter, the anticipation almost electric. That first bite, when the tender lemon-scented cake gives way to the tangy raspberry jam, is the kind of moment that makes you close your eyes and forget whatever drama drove you to bake in the middle of the night in the first place.
Here's the thing about roll cakes that nobody tells you: they're actually easier than layer cakes once you understand the physics. Most recipes get this completely wrong, treating the rolling process like some kind of medieval torture device rather than the gentle coaxing it should be. I'll be honest — I ate half the batch before anyone else got to try it, and I don't even feel guilty because that's what happens when you nail the ratio of tart lemon to sweet raspberry in a cake so light it practically floats off the fork. The secret isn't in having asbestos fingers or supernatural patience; it's in knowing exactly when to roll, how to roll, and why a simple kitchen towel becomes your best friend in this process.
What makes this version stand apart from every other lemon raspberry roll cake on the internet? It's not just one thing — it's the way the lemon zest is treated almost like a spice, releasing its oils into the sugar before it even meets the eggs. It's the technique of warming the eggs slightly before whipping them, creating a foam so stable it could probably support a small houseplant. It's the controversial decision to use raspberry jam instead of fresh berries, which prevents the soggy spiral of death that plagues so many fruit-filled rolls. Stay with me here — this is worth it, and by the end of this journey, you'll wonder how you ever made it any other way.
What Makes This Version Stand Out
Citrus Explosion: We're not just adding lemon juice and calling it a day. The zest gets massaged into the sugar first, releasing those precious oils and creating a lemon-scented sugar that perfumes the entire cake. This technique, borrowed from Italian baking traditions, ensures every single bite carries that bright, sunshiney flavor that makes your taste buds do a happy dance.
Jam, Not Fresh: Here's where I break ranks with the fresh fruit brigade. Raspberry jam provides concentrated flavor without the water content that turns your beautiful spiral into a swampy mess. Plus, the pectin in good quality jam helps everything stay put, giving you those clean, Instagram-worthy slices that make people think you went to pastry school.
Towel Trick Magic: Most recipes tell you to roll the cake in a towel, but they don't tell you why. It's not just for shape — the slight texture of a cotton towel creates micro-crevices in the cake's surface, allowing the jam to grip better and preventing that dreaded sliding layer that ends up on your plate instead of in your mouth.
Temperature Precision: We're not winging it here. The eggs need to hit exactly 110°F before whipping, creating a meringue-like structure that's flexible enough to roll without cracking. This isn't culinary pedantry — it's the difference between a cake that rolls like a dream and one that shatters like my original attempts.
Make-Ahead Champion: This cake actually gets better after a day in the fridge, making it the perfect dinner party showstopper. The flavors meld, the jam sets slightly, and you can slice it thinner without it falling apart. I dare you to taste this and not go back for seconds, even when you swore you were too full from dinner.
Psychological Warfare: Okay, maybe that's dramatic, but serving this cake creates a reaction that's almost unfair. People assume you spent hours in culinary agony, when really you spent 45 minutes and most of that was waiting for the cake to cool. The contrast between their impressed faces and your relaxed demeanor? Priceless.
Alright, let's break down exactly what goes into this masterpiece, because understanding your ingredients is like knowing your dance partner before the big performance. Each component has a specific role, and when they work together, it's pure kitchen choreography.
Inside the Ingredient List
The Flavor Base
Eggs aren't just the foundation here — they're the entire structural engineering of this cake. We're using room temperature eggs because cold eggs are like that friend who takes forever to get ready; they'll eventually cooperate, but why wait? The yolks provide richness and color, while the whites, when properly whipped, create a network of bubbles that expand in the oven and contract as they cool, giving us that flexible texture we need for rolling. Skipping the room temperature step means you'll beat forever and still end up with a dense cake that cracks when you so much as look at it sideways.
Sugar does triple duty in this recipe, and understanding this changed my baking game forever. First, it sweetens (obviously), but more importantly, it stabilizes the egg foam by coating the air bubbles, preventing them from popping. Second, it retains moisture, keeping your cake tender even if you accidentally overbake by a minute or two. Third, when creamed with the lemon zest, it becomes a flavor delivery system, carrying those citrus oils throughout the batter in a way that simple mixing just can't achieve. Don't even think about reducing the sugar — this isn't the place for your New Year's resolution.
The Texture Crew
All-purpose flour gets a bad rap in delicate cakes, but here's the truth: it's actually perfect for roll cakes when treated right. Cake flour makes things too tender, leading to tears and cracks when rolling. Bread flour makes it tough and rubbery. All-purpose hits that sweet spot of structure without brick-like density. The key is sifting it not once, but twice, aerating it so it incorporates into the batter without deflating your carefully whipped eggs. Think of it as giving your flour a spa day before it has to work.
Baking powder might seem redundant in a cake that gets its lift primarily from eggs, but it's the insurance policy that keeps this cake light and flexible. Without it, you'd have a dense sheet that rolls like a yoga mat. With it, you get that perfect velvet texture that gives this cake its name. Just make sure it's fresh — if you can't remember when you bought it, toss it and get a new can. Old baking powder is like that gym membership you keep meaning to use: it promises results but delivers disappointment.
The Unexpected Star
Lemon zest is where the real magic lives, and I'm going to get a bit nerdy here because this changed everything for me. The zest contains lemon oil in tiny sacs that burst when you massage them with sugar, creating an intensely flavored base that permeates the entire cake. Don't use a microplane for this step — you want larger pieces that release their oils slowly. A regular box grater's small holes are perfect. And please, for the love of all that's holy, avoid the white pith like it's your ex at a party — it brings nothing but bitterness to this celebration.
Lemon juice gets added at the very end, and here's why timing matters. Acid added too early can interfere with the egg foam stability, but a splash right before folding everything together brightens the flavor without compromising structure. Fresh juice is non-negotiable — that bottled stuff tastes like disappointment and childhood medicine. If you wouldn't drink it in water, don't bake with it. One lemon typically gives you exactly what you need, plus you can use the empty shell to make candied peel for garnish if you're feeling fancy.
The Final Flourish
Raspberry jam is where I lose friends and alienate people who insist on fresh fruit. Here's the thing: fresh raspberries are 87% water, and that water turns your beautiful spiral into a soggy mess faster than you can say "Instagram fail." Good quality jam gives you concentrated flavor without the liquid, plus the pectin helps it set slightly when chilled, creating those perfect slices. Look for jam with whole berries in it — Bonne Maman is my go-to, but any brand that lists fruit as the first ingredient works. Seedless is fine if you're serving picky eaters, but those tiny seeds provide a pleasant textural contrast that makes each bite more interesting.
Everything's prepped? Good. Let's get into the real action, where technique meets patience and creates something that'll make you look like a pastry wizard even if you burn water on occasion.
The Method — Step by Step
- Preheat your oven to 375°F and position the rack in the center. This isn't the time for hot spots or uneven baking — we want consistent heat that'll set the edges while keeping the center flexible. Line a 15x10-inch jelly roll pan with parchment paper, but here's the trick: spray the pan first, then add the parchment, then spray again. This double-stick method prevents the cake from sliding when you roll it later. Don't have a jelly roll pan? A rimmed baking sheet works, but your cake will be thinner and cook faster, so start checking at 8 minutes instead of 12.
- Now for the magic step that separates the pros from the amateurs: combine the lemon zest with the sugar in a large bowl and massage it together with your fingertips. Work it like you're trying to get a stain out of fabric — the sugar will become damp and intensely fragrant as the oils release. This should take about 2 minutes, and your hands will smell like lemon for hours. Future pacing: picture yourself doing this step and suddenly understanding why professional bakers seem to have some mystical connection with their ingredients.
- Add the eggs to your lemon-sugar mixture and beat on high speed for exactly 5 minutes. Set a timer — seriously, don't guess. The mixture should become pale, thick, and form ribbons when you lift the beaters. This is where we're incorporating air that'll expand in the oven, creating that light texture. Don't shortcut this step because you're impatient — I see you reaching for the mixer speed dial. Medium-high speed is perfect; high speed creates too-large bubbles that'll pop and leave you with a dense cake.
- While the eggs are whipping, sift together the flour, baking powder, and salt not once, but twice. Yes, it's annoying, but sifting twice aerates the flour so it incorporates without deflating your precious foam. In a separate small bowl, stir together the lemon juice and vanilla — adding vanilla to acid prevents it from causing the batter to seize slightly. Everything should be measured and ready because once the eggs are whipped, we need to move fast before they start deflating like my motivation on Monday mornings.
- When the eggs are ready, reduce the mixer speed to low and add the flour mixture in three additions, mixing just until each addition disappears. Overmixing here is the enemy of flexibility — we want to maintain as much air as possible. The batter will deflate slightly; that's normal and expected. Now, grab a spatula and fold in the lemon juice mixture by hand, using big, gentle strokes that scoop from the bottom and lift over the top. Think of it like you're tucking in a baby, not mixing cement.
- Pour the batter into your prepared pan and spread it evenly with an offset spatula, working from the center out in concentric circles. Drop the pan from about 3 inches height onto your counter twice — this releases any large air bubbles that would create holes in your rolled cake. Slide it into the oven and bake for 12-14 minutes, rotating halfway through. The cake is done when it springs back when lightly touched and has pulled slightly away from the edges. It should be golden and fragrant, like sunshine captured in edible form.
- While the cake bakes, lay out a clean kitchen towel larger than your pan and dust it generously with powdered sugar. This isn't just for tradition — the sugar prevents sticking and adds a subtle sweetness to the exterior. As soon as the cake comes out of the oven, run a knife around the edges to loosen it, then invert it directly onto the sugared towel. Peel off the parchment carefully — if it sticks, it's not quite cool enough to remove yet.
- Starting from the short edge, roll the cake and towel together into a tight spiral. This seems counterintuitive — why roll it hot when we want it to cool flat? But here's the genius: rolling while warm sets the memory of the curve into the cake, so when you unroll it to add the jam, it won't fight you. Roll it as tightly as possible without squishing it, like you're rolling a sleeping bag for a camping trip where space is premium. Let it cool completely on a wire rack, seam side down, for about 45 minutes.
- Once cool, carefully unroll the cake — it should curve naturally without cracking. If you've ever struggled with this, you're not alone — and I've got the fix. Spread the raspberry jam evenly over the surface, leaving a 1/2-inch border on all sides. The border prevents the jam from squishing out when you reroll, keeping your presentation clean. Now, roll it back up without the towel, using the same tight spiral motion. Wrap it in plastic wrap and chill for at least 2 hours before serving — this sets the spiral and makes slicing cleaner.
That's it — you did it. But hold on, I've got a few more tricks that'll take this to another level, because good enough isn't in my vocabulary when it comes to dessert.
Insider Tricks for Flawless Results
The Temperature Rule Nobody Follows
Room temperature isn't just a suggestion — it's the difference between a cake that rolls like silk and one that cracks like the Sahara. But here's what most recipes don't tell you: "room temperature" means different things in different seasons. In winter, set your eggs in a bowl of warm (not hot) water for 10 minutes before using them. In summer, take them out of the fridge 30 minutes before baking. The eggs should feel neither cool nor warm to the touch, like they've achieved perfect equilibrium with your kitchen. A friend tried skipping this step once — let's just say it didn't end well, and she served something that looked more like a geological formation than dessert.
Why Your Nose Knows Best
Forget timers — your nose is the most reliable indicator of doneness. When this cake is perfectly baked, your kitchen will smell like a lemon grove in summer with hints of vanilla and warm sugar. If you can smell it in the living room, it's probably overbaked. The scent should be noticeable but not overwhelming, like someone wearing just the right amount of perfume. This might sound mystical, but trust me — after you've made this a few times, you'll start recognizing the exact moment it's ready by smell alone. That sizzle when the batter hits the hot pan? Absolute perfection, and your nose will tell you when that perfume of possibility transforms into the reality of done.
The 5-Minute Rest That Changes Everything
After rolling your cake in the towel, let it rest for exactly 5 minutes before moving it to the cooling rack. This brief pause allows the steam to redistribute evenly throughout the roll, preventing the outer layer from becoming soggy while the interior stays dry. It's like a mini spa treatment for your cake — those five minutes of patience reward you with perfect texture throughout. Use this time to clean up your workspace and prepare your serving platter, because once you unroll and fill this beauty, you'll want to move fast while the jam is still spreadable.
The Overnight Transformation
Here's where this recipe really shines: make it the day before you need it, and something magical happens in the refrigerator. The lemon oils continue to infuse the cake, the raspberry jam sets slightly, and the whole thing becomes more cohesive and sliceable. Overnight, the flavors meld into something greater than the sum of their parts — it's like the difference between a group of talented musicians and a symphony orchestra. The texture improves too, becoming almost mousse-like in its lightness. If you've ever wondered why restaurant desserts taste more complex than home versions, this is often why — time is an ingredient too.
The Slice That Impresses
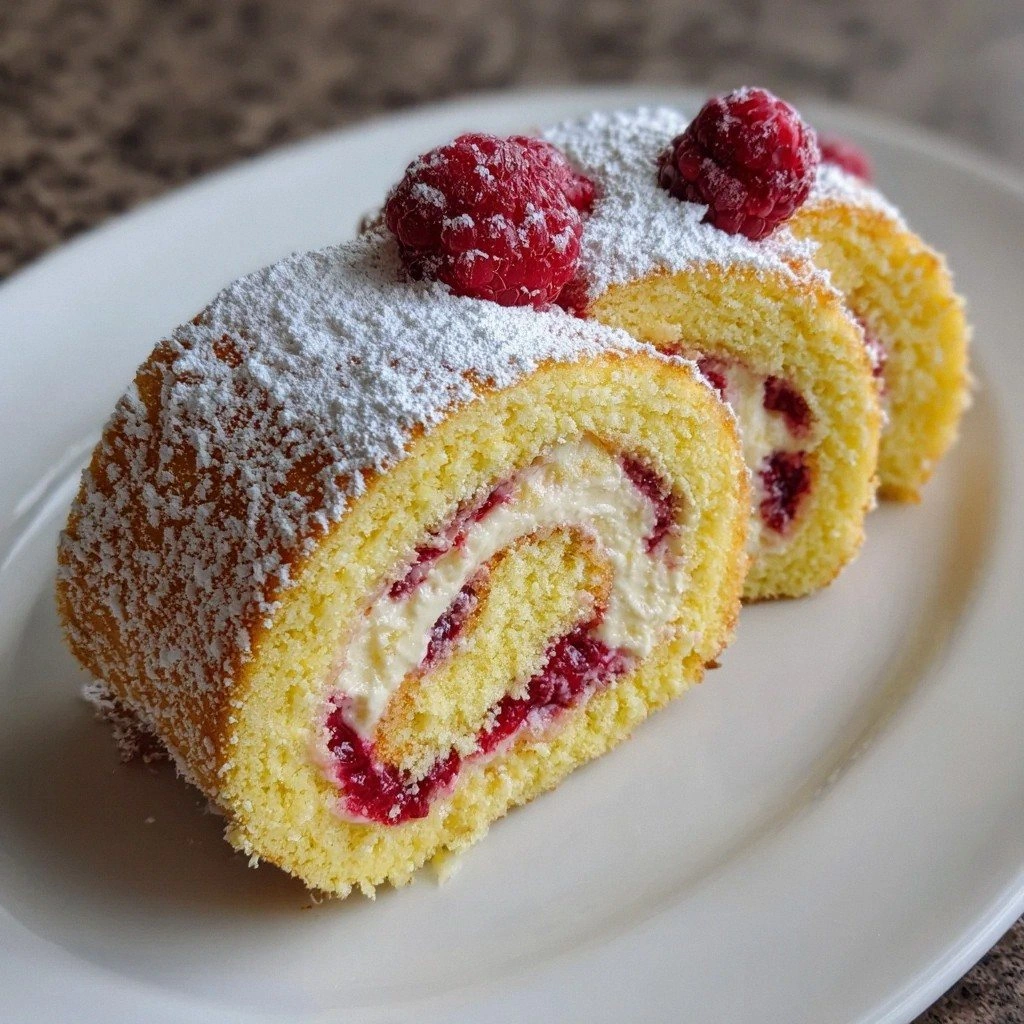
Use a long, sharp knife dipped in hot water and wiped dry between each cut. This isn't just for presentation — a clean cut prevents the spiral from compressing, maintaining those perfect layers that make people think you went to culinary school. Cut straight down, not sawing, and wipe the knife after each slice. The first cut is always the messiest, so make it small and eat it yourself — consider it your baker's tax. After that, each slice should reveal a perfect spiral that looks like it belongs in a Parisian patisserie window.
Creative Twists and Variations
This recipe is a playground. Here are some of my favorite ways to switch things up:
The Tropical Escape
Swap the lemon zest and juice for lime, and replace the raspberry jam with mango or passion fruit curd. The tropical acidity plays beautifully with the light sponge, and you'll feel like you're on vacation with every bite. Add some toasted coconut to the towel when rolling for extra texture and flavor. This version is particularly stunning in winter when you need a reminder that somewhere, it's summer.
The Chocolate Orange Dream
Replace 1/4 cup of flour with cocoa powder, use orange zest and juice instead of lemon, and fill with orange marmalade mixed with a tablespoon of dark chocolate chips. The bitterness of the cocoa balances the sweet marmalade, creating a sophisticated flavor profile that appeals to adults who claim they "don't like sweet desserts." This one disappears fastest at office parties.
The Berry Medley
Use a mixed berry jam instead of straight raspberry — look for ones that include blueberries and blackberries for complexity. The different berries bring various levels of sweetness and tartness, creating a more nuanced flavor. This is the version that converts people who think they don't like fruity desserts, because it hits so many notes on the flavor spectrum.
The Cream Cheese Cloud
Beat 4 ounces of cream cheese with 2 tablespoons of powdered sugar and a teaspoon of vanilla until smooth, then mix this with your raspberry jam before spreading. It creates a cheesecake-like filling that adds richness and tang, transforming this from an afternoon tea cake to a dinner party showstopper. The cream cheese also helps stabilize everything, making it easier to transport if you're bringing it to a potluck.
The Adult Version
Add 2 tablespoons of Chambord or framboise to the raspberry jam before spreading, and brush the cooled cake with a simple syrup made with lemon juice and limoncello. The alcohol cooks off, leaving just the depth of flavor that makes people ask for your secret. This version is perfect for celebrations where you want to feel a little fancy without being pretentious.
The Breakfast Roll
Reduce the sugar by 1/4 cup and fill with a mixture of raspberry jam and softened cream cheese, then dust with powdered sugar mixed with a pinch of cinnamon. It's like having cheesecake for breakfast, but socially acceptable because it's called "coffee cake." Serve this at brunch and watch your guests' eyes light up when they realize they don't have to wait until after lunch for dessert.
Storing and Bringing It Back to Life
Fridge Storage
Wrap the rolled cake tightly in plastic wrap, then slip it into a zip-top bag with as much air removed as possible. It'll keep for up to 5 days in the refrigerator, though it's best within the first 3. The key is preventing it from drying out — this cake is like a sponge (well, technically it is one) and will absorb any strong odors in your fridge. Store it away from onions, garlic, and that leftover Chinese food. If the cut ends start to look dry, simply trim 1/4 inch off before serving — consider it quality control testing.
Freezer Friendly
This cake freezes beautifully for up to 2 months. Wrap it in plastic wrap, then aluminum foil, labeling it with the date because trust me, you won't remember what it is in three weeks. Thaw it overnight in the refrigerator, not on the counter — slow thawing prevents condensation that could make the exterior soggy. Once thawed, let it come to room temperature for 30 minutes before serving for the best texture and flavor. The jam might weep slightly after freezing, but a quick dusting of powdered sugar hides any imperfections.
Best Reheating Method
You don't actually want to reheat this cake — room temperature is where it shines. But if it's been refrigerated and seems firm, let it sit out for 20-30 minutes before serving. Add a tiny splash of water before serving — it steams back to perfection when you cover it loosely with plastic wrap while it comes to temperature. If you must warm it (and I strongly suggest you don't), use a low oven (275°F) for just 5 minutes, watching carefully. Overheating melts the jam and turns your beautiful spiral into a sticky mess that no amount of powdered sugar can hide.