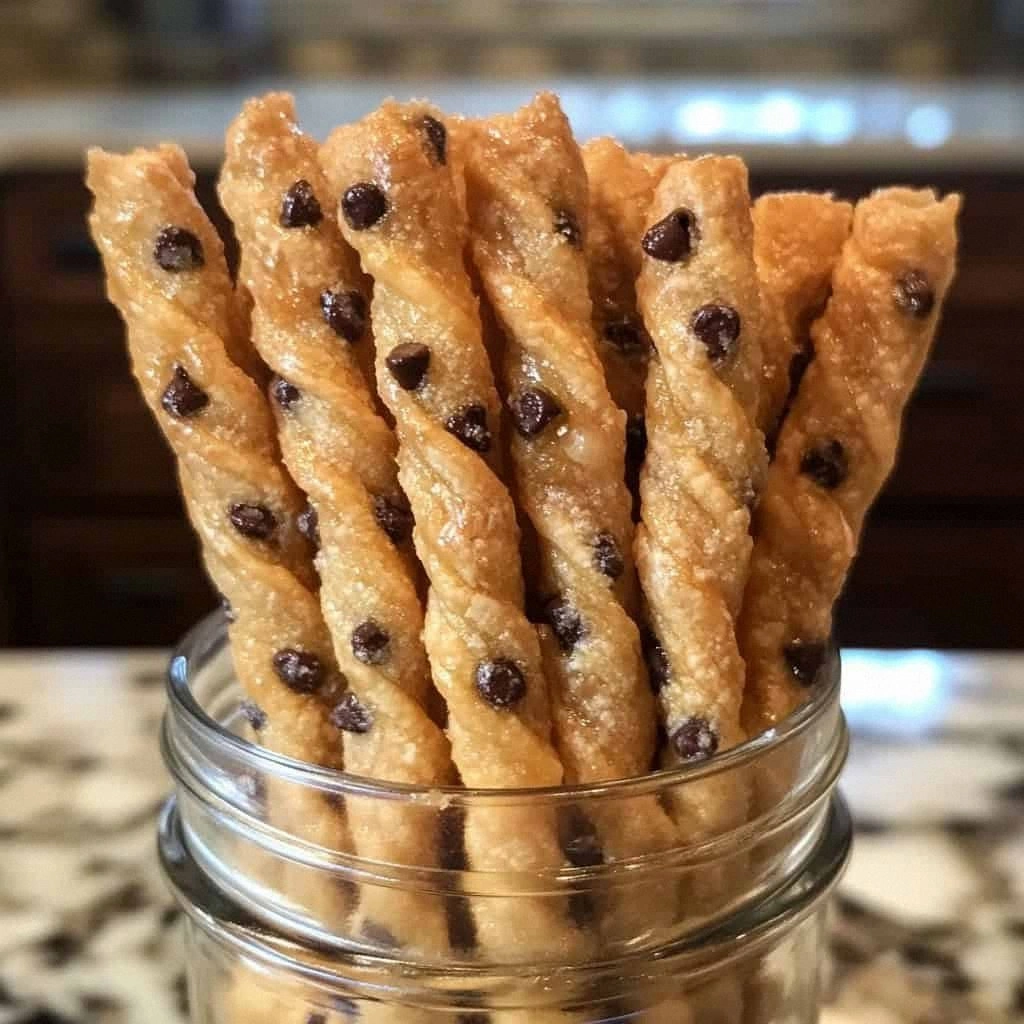
Picture this: It's 2:47 a.m. on a Tuesday night, and I'm standing in my kitchen wearing mismatched socks and a bathrobe that's seen better decades. The house is dark except for the warm glow of the oven light, and I'm staring at a tray of what might be the most beautiful thing I've ever created. These aren't just cookies. These aren't just twists. These are cookie dough twists — and they're about to change your midnight-snacking game forever.
I discovered this recipe the way most great kitchen discoveries happen: by complete accident. I was trying to make chocolate chip cookies for my nephew's birthday party the next day, but I got distracted by a group chat drama and accidentally over-mixed my dough. Instead of tossing it (because wasting cookie dough should be a crime), I started playing around with it like Play-Doh. Twenty minutes later, I had twisted these gorgeous spirals of cookie dough that looked like something from a fancy bakery, but tasted like pure nostalgia.
The first bite was like being transported back to being eight years old, sneaking spoonfuls of raw cookie dough when my mom wasn't looking — except these are completely safe to eat raw, and they bake up into these golden, caramelized twists that crackle when you bite into them. The edges get these crispy, lacy bits that shatter like spun sugar, while the centers stay soft and chewy like the best parts of a fresh-baked cookie.
I've made these cookie dough twists for bake sales, birthday parties, and late-night Netflix binges. I've watched grown adults fight over the last one on the plate. I've seen teenagers put down their phones to pay attention to something for the first time in hours. This recipe is pure magic, and I'm about to share every single secret with you.
What Makes This Version Stand Out
Heat-Treated Flour Magic: Unlike those risky raw cookie dough recipes that leave you gambling with food safety, we're using heat-treated flour that kills off any nasty bacteria while keeping that authentic cookie dough flavor. It's the difference between eating cookie dough and eating cookie dough that's actually safe to consume without any guilt or worry.
The Twist Technique: Most recipes just tell you to roll and cut, but we're creating actual twists that create more surface area for caramelization. Those nooks and crannies catch melted chocolate chips and create crispy edges that'll make you weak in the knees. Each twist is like getting the corner piece of a brownie — maximum texture contrast in every bite.
Brown Sugar Brilliance: We're using a higher ratio of brown sugar to white sugar than traditional cookies, which gives these twists deeper caramel notes and that gorgeous golden color. The molasses in the brown sugar also helps keep them soft and chewy for days, assuming they last that long.
Mini Chip Distribution: Mini chocolate chips are the unsung heroes here. They distribute more evenly throughout the twists, giving you chocolate in every bite without overwhelming the delicate dough. Regular chips would sink and create chocolate pools that throw off the texture balance.
Bake-Time Precision: We're pulling these out when they still look slightly underbaked in the very center. They'll continue cooking on the hot pan, giving you that perfect contrast between crisp edges and gooey centers. Most recipes overbake and you lose that cookie dough essence.
Make-Ahead Champion: These twists freeze beautifully both before and after baking. I always keep a batch of unbaked twists in my freezer for emergencies — and by emergencies, I mean Tuesday nights when I need something sweet and don't want to turn on the mixer.
Vanilla Double-Dose: We add vanilla to both the dough and the egg wash, giving you layers of vanilla flavor that complement the brown sugar beautifully. It's subtle but makes a huge difference in the final flavor profile.
Inside the Ingredient List
The Flavor Base
Butter is the foundation of any great cookie, and we're using a full cup of the good stuff here. I'm talking about real, unsalted butter that's been sitting on your counter for about 30 minutes — soft enough to leave an indent when you press it, but not so soft it's greasy. This temperature matters more than you think. Too cold and you'll have chunks that never incorporate properly. Too warm and your twists will spread into puddles instead of holding their gorgeous shape.
The sugars are where the magic really happens. We're using three-quarters cup each of brown and white sugar, but here's the kicker — pack that brown sugar tight. I mean really pack it in there like you're trying to fit your entire week into a weekend. The brown sugar gives us those deep caramel notes and keeps everything moist, while the white sugar provides structure and helps create those crispy edges we're after.
The Texture Crew
All-purpose flour is our workhorse here, but we're using a bit more than you might expect — three cups total. This isn't a typo. The extra flour helps the twists hold their shape during baking and gives us that tender, almost shortbread-like texture in the center. We're also adding a teaspoon of baking powder and half a teaspoon of baking soda. The baking powder gives lift, while the baking soda helps with browning and creates those beautiful crackly tops.
Salt is the ingredient everyone forgets about, but it's absolutely crucial here. Just a quarter teaspoon enhances all the other flavors and prevents your twists from tasting flat. It's like the bass line in a song — you don't always notice it, but you'd miss it if it were gone.
The Unexpected Star
Here's where we get a little wild — we're making an edible cookie dough filling using heat-treated flour. This isn't just regular dough we're twisting up. We're creating a separate cookie dough mixture that's safe to eat raw, then wrapping it inside our regular cookie dough. It's like a cookie inception situation that'll blow everyone's minds. The filling uses brown sugar for depth, milk for creaminess, and mini chocolate chips for those little bursts of chocolate in every bite.
The vanilla extract in both the dough and the filling isn't just for flavor — it actually enhances our perception of sweetness, meaning we can use slightly less sugar while still getting that satisfying sweet hit. Use real vanilla extract, not the imitation stuff. Your taste buds will thank you, and so will anyone lucky enough to try these twists.
The Final Flourish
Our egg wash isn't just for show — it creates that gorgeous golden-brown shine that makes these twists look like they came from a professional bakery. Mix one egg with a tablespoon of milk for the perfect consistency. The milk helps thin the egg so it brushes on smoothly without creating thick, gloopy spots. Finish with a sprinkle of coarse sugar for crunch and visual appeal, or go wild with colorful sprinkles if you're feeling festive.

The Method — Step by Step
- Start by heat-treating your flour for the cookie dough filling — this is non-negotiable if you want to eat it safely. Preheat your oven to 350°F and spread 1½ cups of flour on a rimmed baking sheet. Bake for exactly 5 minutes, stirring once halfway through. You're not trying to brown it, just heat it enough to kill any potential bacteria. Let it cool completely before using, or you'll end up with warm flour that melts your chocolate chips into a mess.
- While your flour cools, cream together the butter and sugars for your main dough. This isn't just mixing — we're incorporating air here. Beat the softened butter with both sugars for a full 3 minutes until the mixture is light and fluffy, scraping down the bowl twice. It should look pale and increased in volume, like buttercream frosting. This step is crucial for the texture of your final twists.
- Add the eggs one at a time to your creamed butter mixture, beating well after each addition. The first egg might look like it's curdling — that's normal, keep beating and it'll come together. Add the vanilla extract and mix just until combined. Overmixing here can make your twists tough, and nobody wants a tough twist.
- In a separate bowl, whisk together your flour, baking powder, baking soda, and salt. This ensures even distribution of the leavening agents, so you don't end up with one twist that explodes like a volcano while the others stay flat. Gradually add this to your wet ingredients, mixing just until you see no more flour streaks. The dough will be thick and slightly sticky — that's perfect.
- Now for the cookie dough filling: In a bowl, beat together the softened butter, brown sugar, and white sugar until creamy. Add the milk and vanilla, then gradually mix in your cooled, heat-treated flour. Fold in the mini chocolate chips gently so they don't break. This filling should be thick but spreadable — if it's too soft, chill it for 15 minutes.
- Divide your main dough into two portions. Roll each portion into a rectangle about ¼-inch thick on a well-floured surface. The dough will be soft, so flour your rolling pin too. Spread half the cookie dough filling evenly over each rectangle, leaving a ½-inch border around the edges. Roll up each rectangle tightly, like you're making cinnamon rolls, then slice each log in half lengthwise to reveal the beautiful spiral.
- Twist each half-log by holding one end and twisting the other 3-4 times. This creates those gorgeous spirals and exposes more surface area for caramelization. Place the twists on a parchment-lined baking sheet, leaving 2 inches between each one. They'll spread during baking, and you don't want them turning into one giant twist blob.
- Beat together the egg and milk for your egg wash. Brush this gently over each twist, making sure to get into all the crevices. Sprinkle with coarse sugar or sprinkles, pressing lightly so they stick during baking. Let the twists rest for 15 minutes while your oven preheats to 375°F — this helps prevent spreading.
- Bake for 12-14 minutes, until the edges are golden brown and the centers are just set. They'll look slightly underbaked — that's perfect. Let them cool on the baking sheet for 5 minutes before transferring to a wire rack. This is the hardest part: waiting. The smell will be intoxicating, and you'll want to grab one immediately, but trust me, they're even better after a few minutes when the flavors settle.
Insider Tricks for Flawless Results
The Temperature Rule Nobody Follows
Your butter temperature can make or break these twists. Too cold and you'll have lumps that never incorporate, creating pockets of pure butter that leak out during baking. Too warm and your twists will spread into unrecognizable puddles. The sweet spot is butter that's soft enough to leave an indent when you press it with your finger, but still holds its shape. If you can squish it easily, it's too soft. Pop it in the fridge for 10 minutes and try again.
Why Your Nose Knows Best
Don't rely solely on the timer — your nose is your best guide here. When these twists are perfectly baked, your kitchen will smell like a vanilla-caramel wonderland. If you catch a whiff of something toasty and sweet, check them immediately. Overbaking is the enemy of that soft, cookie dough-like center we're after. They should be golden at the edges and pale in the very center when you pull them out.
The 5-Minute Rest That Changes Everything
After baking, let these beauties rest on the hot pan for exactly 5 minutes. Not 3, not 7 — 5. This allows the centers to finish cooking from residual heat while the bottoms stay slightly crisp. Transfer them too early and they'll fall apart. Wait too long and they'll stick to the parchment. Set a timer and trust the process. Your patience will be rewarded with twists that hold their shape but stay tender in the middle.
The Freezer Trick for Perfect Slices
If you're struggling with the twisting step, pop your filled dough logs in the freezer for 15 minutes before slicing. This firms up the butter and makes everything easier to handle. You'll get cleaner cuts and the filling won't squish out when you twist them. Just don't forget about them — frozen dough becomes impossible to twist and you'll have to let it warm up again.
The Secret to Grocery Store Quality
You know those gorgeous twists you see at fancy bakeries? The secret is in the egg wash. Don't just brush it on — really work it into all the nooks and crannies. Use a pastry brush and go over each twist twice: once to apply, once to smooth. This creates that professional-looking shine and helps the coarse sugar adhere properly. Skip this step and your twists will look homemade in the worst way possible.
Creative Twists and Variations
This recipe is a playground. Here are some of my favorite ways to switch things up:
Peanut Butter Paradise
Replace half the butter in the filling with creamy peanut butter and add chopped peanuts for crunch. The peanut butter adds richness and that salty-sweet combo that makes people lose their minds. Use peanut butter chips instead of chocolate for the ultimate peanut lover's dream. These disappear faster than free samples at Costco.
S'mores Explosion
Mix crushed graham crackers into your cookie dough filling, use mini marshmallows instead of chocolate chips, and add a sprinkle of graham cracker crumbs on top before baking. The marshmallows get toasty and gooey while the graham flavor takes you straight to summer campfires. Pro tip: Drizzle with chocolate after baking for the full s'mores experience.
Salted Caramel Dream
Add a tablespoon of caramel sauce to your filling and sprinkle flaky sea salt on top before baking. The salt enhances all the sweet flavors and makes these taste like they came from a gourmet bakery. Use caramel chips instead of chocolate for maximum caramel impact. These are dangerous — you can't eat just one.
Cinnamon Roll Style
Mix 2 tablespoons of cinnamon into your filling and add a cream cheese drizzle after baking. Roll them up like cinnamon rolls before twisting for that classic spiral look. The cream cheese drizzle adds tang that balances the sweetness perfectly. These taste like the best parts of cinnamon rolls and cookies combined.
Holiday Spice
Add a teaspoon of pumpkin pie spice to your filling and use red and green sprinkles on top. Perfect for holiday cookie exchanges but delicious year-round. The warm spices make your kitchen smell like December even in July. These are my go-to for office parties because they look festive but taste sophisticated.
Double Chocolate Decadence
Replace ¼ cup of flour in the main dough with cocoa powder for chocolate cookie twists. Use white chocolate chips in the filling for contrast and visual appeal. The combination of chocolate cookie with chocolate chip cookie dough filling is for serious chocoholics only. You've been warned.
Storing and Bringing It Back to Life
Fridge Storage
Store completely cooled twists in an airtight container at room temperature for up to 5 days. Layer them between sheets of parchment paper to prevent sticking. Whatever you do, don't refrigerate them — the cold air will make them go stale faster than you can say "midnight snack." If they start to lose their crispness, pop them in a 300°F oven for 5 minutes to revive them.
Freezer Friendly
These twists freeze beautifully both before and after baking. For unbaked twists, flash-freeze them on a baking sheet for 2 hours, then transfer to a freezer bag. They'll keep for 3 months and can be baked straight from frozen — just add 2-3 minutes to the baking time. For baked twists, cool completely, wrap individually in plastic wrap, then freeze in a bag. Thaw at room temperature for 30 minutes or microwave for 15 seconds.
Best Reheating Method
The best way to reheat these is in a toaster oven at 300°F for 5-7 minutes. This crisps up the edges while warming the centers. Avoid the microwave unless you're desperate — it makes them rubbery. If you must use a microwave, wrap them in a damp paper towel and heat for 10-12 seconds max. Add a tiny splash of water before reheating in the oven — it steams them back to perfection without drying them out.