Picture this: I’m standing in a cramped kitchen, the fridge door slamming shut behind me, a bag of pork loin staring back at me like a silent dare. The smell of a half‑cooked stir‑fry I tried last week still lingers, and I’m convinced my culinary destiny is to turn that disaster into a triumph. I grabbed a handful of garlic chives, minced ginger, and a few fiery Thai chilis, and decided that tonight’s dinner would be a battle of flavor and technique. The sizzling pan was my battlefield, and every ingredient had a role to play.
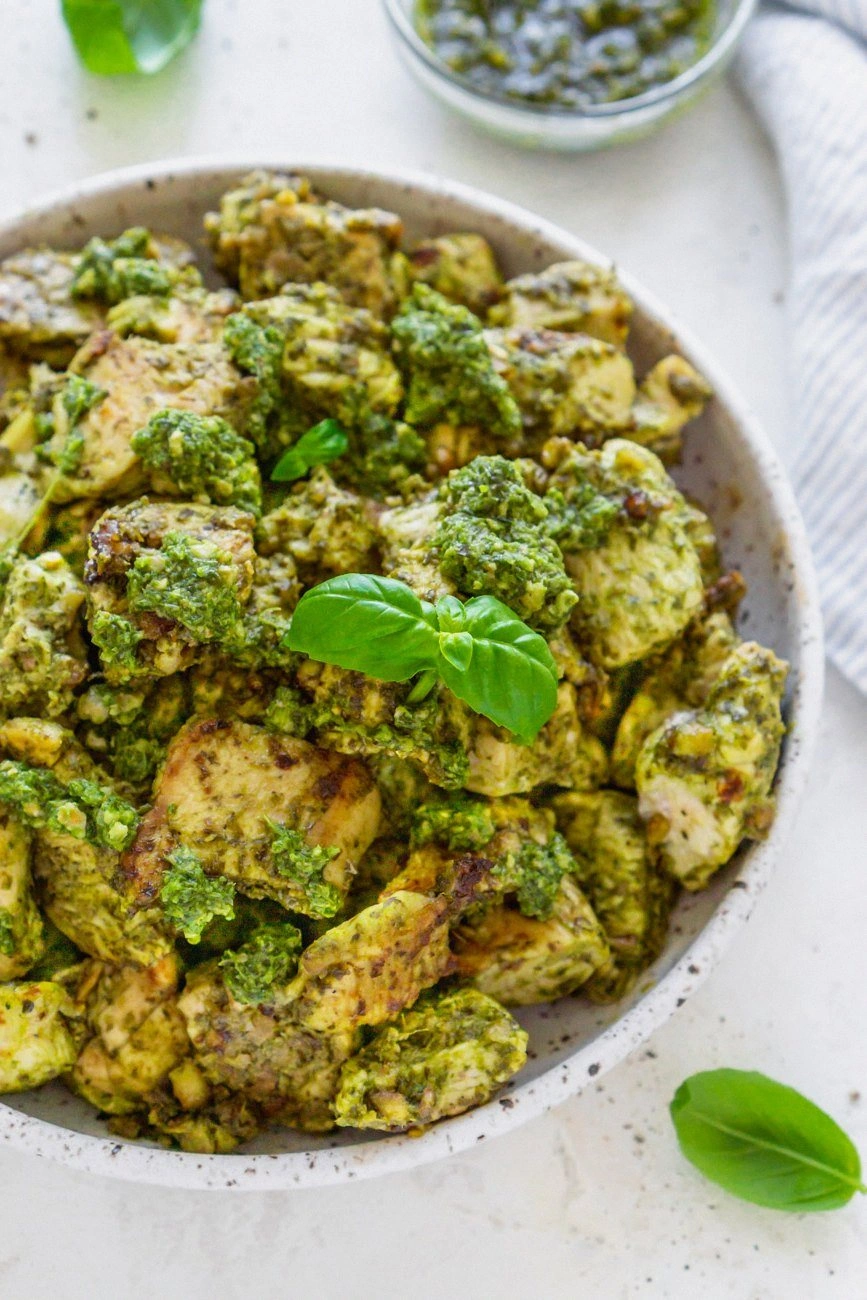
I dare you to taste this and not go back for seconds. The first thing that hits your palate is the bright, almost citrusy zing of the garlic chives, their crisp edges shattering like thin ice under the heat. Then the pork, caramelized to a golden brown, releases a savory perfume that makes the kitchen feel like a secret spice shop. The sauce, a glossy, velvety coat of dark soy and Shaoxing wine, clings to each bite, delivering depth with every mouthful. The chilis provide a subtle, lingering heat that lingers long after the last forkful.
If you’ve ever struggled with the right balance of umami and heat, you’re not alone. Most recipes get this completely wrong, layering too much soy or too much oil, ending up with a dish that feels either flat or greasy. What sets this version apart is the precise layering of flavors, the intentional use of cornstarch for that silky finish, and the strategic timing of each addition. I’ve fine‑tuned the sauce to coat the pork without drowning it, and I’ve kept the garlic chives bright and crunchy, not wilted.
And now the fun part. The technique I’ll reveal is a simple but game‑changing step that transforms any stir‑fry into a restaurant‑level dish: the quick blanch of the garlic chives. It’s a trick I learned from a seasoned chef who swore that “a quick shock keeps the green alive.” By briefly plunging the chives into boiling water and then ice water, you lock in color, crunch, and flavor, making every bite a burst of freshness. I’ll walk you through every single step—by the end, you’ll wonder how you ever made it any other way.
What Makes This Version Stand Out
- Taste: The sauce is a balanced duet of sweet, salty, and umami, with a subtle depth from Shaoxing wine that elevates the pork.
- Texture: The pork is thinly sliced and quickly seared, giving it a tender center with a slightly crisp edge.
- Ingredient Quality: Fresh garlic chives and high‑grade dark soy sauce make the difference between good and unforgettable.
- Technique: The quick blanch of the chives preserves crunch, while the cornstarch slurry creates a silky glaze.
- Versatility: It can be served over rice, noodles, or even cauliflower rice for a low‑carb option.
- Make‑Ahead Potential: The sauce can be pre‑made and stored, making this dish a reliable weeknight saver.
Alright, let’s break down exactly what goes into this masterpiece…
Inside the Ingredient List
The Flavor Base
Dark soy sauce is the backbone of this dish, providing a deep, almost chocolatey umami that anchors every other flavor. The Shaoxing wine adds a subtle, nutty sweetness that balances the saltiness of the soy, giving the sauce a silky finish. The chicken bouillon powder is a secret weapon; it boosts the savory profile without adding too much sodium, allowing you to keep the dish healthy.
If you’re missing Shaoxing wine, dry sherry or even a splash of rice wine can work, but the flavor will shift slightly toward a sweeter finish. For those who prefer a lower sodium version, use low‑sodium soy sauce and reduce the bouillon to a pinch. The sugar, though minimal, caramelizes during searing, adding a subtle gloss to the pork.
The Texture Crew
Cornstarch is the key to that glossy, silky coat that makes the dish feel indulgent. When combined with a splash of water, it creates a slurry that thickens the sauce in seconds, giving the pork a luscious sheen. The peanut oil is chosen for its high smoke point and neutral flavor; it lets the pork sear without imparting a nutty taste.
If you’re allergic to peanuts or simply want a different profile, a neutral oil like grapeseed or canola works just as well. The quick blanching of garlic chives keeps them crisp and bright, preventing them from turning mushy or bitter. The ginger adds a sharp, aromatic kick that cuts through the richness of the pork.
The Unexpected Star
Garlic chives are the unsung hero of this dish. Their subtle garlic flavor is more delicate than regular garlic, and their green stems add a pop of color and crunch. Many people overlook them, but when used correctly, they elevate the dish from simple to spectacular.
If garlic chives are unavailable, scallions can be a suitable substitute, though they’re slightly milder. The key is to keep the stems crisp; otherwise, you lose that delightful snap. The chives also bring a slight citrusy note that balances the deep umami of the soy sauce.
The Final Flourish
The Thai chilis add a gentle heat that lingers, but you can adjust the number to suit your tolerance. A pinch of sugar at the end helps to balance the acidity of the soy sauce and prevents the sauce from feeling too sharp. The combination of all these elements creates a dish that’s both comforting and exciting.
Everything's prepped? Good. Let's get into the real action…

The Method — Step by Step
- Begin by cutting the pork loin into thin, bite‑size strips. The thinner the cut, the faster it will sear, preventing it from becoming rubbery. Make sure the slices are uniform so that each piece cooks evenly. I always lay them out on a cutting board and use a sharp knife, because a dull blade is a recipe for unevenness.
- In a small bowl, whisk together the cornstarch, water, and a pinch of salt to create a smooth slurry. This will be your thickening agent. The key is to avoid lumps; a fine whisk or a small sieve does wonders. This slurry should be ready before you start cooking the pork.
- Heat a wok or large skillet over medium‑high heat and add the peanut oil. Once the oil shimmers, add the pork in a single layer, letting it sear without stirring for about 30 seconds. Flip the pieces to achieve a beautiful caramelized crust. The pork should release easily from the pan once it’s properly seared.
- Remove the pork and set it aside on a plate. In the same pan, toss in the minced ginger and chopped Thai chilis, letting them sizzle for 10–15 seconds. The aroma that rises is the first hint that this dish is about to become extraordinary. Be careful not to burn the ginger; a quick stir keeps it from scorching.
- Add the garlic chives to the pan and stir-fry for just 30 seconds, until they start to wilt but still retain their crunch. This is the moment of truth: if you overcook them, you lose the vibrant snap that’s essential to the dish. Keep the heat high to ensure a quick, crisp finish.
- Return the pork to the pan, then pour in the dark soy sauce, Shaoxing wine, and the remaining dark soy sauce from the sauce mixture. Stir everything together, letting the sauce coat each piece of pork. The sauce should begin to thicken as it warms.
- Quickly drizzle the cornstarch slurry over the mixture, stirring vigorously. The sauce should thicken to a glossy consistency that clings to the pork and chives. This step is crucial; a thin sauce will leave the dish looking watery. If it’s too thick, add a splash of water to reach the desired sheen.
- Finish with the chicken bouillon powder and a final sprinkle of sugar. Taste and adjust the seasoning if needed. The dish should have a balanced sweet–salty profile with a hint of umami. Serve immediately over steamed rice or your favorite noodle base.
That’s it— you did it. But hold on, I've got a few more tricks that'll take this to another level…
Insider Tricks for Flawless Results
The Temperature Rule Nobody Follows
Keep the wok at a steady, high heat; this ensures the pork sears quickly and locks in juices. A temperature that’s too low will cause the pork to steam rather than brown, leading to a soggy texture. If you’re using a gas stove, let the flame burn down to medium‑high before adding the oil. Once the oil shimmers, the pork should sizzle immediately.
Why Your Nose Knows Best
Before adding the sauce, let the pork finish searing, and then take a quick sniff. A slightly smoky aroma signals that the Maillard reaction is at its peak. That’s the sweet spot for flavor; if you add the sauce too early, you’ll mask that subtle nuttiness.
The 5‑Minute Rest That Changes Everything
After cooking, let the dish rest for five minutes off the heat. This allows the flavors to meld and the sauce to thicken slightly. It also gives the pork a chance to relax, preventing it from becoming chewy. I always cover the pan with foil to keep the heat trapped.
The Quick Blanch Trick
Blanching the garlic chives for 15 seconds in boiling water, then plunging them into ice water, locks in their green color and crispness. This step is often overlooked but makes a huge difference in presentation. It’s especially useful if you’re serving the dish in a crowd where visual appeal matters.
The Sauce Ratio
The sauce should be thick enough to coat the pork but not so heavy that it drowns the ingredients. A good rule of thumb is to use about 1.5 tablespoons of sauce per 8 oz of pork. If the sauce feels thin, add a splash of water or a bit more cornstarch slurry.
Creative Twists and Variations
This recipe is a playground. Here are some of my favorite ways to switch things up:
Citrus Kick
Add a squeeze of fresh lime or a tablespoon of rice vinegar at the end for a bright, acidic lift that cuts through the richness. The citrus also pairs well with the garlic chives, adding a refreshing contrast. This variation is perfect for a summer dinner.
Spicy Thai
Swap the Thai chilis for fresh sliced bird’s eye chilies and add a dash of fish sauce for an extra layer of umami. The heat becomes more pronounced, and the fish sauce introduces a deep, savory undertone. This version is great for those who love a fiery bite.
Mushroom Medley
Incorporate sliced shiitake or button mushrooms during the searing stage. The mushrooms absorb the sauce and add a meaty texture that pairs well with the pork. This twist is ideal for a more hearty, earthy flavor profile.
Low‑Carb Version
Serve the dish over cauliflower rice or shirataki noodles instead of regular rice. The low‑carb base keeps the dish light while still delivering the same punch of flavor. This variation is perfect for keto or paleo diets.
Vegetarian Swap
Replace the pork with thinly sliced beef or tofu for a vegetarian-friendly option. The same sauce and technique apply, but the protein choice changes the overall taste. This version works well for a quick weeknight meal.
Storing and Bringing It Back to Life
Fridge Storage
Store the stir‑fry in an airtight container for up to three days. The sauce may thicken slightly in the fridge, so add a splash of water when reheating to restore its original consistency. Keep the pork and chives separate if you’re worried about the vegetables becoming soggy.
Freezer Friendly
Freeze the dish in a freezer‑safe container for up to two months. When reheating, thaw overnight in the refrigerator, then gently reheat on the stove with a splash of water. The texture remains tender, and the flavor stays intact.
Best Reheating Method
Reheat the dish in a non‑stick skillet over medium heat, stirring occasionally. Add a tablespoon of water or broth to keep the sauce from drying out. The dish should be heated through in about five minutes, and the aroma will remind you of the original cooking.