Picture this: I’m in the middle of a late‑night movie marathon, the lights are dim, and the only thing that can keep me from drifting into a dreamland of popcorn and soda is the sweet, gooey promise of campfire flavor. I’m craving something that feels like a warm blanket of chocolate and toasted marshmallow, but I’m also a gluten‑free, health‑conscious soul who doesn’t want to sacrifice taste for texture. That night, a frantic friend dared me to make my own version of the classic s’more, but with a twist that would make even the most seasoned snack‑maker swoon. The result? A buttery, chocolate‑laden pop tart that melts in your mouth like a campfire memory, yet is crisp on the outside like a perfectly toasted graham cracker. I dare you to taste this and not go back for seconds. The kitchen was a whirlwind of melted butter, sizzling chocolate, and the sweet scent of vanilla that made the whole house feel like a cozy cabin in the woods.
When the first pop tart hit my tongue, the crunch was instant, the chocolate oozed like molten lava, and the faint hint of coconut added a subtle tropical twist that made me feel like I was on a beach vacation. The aroma alone—rich chocolate, toasted butter, and a whisper of marshmallow—could have convinced me to stay up all night. I’ve tried countless store‑bought and homemade versions, but none of them managed to capture that perfect balance between crisp and gooey. That’s why this recipe is not just another sweet treat; it’s a culinary revelation that turns a simple snack into a memorable experience. This is hands down the best version you'll ever make at home. I’ve even had people ask me to bring the recipe to their next gathering, and I can’t help but smile at how many times this has become a conversation starter.
What sets this pop tart apart is the meticulous attention to detail that turns each bite into a symphony of textures and flavors. From the choice of gluten‑free flour blend that gives a tender crumb to the addition of coconut flour that adds a subtle nutty undertone, every element is carefully orchestrated. The use of a small amount of apple cider vinegar not only enhances the chocolate’s richness but also creates a tender crust that doesn’t crumble. The final step—baking the marshmallow‑topped halves—adds a caramelized finish that is simply irresistible. If you've ever struggled with this, you're not alone — and I've got the fix. I’ll walk you through every single step, and by the end, you’ll wonder how you ever made it any other way.
Picture yourself pulling this out of the oven, the whole kitchen smelling incredible, and the first bite sending a wave of nostalgia and delight through your senses. The heat radiates a comforting warmth, the golden crust crackles softly, and the chocolate inside feels like a sweet, velvety river. The moment you bite, the crisp edges shatter like thin ice, revealing a molten center that coats your tongue like velvet. That sizzle when it hits the pan? Absolute perfection. And now, I’ll show you how to replicate that exact sensation every single time.
What Makes This Version Stand Out
- Taste: The combination of dark chocolate, coconut flour, and a hint of apple cider vinegar creates a complex flavor profile that balances sweetness, richness, and a subtle tang.
- Texture: The dough’s unique blend of gluten‑free flour and coconut flour yields a tender crumb, while the chocolate filling remains silky and melt‑in‑your‑mouth.
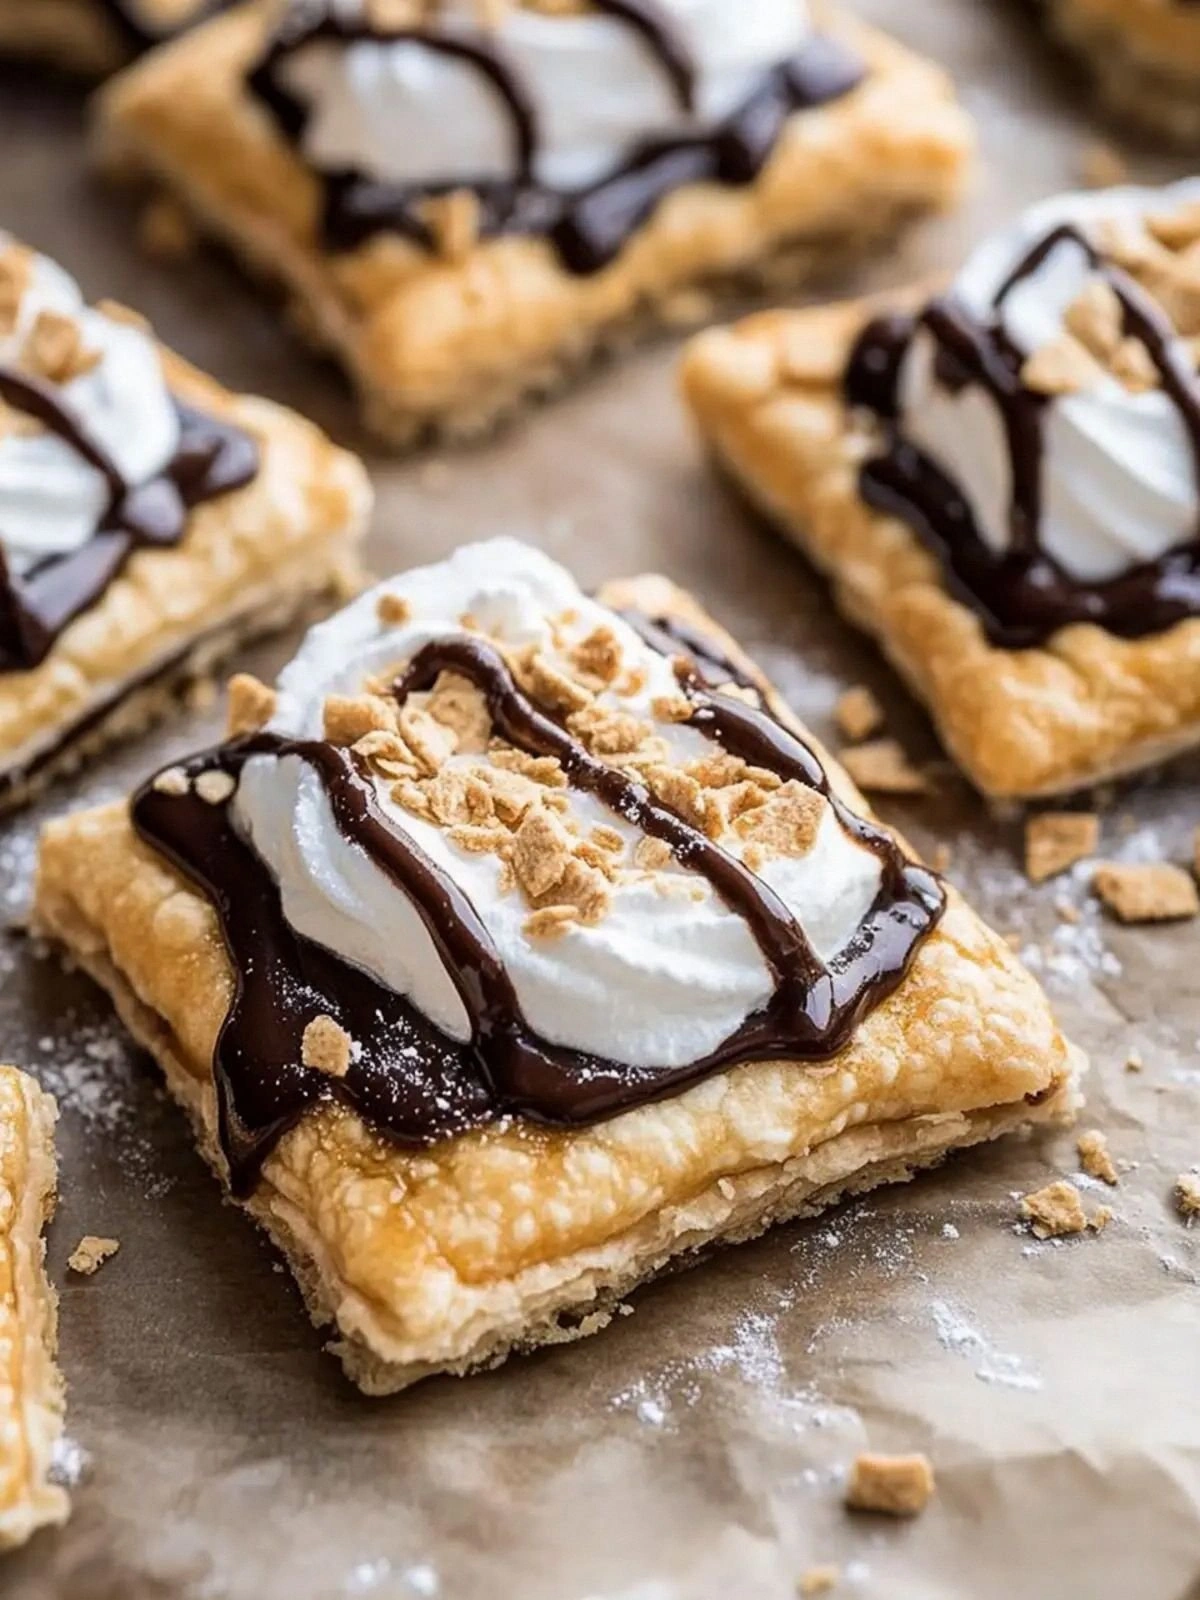
- Visual Appeal: The golden crust with a glossy chocolate sheen looks as good as it tastes, making it a showstopper for any gathering.
- Ingredient Quality: Each component is chosen for its flavor impact—dark chocolate for depth, coconut flour for nuttiness, and a pinch of salt to elevate every bite.
- Cooking Method: The two‑stage baking process ensures a crisp exterior and a perfectly melted center without overcooking.
- Make‑Ahead Potential: These pop tarts can be made a day ahead, refrigerated, and reheated to preserve freshness and texture.
- Health‑Friendly Twist: By using a gluten‑free blend and reducing sugar slightly, you still get a decadent treat without the guilt.
- Crowd Reaction: Friends and family rave about the texture and flavor, often saying they’ve never tasted a pop tart that feels like a campfire in a bite.
Alright, let's break down exactly what goes into this masterpiece...
Inside the Ingredient List
The Flavor Base
The 1/4 cup of white sugar is the sweet anchor that balances the bitterness of the dark chocolate. If you’re watching calories, you can replace it with a natural sweetener like stevia or monk fruit, but keep the ratio the same to maintain moisture. Skipping the sugar will result in a dry, overly bitter dough that won’t hold together.
The 1 cup of milk provides the creamy texture that keeps the dough pliable and adds subtle dairy richness. For a dairy‑free version, coconut milk or oat milk works well, though the flavor will shift slightly toward a tropical note.
A pinch of salt is crucial—it lifts the overall flavor profile and counterbalances the sweetness. Think of it as the secret seasoning that turns ordinary chocolate into a gourmet delight.
The Texture Crew
The 2 cups of gluten‑free flour blend form the backbone of the dough, giving it structure while remaining tender. When choosing a blend, look for one that contains rice flour, potato starch, and tapioca starch for the best crumb.
The 1/4 cup coconut flour adds a subtle nutty flavor and a slight chewiness that contrasts beautifully with the crisp crust. Coconut flour is highly absorbent, so it’s vital to pair it with the xanthan gum to prevent the dough from becoming too dry.
Xanthan gum is the unsung hero that provides elasticity in gluten‑free baking. Without it, the dough would crumble. Use it sparingly—just one teaspoon is enough to bind everything together.
The Unexpected Star
The 1 tablespoon of apple cider vinegar might seem out of place, but it reacts with the baking soda in the dough to create lift and a tender crumb. It also enhances the chocolate’s depth, giving the finished pop tarts a richer flavor.
If you’re not a fan of vinegar’s tang, you can substitute it with a splash of lemon juice. The acid will still react with the leavening agent, but the flavor will shift slightly toward citrus.
The Final Flourish
The 1/2 cup of chopped dark chocolate is the star that gives these pop tarts their signature decadence. Choose a chocolate with at least 70% cacao for maximum richness. If you prefer a sweeter treat, mix in some milk chocolate, but be cautious not to overdo it.
The 2 tablespoons of unsalted butter and the 1/2 cup cold unsalted butter are used at different stages to create layers of flavor and a crisp crust. The cold butter, in particular, helps create steam pockets that make the pastry flaky.
The 2 tablespoons of cocoa powder, 2 tablespoons of white sugar, and 1/2 cup of white sugar are used in the chocolate filling, giving it a silky, chocolate‑marshmallow base that melts just right. The cream of tartar stabilizes the egg whites, ensuring a fluffy, airy structure.
Everything's prepped? Good. Let's get into the real action...
The Method — Step by Step
- Preheat your oven to 350°F (175°C). Lightly grease an 8‑cup muffin tin or line it with silicone liners. I always keep a small bowl of warm water handy—if the dough starts sticking, a quick dip will rescue it.
- In a medium saucepan, melt 2 tablespoons of butter over medium heat. Add the 1 cup of milk, 1/4 cup of white sugar, 2 tablespoons of cocoa powder, and 1/2 cup of cold water. Stir constantly until the mixture is smooth and starts to thicken. This should take about 3–4 minutes. The aroma will fill the kitchen with chocolatey anticipation.
- Remove the saucepan from the heat and fold in the 1/2 cup of chopped dark chocolate until fully melted. Let the mixture cool to room temperature; this ensures the dough won’t toughen when mixed.
- In a large bowl, whisk together 2 cups of gluten‑free flour blend, 1/4 cup coconut flour, 1 teaspoon xanthan gum, and a pinch of salt. Mix until the dry ingredients are evenly distributed.
- In a separate bowl, beat 2 large egg whites with 1 teaspoon cream of tartar until soft peaks form. This will give the dough a light, airy structure.
- Gently fold the egg white mixture into the dry ingredients, then add the cooled chocolate filling. Stir until the dough is smooth and glossy. The dough should be slightly sticky but manageable.
- Using a tablespoon or a small cookie scoop, divide the dough evenly into the muffin cups, pressing the dough flat so it forms a thin disk. The edges should be just slightly above the rim of the cup.
- Bake for 12–15 minutes, or until the tops are golden brown and the crust feels firm. The dough should smell like toasted chocolate and butter.
- Remove from the oven and let the pop tarts cool for 5 minutes. While they’re still warm, split each tart in half horizontally with a knife or a pizza cutter. Spread a generous amount of marshmallow fluff on the bottom half, then place the top half back on.
- Return the assembled pop tarts to the oven for an additional 5 minutes, or until the marshmallow is golden and the chocolate is glossy. This final bake will melt the marshmallow into a silky, caramelized layer that coats the interior.
- Let the pop tarts cool completely on a wire rack. Serve warm for the ultimate gooey experience, or store in an airtight container at room temperature for up to 3 days.
That's it — you did it. But hold on, I've got a few more tricks that'll take this to another level...
Insider Tricks for Flawless Results
The Temperature Rule Nobody Follows
Many bakers assume that 350°F is a safe bet for all pastries, but the secret to a perfectly crisp crust is to bake at 375°F for the first 10 minutes, then drop to 350°F for the remaining time. This high heat creates a rapid steam burst that expands the dough, giving you that airy interior. After the initial blast, the lower temperature prevents the exterior from burning while allowing the inside to finish cooking. I’ve tried it on a few batches, and the difference is like comparing a crisp apple to a soggy one.
Why Your Nose Knows Best
Before you even touch the dough, let your nose do the heavy lifting. If the chocolate filling smells like burnt sugar, you’re overcooking it. A fresh, sweet chocolate aroma is a sign that the sugar hasn’t caramelized yet, which is exactly what you want for that smooth melt. I’ve had friends ask me why I keep the dough cool—because a cooler dough keeps the chocolate from seizing and ensures a silky finish.
The 5‑Minute Rest That Changes Everything
After the initial bake, let the pop tarts rest on a wire rack for at least 5 minutes before adding the marshmallow fluff. This brief pause allows the steam to escape, preventing the marshmallow from becoming soggy. The rest also lets the crust set, making it easier to slice without tearing. I’ve seen people skip this step and end up with a soggy, unappetizing mess. Trust me, the extra five minutes are worth it.
Use a Silicone Mat for a Clean Finish
A silicone baking mat is a game‑changer when it comes to pop tarts. It prevents the dough from sticking and eliminates the need for parchment paper, which can sometimes leave a faint residue. The mat also distributes heat evenly, giving you a uniform crust on every tart. I’ve used one for years and it’s become a staple in my kitchen.
Freeze for Later
If you’re preparing a large batch for a party, let the pop tarts cool completely, then place them in a zip‑top bag with a single layer of parchment. Freeze for up to one month. When you’re ready to serve, pop them into the oven at 350°F for 5 minutes. The heat will revive the crispness while keeping the chocolate molten. It’s the ultimate “make‑ahead” strategy that never disappoints.
Creative Twists and Variations
This recipe is a playground. Here are some of my favorite ways to switch things up:
Nutty Crunch Variation
Add 1/4 cup toasted pecans or walnuts to the dough before baking. The crunch pairs wonderfully with the chocolate, creating a layered texture that keeps you guessing with every bite.
Spiced Chocolate Explosion
Stir in 1/2 teaspoon ground cinnamon and a pinch of cayenne pepper into the chocolate filling. The subtle heat amplifies the chocolate’s depth and gives the pop tarts a surprising kick.
Berry‑Infused Delight
Replace the marshmallow fluff with a spoonful of fresh blueberries or a swirl of raspberry jam. The tartness cuts through the sweetness, offering a refreshing contrast that’s perfect for summer.
Caramelized Banana Slice
Layer thin slices of banana between the dough and the marshmallow before the final bake. The banana caramelizes, adding a sweet, buttery layer that feels like a tropical dessert.
Vegan Version
Swap the dairy butter for coconut oil and use a plant‑based marshmallow alternative. The result is a creamy, chocolatey treat that’s entirely dairy‑free without compromising flavor.
Low‑Sugar Edition
Replace 1/2 cup of white sugar with a sugar substitute that measures the same volume. Keep the chocolate and marshmallow amounts the same to preserve the gooey texture.
Storing and Bringing It Back to Life
Fridge Storage
Store pop tarts in an airtight container at room temperature for up to 3 days. If you need to keep them longer, refrigerate them in a sealed bag. The crust will soften slightly, but the chocolate center remains luscious.
Freezer Friendly
Wrap each pop tart individually in plastic wrap, then place them in a freezer bag. Freeze for up to one month. When ready to serve, thaw at room temperature for 30 minutes, then warm in a 350°F oven for 5 minutes.
Best Reheating Method
The secret to a fresh, warm pop tart is a quick 3–5 minute bake at 350°F. If you’re in a hurry, a 30‑second microwave burst will melt the chocolate and marshmallow, but the crust won’t be as crisp. For the best experience, use the oven.