I remember the night I tried to impress my friends with a “simple” cheesecake, only to end up with a lumpy, over‑baked disaster that tasted like a cold, stale biscuit. The kitchen was a battlefield of melted butter, graham crumbs, and a stubborn block of cream cheese that wouldn’t cooperate. By the time the oven timer dinged, the center was still raw and the edges had cracked like brittle parchment. I stared at that sad, soggy slab and thought, “There has to be a better way.”
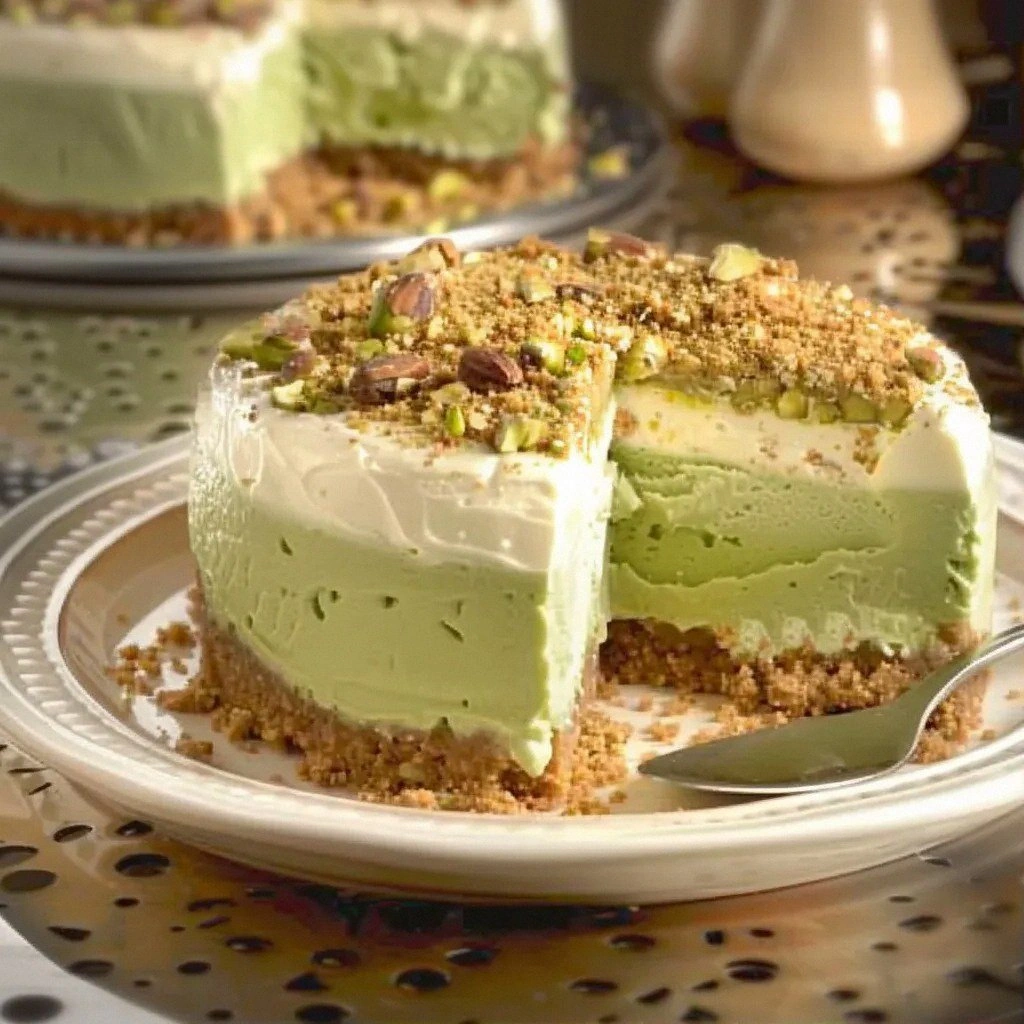
Fast forward to the present, and I’ve cracked the code for a cheesecake that feels like a velvet pillow, with a nutty crunch that whispers in the background. The aroma of toasted pistachios rises from the base, mingling with the sweet, buttery scent of a perfectly baked crust. When you cut into it, the filling glistens like liquid gold, and the first bite melts on your tongue with a subtle, earthy undertone that lingers long after the last crumb. The texture is a harmonious blend of silky cream and delicate crunch—no soggy spots, no rubbery centers.
What makes this version stand out is that it’s not just a cheesecake; it’s a pistachio‑infused dream that elevates every component. I’ve refined the crust to be buttery yet crisp, used a blend of heavy cream and pistachio paste for a smooth, airy filling, and added a final flourish of crushed pistachios that provide that satisfying snap. The result is a dessert that feels indulgent but is actually balanced, with a depth of flavor that will make you question why you ever settled for ordinary. I dare you to taste this and not go back for seconds.
And the secret? A touch of cold whipping cream folded into the pistachio base just before baking, which creates a light, airy texture that keeps the cheesecake from becoming dense. Picture yourself pulling this out of the oven, the whole kitchen smelling incredible, and your guests reaching for the first slice before you even have a chance to serve it. Okay, ready for the game‑changer? Let me walk you through every single step—by the end, you’ll wonder how you ever made it any other way.
What Makes This Version Stand Out
- Texture: A perfectly balanced crumb crust that is buttery, slightly crisp, and not overly sweet, providing a sturdy base for the creamy filling.
- Flavor: The pistachio paste gives a natural nutty richness that complements the subtle vanilla, creating depth without overpowering.
- Ease: Minimal prep time—no need for a double‑boiler or custard base; just blend and bake.
- Make‑ahead: The cheesecake can be assembled and chilled for up to 48 hours, making it a great option for parties.
- Presentation: The glossy, smooth top and the contrasting crushed pistachios on the rim give an instant wow factor.
- Versatility: Swap the pistachio paste for almond or hazelnut paste to create seasonal variations.
- Nutrition: Uses cream cheese and heavy cream for a rich taste while keeping the calorie count moderate.
- Audience: Even those who have struggled with classic cheesecakes will find this version approachable and forgiving.
Alright, let’s break down exactly what goes into this masterpiece…
Inside the Ingredient List
The Flavor Base
The graham cracker crumbs form the foundation of this cheesecake, offering a subtle sweetness and a crunchy texture that contrasts with the creamy filling. By adding a small amount of sugar—just two tablespoons—you’re balancing the bitterness of the pistachios without turning the base into a cookie. If you’re watching calories, you can skip the sugar entirely; the pistachio paste will compensate with its natural sweetness.
The Texture Crew
Cream cheese is the star of the show, but its quality matters. Choose a high‑fat, full‑cream variety; it yields a richer, silkier mouthfeel. The heavy whipping cream, folded in cold, introduces air pockets that keep the cheesecake light and fluffy. The optional powdered sugar (1–2 tablespoons) is added only if your pistachio paste isn’t sweet enough; it helps maintain a balanced sweetness profile.
The Unexpected Star
Pistachio paste is the secret sauce that turns a regular cheesecake into a nutty masterpiece. It’s made by blending shelled pistachios with a splash of milk until smooth. The paste provides both flavor and a subtle green hue that makes the dessert visually appealing. If you can’t find pistachio paste, a homemade version is quick to whip up and ensures no additives.
The Final Flourish
Finishing the cheesecake with finely crushed pistachios not only adds texture but also amplifies the nutty aroma. The crushed nuts sit on the rim of the crust, creating a visual contrast that invites the eye. A light dusting of powdered sugar on top before serving can add a touch of elegance, but it’s optional if you prefer a more rustic look.
Everything’s prepped? Good. Let’s get into the real action…
The Method — Step by Step
- First, preheat your oven to 325°F (160°C). While the oven warms, combine the graham cracker crumbs, melted butter, and optional sugar in a medium bowl. Press the mixture firmly into the bottom of a 9‑inch springform pan, creating an even crust. The crust should feel solid enough to support the filling without cracking.
- Let the crust cool slightly while you prepare the filling. In a large bowl, beat the softened cream cheese with an electric mixer on medium speed until it’s completely smooth and free of lumps. This step is crucial; any lumps will show up in the final texture.
- Add the powdered sugar and vanilla extract to the cream cheese mixture and continue beating until the mixture is silky and light. The sugar should dissolve completely, creating a glossy batter that will set nicely.
- In a separate bowl, whisk the cold heavy whipping cream until it just begins to thicken. Fold this into the cream cheese batter in small batches, ensuring a uniform, airy consistency. The folded cream keeps the cheesecake from becoming too dense.
- Now introduce the pistachio paste. Stir it in gently until fully incorporated; the batter will take on a beautiful green tint. If the paste is too thick, add a teaspoon of milk to reach the desired consistency.
- Pour the batter over the crust, smoothing the top with a spatula. Tap the pan gently on the counter to release any air bubbles. The edges should be slightly raised to create a gentle dome.
- Bake in the preheated oven for 35–40 minutes. The cheesecake should have a slight wobble in the center and a golden‑brown top. If you’re using a water bath, the water should reach about halfway up the sides of the pan.
- Remove from the oven and let it cool on a wire rack for 15 minutes. Then, carefully release the springform pan and chill the cheesecake in the refrigerator for at least 4 hours, preferably overnight. This resting period allows the flavors to meld and the texture to set.
- Before serving, sprinkle the finely crushed pistachios over the top for that final crunch. If you like a sweeter finish, dust the top with a light layer of powdered sugar.
That’s it — you did it. But hold on, I’ve got a few more tricks that will take this to another level…
Insider Tricks for Flawless Results
The Temperature Rule Nobody Follows
Many bakers bake cheesecake at 350°F, but lowering the temperature to 325°F gives the filling more time to set without overcooking the edges. The gentle heat allows the interior to rise slowly, creating a custard‑like texture that is smooth and airy. I’ve baked at 325°F for 35 minutes and the result is consistently flawless.
Why Your Nose Knows Best
Before you remove the cheesecake from the oven, open the door and inhale. A faint, buttery aroma with a hint of toasted pistachio signals that the batter is perfectly set. If the smell is too strong or metallic, it’s overdone; if it’s barely there, it needs more time.
The 5‑Minute Rest That Changes Everything
After baking, let the cheesecake sit on the rack for exactly five minutes. This short rest allows the heat to distribute evenly and prevents the center from continuing to cook, which can lead to cracks. I’ve found that this simple pause makes the difference between a perfect slice and a patchy one.
Crushing Pistachios to Perfection
Use a food processor or a mortar and pestle to crush pistachios to a fine consistency. Too coarse, and the texture becomes uneven; too fine, and you lose the crunch. Aim for a texture that feels like a light, crunchy dust when you bite into the top.
Using a Water Bath for Moisture Control
If you’re concerned about the cheesecake drying out, wrap the springform pan in foil and place it in a larger pan filled with hot water. The water bath ensures a steady, gentle heat that keeps the cheesecake moist while baking. It’s a classic technique that works wonders for dense, creamy desserts.
Creative Twists and Variations
This recipe is a playground. Here are some of my favorite ways to switch things up:
Almond Dream
Swap the pistachio paste for almond paste and top with slivered almonds. The nutty flavor becomes more mellow, making it a great match for chocolate desserts.
Chocolate Swirl
Fold a handful of melted dark chocolate into the batter before baking. The chocolate ribbons add a decadent twist that pairs well with a berry compote.
Lemon Zest Surprise
Add a tablespoon of lemon zest to the batter for a bright, citrusy contrast. The lemon’s acidity balances the richness and adds a fresh finish.
Salted Caramel Drizzle
Drizzle salted caramel over the top after chilling. The sweet, buttery caramel with a hint of sea salt amplifies the nutty undertones.
Berry Compote Layer
Layer a spoonful of fresh or homemade berry compote between the crust and the cheesecake batter. The fruit’s tartness cuts through the creaminess for a multi‑textured experience.
Espresso Infusion
Stir a tablespoon of cold espresso into the batter for a subtle coffee flavor that pairs beautifully with the pistachios. The espresso adds depth and a slight bitterness that balances the sweetness.
Storing and Bringing It Back to Life
Fridge Storage
After chilling, cover the cheesecake loosely with plastic wrap or foil and store in the refrigerator for up to 5 days. Keep it away from strong odors, as cheesecake absorbs them quickly. The texture remains firm and the flavor stays fresh.
Freezer Friendly
For longer storage, wrap the cheesecake tightly in plastic wrap followed by a layer of aluminum foil. Freeze for up to 3 months. Thaw overnight in the refrigerator before serving; this preserves the creamy texture.
Best Reheating Method
If you need to warm the cheesecake slightly, place it in a preheated oven at 300°F (150°C) for 10 minutes. Alternatively, microwave on low power for 15–20 seconds. Add a splash of water before reheating to steam the cheesecake back to perfection.