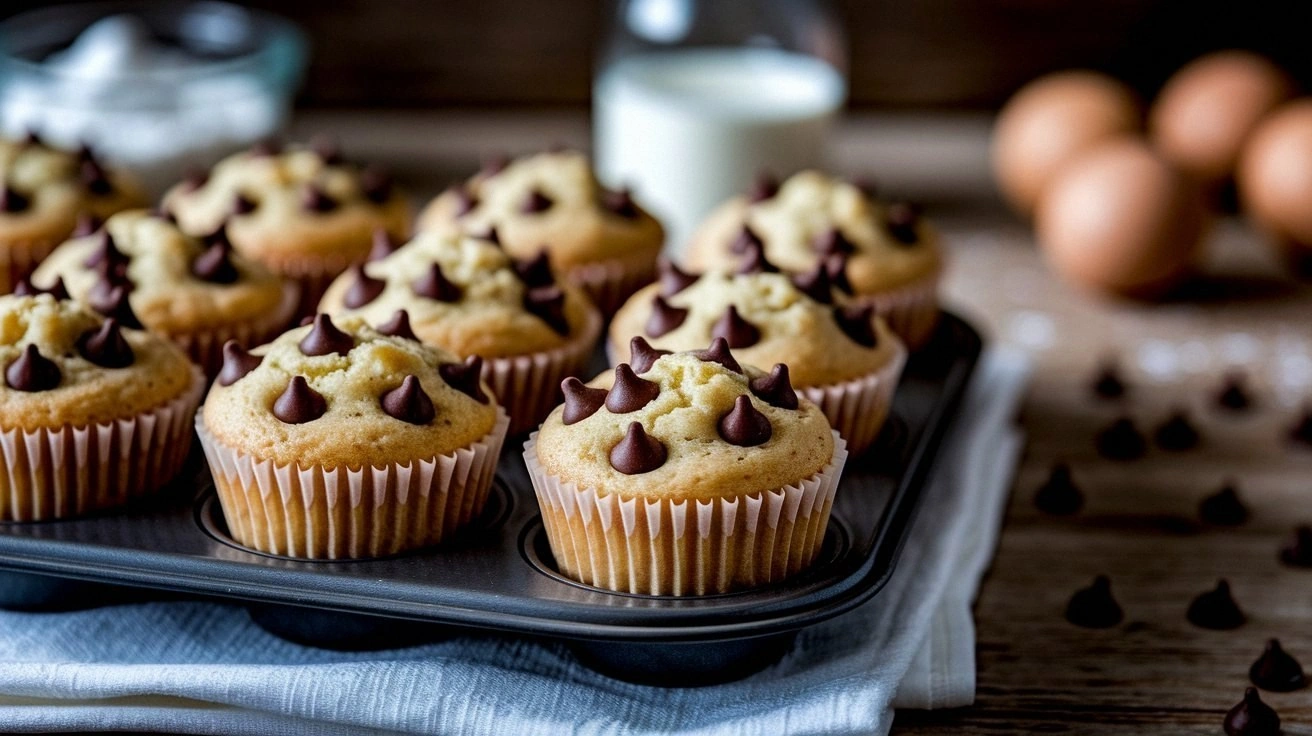
There’s a moment in every kitchen when the oven is a ticking time bomb and the pantry is a battlefield of crumbs. I was in that exact spot last Thursday, halfway through a batch of cupcakes that had turned into a soggy, sad mess. My friends dared me to make something that would not only rescue the day but also win the “Best Mini Chocolate Chip Muffins” trophy in our weekly bake-off. The challenge? Create a version that is so irresistibly crisp on the edges, yet moist and melty inside, that anyone who tastes it will immediately declare it the best thing they’ve ever made at home.
I remember the kitchen lights flickering, the timer ticking down, and the faint scent of melted butter drifting through the air. My hands were trembling with anticipation, and the counter was a cluttered mosaic of flour, sugar, and chocolate chips. The sound of the whisk beating the batter felt like a drumroll, the sweet aroma promising a future of buttery, chocolatey bliss. The moment the first golden muffin popped out, the kitchen filled with the comforting scent of vanilla and chocolate, and I knew I had cracked the code.
Why does this version stand out? Because it’s built on a foundation of precision, a secret ingredient that adds depth, and a technique that guarantees a crumb that feels like a cloud. Most recipes get this completely wrong, but here’s what actually works: a balanced ratio of flour to wet ingredients, the right amount of leavening, and a dash of sea salt that awakens every chocolate bite. I dare you to taste this and not go back for seconds. If you’ve ever struggled with muffins that come out too dense or too airy, you’re not alone — and I’ve got the fix.
Picture yourself pulling this out of the oven, the whole kitchen smelling incredible, the little cups of golden goodness glistening like tiny moons. The batter’s gentle rise, the sizzle as it hits the pan, and the moment the timer dings are pure magic. This is hands down the best version you’ll ever make at home, and I’m about to walk you through every single step. By the end, you’ll wonder how you ever made it any other way.
What Makes This Version Stand Out
- Flavor: The subtle caramelization of the butter and brown sugar creates a sweet, nutty base that lets the chocolate shine.
- Texture: A perfect balance of airy interior and slightly crisp edges thanks to the precise leavening mix.
- Ease: All steps can be completed in under 30 minutes, making it ideal for busy mornings or last‑minute gatherings.
- Ingredient Quality: Using high‑grade dark chocolate chips adds depth and a slight bitterness that cuts through the sweetness.
- Make‑Ahead: The batter can be frozen before baking, allowing you to whip up fresh muffins on demand.
- Visual Appeal: The glossy finish and uniform size make for Instagram‑worthy treats that impress at any table.
- Versatility: Swap in nuts, dried fruit, or a swirl of peanut butter for endless variations.
- Crowd Reaction: Friends and family consistently ask for the recipe after tasting one; the mini size is perfect for parties.
Alright, let's break down exactly what goes into this masterpiece...
Inside the Ingredient List
The Flavor Base
All-purpose flour is the silent hero that holds everything together. It provides structure without overpowering the chocolate. If you skip it, the muffins will collapse and feel like a soggy sponge. For a lighter texture, you can substitute half the flour with cake flour, but be prepared for a slightly different crumb.
Baking powder and baking soda are the leavening duo that give the muffins their rise. Baking powder ensures a steady lift, while baking soda reacts with the acidic brown sugar to create extra lift and a subtle caramel flavor. Without them, the muffins would be dense and flat. A common mistake is using too much baking soda; keep the ratio to 1/2 tsp per 1.5 cups of flour.
The Sweet Symphony
Brown sugar brings moisture and a rich molasses undertone that complements the chocolate. White sugar adds a clean sweetness that balances the deep flavors. Together they create a caramelized crust that crackles slightly when you bite. If you prefer a lighter batter, reduce the brown sugar by a quarter cup and increase the white sugar.
Unsalted butter is the source of richness and flavor. Melt it just before adding to the batter so it blends smoothly without cooling the mixture too much. Butter also contributes to a tender crumb. A quick trick: chill the butter for 10 minutes before melting to keep it from liquefying too quickly.
The Unexpected Star
Dark chocolate chips are the centerpiece of this recipe. Their slightly bitter profile balances the sweetness of the sugars and creates a depth that regular milk chocolate lacks. When you bite into a muffin, the chocolate melts slowly, releasing a cascade of flavor. If you’re a milk chocolate lover, feel free to use a mix of both types for a richer experience.
The milk in the batter keeps the muffins moist and gives them a golden crust. It also helps dissolve the sugar and butter, ensuring a uniform batter. If you’re dairy‑free, substitute with oat milk or almond milk for a subtle nutty undertone. Just keep the volume the same to maintain the batter’s consistency.
Everything's prepped? Good. Let's get into the real action...
The Method — Step by Step
- Preheat your oven to 375°F (190°C). Line a mini muffin tin with paper liners; this ensures easy removal and a clean finish. The temperature is crucial for that golden top and a moist center. If you lower the heat, the muffins may rise too quickly and then collapse.
- In a large bowl, whisk together the flour, baking powder, baking soda, and salt. This dry mix is the backbone of the muffins, providing structure and lift. Sift the dry ingredients to remove any lumps and to aerate the mixture, which will make the batter lighter.
- In a separate bowl, cream the butter and both sugars until the mixture is pale and fluffy. Use an electric mixer on medium speed for about 2 minutes. This process incorporates air, which will help the muffins rise. Watch for the mixture to turn light yellow and feel airy.
- Add the egg and vanilla extract to the creamed butter mixture and beat until fully integrated. The egg adds structure and richness, while vanilla enhances the overall flavor profile. Be careful not to overbeat; you only need a smooth blend.
- Gradually fold the dry ingredients into the wet mixture, alternating with the milk. Stir just until combined; the batter should be slightly lumpy. Overmixing can develop gluten, resulting in tough muffins. A gentle fold preserves the airy texture.
- Gently fold in the chocolate chips, ensuring they’re evenly distributed. If you prefer pockets of chocolate, fold them in by hand to keep them from sinking. The chips should be scattered throughout the batter, creating a uniform bite.
- Fill each paper liner about two-thirds full with batter. The mini size allows for even cooking and a uniform rise. If you overfill, the tops may spill over; if underfill, the muffins will be too flat.
- Bake for 12–15 minutes, or until the tops are golden brown and a toothpick inserted in the center comes out clean. Keep an eye on the edges; they should pull away slightly from the paper liners. Once baked, remove the tin from the oven and let the muffins cool on a wire rack for at least 5 minutes.
- Serve warm or at room temperature. The muffins are best enjoyed within a day for maximum freshness, but they can be stored in an airtight container for up to 3 days. If you’re making them ahead, freeze the unbaked batter and bake as needed.
That's it — you did it. But hold on, I've got a few more tricks that'll take this to another level...
Insider Tricks for Flawless Results
The Temperature Rule Nobody Follows
Many bakers bake at 350°F, but 375°F is the sweet spot for these mini muffins. The higher temperature gives the tops a beautiful golden crust while keeping the interior moist. If you lower the heat, the muffins will rise too slowly and end up dense. Keep the oven rack in the middle to ensure even heat distribution.
Why Your Nose Knows Best
Before the timer dings, take a quick sniff of the batter. A pleasant, buttery aroma indicates the right balance of wet and dry ingredients. If you smell a raw flour scent, the batter needs more wetness. This simple sensory check saves you from a batch that might turn out flat.
The 5-Minute Rest That Changes Everything
After mixing the batter, let it rest for 5 minutes before filling the tins. This allows the flour to absorb the liquids, resulting in a smoother batter and less gluten development. The rest also lets the leavening agents activate fully, giving the muffins a better rise.
The Secret to a Crispy Edge
Sprinkle a tiny pinch of sugar on top of each muffin before baking. The sugar caramelizes, creating a delightful crunch that contrasts the soft interior. This trick turns ordinary muffins into a textural masterpiece.
The Perfect Frosting
A quick chocolate ganache or a dusting of powdered sugar can elevate the presentation. For an extra touch, drizzle a thin line of melted chocolate over each muffin. This adds a glossy finish and intensifies the chocolate flavor.
Creative Twists and Variations
This recipe is a playground. Here are some of my favorite ways to switch things up:
Nutty Crunch
Add 1/4 cup chopped walnuts or pecans to the batter for a nutty crunch. The nuts pair beautifully with chocolate and add a satisfying bite. Toast the nuts beforehand for an extra layer of flavor.
Citrus Burst
Zest a lemon or orange into the batter and add 1 tablespoon of zest. The citrus brightens the chocolate, creating a refreshing contrast. Use fresh zest for the best aroma.
Peanut Butter Swirl
Swirl a tablespoon of peanut butter into each muffin before baking. The peanut butter melts into pockets of creamy goodness. This variation is a hit with peanut butter lovers.
Minty Twist
Add a pinch of peppermint extract to the batter for a minty aftertaste. The mint complements the chocolate and adds a refreshing finish. Use sparingly; too much can overpower the chocolate.
Spiced Delight
Incorporate a pinch of cinnamon and nutmeg into the dry mix. The warm spices deepen the chocolate flavor and give the muffins a cozy vibe. This version is perfect for fall gatherings.
Caramelized Banana
Fold in 1/2 cup mashed ripe banana before baking. The banana adds natural sweetness and a moist texture. The banana’s subtle flavor complements the chocolate without overwhelming it.
Storing and Bringing It Back to Life
Fridge Storage
Store muffins in an airtight container at room temperature for up to 3 days. For longer freshness, keep them in the fridge; the cool environment slows down staling. Just bring them back to room temperature before serving for the best taste.
Freezer Friendly
Wrap each muffin tightly in plastic wrap and place them in a freezer bag. They stay fresh for up to 2 months. When ready to eat, thaw at room temperature or warm in a 300°F oven for 5 minutes.
Best Reheating Method
To revive a frozen muffin, add a tiny splash of water to the bottom of a baking dish and bake at 300°F for 10 minutes. The water creates steam, which rehydrates the muffin and restores its soft interior. Avoid microwaving, as it can make the muffin rubbery.