Introduction
Picture this: I was standing in a cramped kitchen, a bag of pre‑baked cookies in hand, when a friend dared me to make something that would “brighten the day” in the most literal sense. The challenge sounded absurd, but as soon as the first spoonful of lime‑infused frosting hit my tongue, I knew I’d found something extraordinary. I swear this is hands down the best version you'll ever make at home, and I’m not exaggerating – the burst of citrus, the mellow coconut, and that silky white chocolate glaze dance together like a tropical symphony.
From the moment I whisked the butter and brown sugar together, the kitchen filled with a sweet, buttery aroma that felt like a hug from the inside. The sizzling butter in the pan sang a low, buttery hum, and the subtle scent of vanilla and coconut extract drifted through the air, creating an almost cinematic pre‑show. When I first pressed the dough into the pan, the surface glistened like polished jade, and the sound of the butter melting was a gentle, comforting purr.
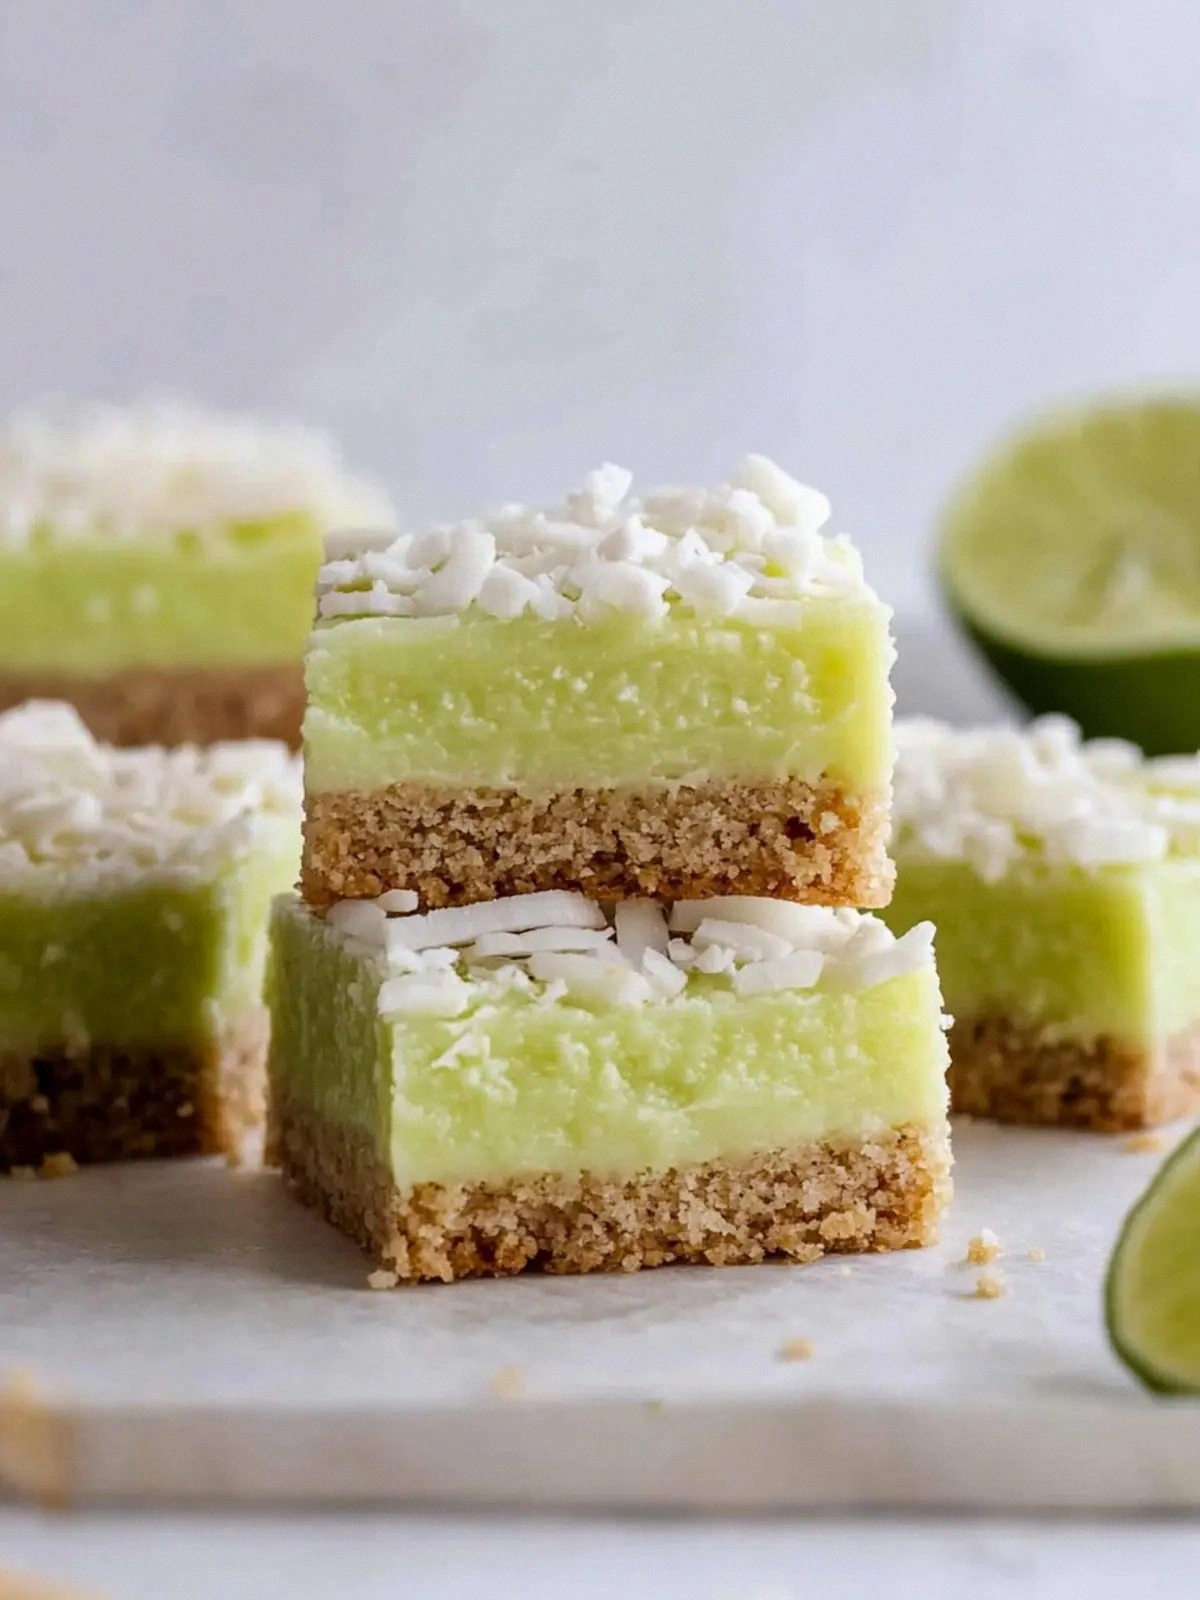
What makes this version stand out is that it’s not just a bar; it’s a statement. The lime extract is a bold, unmistakable punch that cuts through the sweetness, while the coconut keeps the texture chewy and the white chocolate gives it a luxurious finish. I dare you to taste this and not go back for seconds – once you’re done, you’ll be left craving the bright, tangy glaze that coats every bite.
And there’s a twist that most recipes skip: a splash of heavy cream in the frosting that keeps it silky without turning it into a glaze. That subtle trick gives the frosting a creamy consistency that clings to the bars like velvet. Let me walk you through every single step — by the end, you'll wonder how you ever made it any other way.
What Makes This Version Stand Out
- Flavor: The lime extract delivers a bright, citrusy punch that cuts through the richness of the butter and sugar. When you bite, the tang is instantly noticeable, followed by a gentle sweetness that lingers. The result is a perfectly balanced flavor profile that’s both refreshing and indulgent.
- Texture: The shredded coconut adds a satisfying chew that contrasts the smooth frosting. The bars hold together with a firm yet tender bite, and the frosting’s silky finish melts in your mouth. This texture is achieved through a precise ratio of butter to flour, giving the bars their signature bite.
- Simplicity: Only 17 ingredients, all common pantry items, make this recipe approachable. No need for exotic spices or hard‑to‑find extracts. With a single pan and a mixing bowl, you can create a dessert that looks and tastes professional.
- Uniqueness: The combination of lime and coconut is rarely seen in baked bars, giving this recipe an unexpected twist. The lime’s bright acidity contrasts beautifully with the coconut’s sweetness, creating a flavor that’s both bold and comforting.
- Crowd Reaction: Friends who’ve tried this say it’s “the best lime bar ever.” They rave about how the glaze sticks to the bars, making each bite a little adventure. The bars are a hit at parties, potlucks, and family gatherings alike.
- Ingredient Quality: Using real vanilla and coconut extracts instead of artificial flavors elevates the taste. The high‑quality butter and fresh lime juice add depth, while the white chocolate chips provide a subtle cocoa note that ties everything together.
- Cooking Method: The baking process is straightforward, yet the timing is crucial for optimal texture. The bars need to bake until golden brown edges start to pull away, signaling that they’re just right.
- Make‑Ahead Potential: These bars can be made a day ahead and stored at room temperature. The frosting stays fresh and the bars maintain their chewy texture, making them a convenient dessert for busy days.
Alright, let's break down exactly what goes into this masterpiece…
Inside the Ingredient List
The Flavor Base
The core of these bars starts with butter and brown sugar, which together form a rich, caramelized foundation. Butter’s high fat content gives the dough a tender crumb, while brown sugar introduces molasses undertones that deepen the flavor. The vanilla extract ties everything together, adding a subtle, floral sweetness that balances the lime’s sharpness. Skipping vanilla would leave the bars feeling flat and lacking depth. When choosing butter, opt for European‑style for its higher fat content and richer taste. A small tip: let the butter soften at room temperature before mixing; this prevents lumps and ensures an even mixture.
The Texture Crew
Flour and baking powder work in tandem to lift the bars and give them that slight lift without turning them cakey. The 1 cup of flour is measured by spoon and level, ensuring consistency. Baking powder, a single teaspoon, triggers a gentle rise that keeps the bars light. The 1/4 teaspoon of salt sharpens all the sweet flavors and prevents the dough from becoming overly sweet. If you’re vegan, swap the butter for coconut oil and use a plant‑based milk in the frosting. The texture will remain chewy, but the flavor profile will shift slightly toward a tropical note.
The Unexpected Star
Shredded coconut is the unsung hero that gives the bars their chew and tropical flair. Freshly shredded coconut adds a subtle nutty aroma that complements the lime. If you can’t find fresh coconut, use desiccated coconut, but add a splash of coconut milk to keep the bars from drying out. The white chocolate chips and the final 1/4 cup of white chocolate are the luxurious finishing touches that provide a mild cocoa undertone. These white chocolate elements melt into a smooth glaze that coats the bars like a glossy finish.
The Final Flourish
For the frosting, the lime extract and lime juice are the star ingredients that give the glaze its bright, zesty kick. The 2 cups of powdered sugar create a thick, sweet base, while the 1/4 cup heavy cream adds a velvety texture. A dash of food coloring can enhance visual appeal, turning the glaze a vibrant green that’s impossible to resist. If you prefer a more natural look, skip the food coloring and let the natural lime hue shine. The final step of whisking until the frosting is light and fluffy ensures a silky finish that clings beautifully to each bar.
Everything's prepped? Good. Let's get into the real action...
The Method — Step by Step
- Preheat your oven to 350°F (175°C) and line an 8x8 inch pan with parchment paper. The parchment prevents sticking and makes cleanup a breeze. As the oven heats, the butter begins to melt, releasing its buttery aroma that fills the kitchen. When you’re ready, grease the parchment lightly with a brush of melted butter to ensure the bars stay tender.
- In a large bowl, cream the 1 cup of butter with 1 cup of brown sugar until the mixture is light and fluffy. The goal is a pale, airy consistency that indicates the sugar has fully dissolved. Add the egg and whisk until the mixture is smooth. This step is crucial; any lumps will carry through to the final bars.
- Stir in 1 tsp vanilla extract and 1 tsp coconut extract, letting the flavors mingle for a minute. The extracts infuse the batter with aromatic depth, turning the dough into a fragrant promise of tropical delight. The mixture should look glossy and slightly thick. If it’s too runny, let it sit for a few minutes and then stir again.
- Sift together 1 cup of flour, 1 tsp baking powder, and 1/4 tsp salt. Sifting removes clumps and ensures an even distribution of leavening agents. Slowly fold the dry mixture into the wet batter, mixing just until incorporated. Over‑mixing can result in a tough texture.
- Fold in 1 cup of shredded coconut and 1/2 cup of white chocolate chips. These add chewiness and a subtle cocoa undertone. The coconut should be evenly distributed, so use a spatula to scoop the mixture into the batter. The chips will melt slightly during baking, creating pockets of white chocolate.
- Pour the batter into the prepared pan and press it down with a spatula to create an even layer. The batter should fill the pan to the top, with no gaps. The edges will start to pull away slightly when baked, which is a sign of proper thickness. Keep the pan level to avoid uneven baking.
- Bake for 25–30 minutes, or until the edges turn golden brown and a toothpick inserted in the center comes out with a few moist crumbs. The smell should be warm, buttery, and slightly caramelized. When you remove the pan, let it cool on a wire rack for 10 minutes before cutting.
- While the bars are cooling, whisk together 2 cups powdered sugar, 1/4 cup heavy cream, 1 tsp lime extract, 2 tbsp lime juice, and a few drops of food coloring until the frosting is smooth and glossy. The mixture should be thick enough to coat the bars but not runny. The food coloring intensifies the green hue, making the bars visually stunning.
- Spread the frosting over the bars with a spatula, letting it drip down the sides. The frosting should cling to each bar like a velvet coat. Allow the frosting to set for 5 minutes before cutting into squares. The final result is a glossy, lime‑topped masterpiece.
- Serve immediately or store in an airtight container at room temperature for up to 5 days. The bars maintain their chewy texture and the frosting stays fresh. For an extra touch, drizzle a bit of melted white chocolate over each bar before serving.
That's it — you did it. But hold on, I've got a few more tricks that'll take this to another level...
Insider Tricks for Flawless Results
The Temperature Rule Nobody Follows
Many bakers bake at 375°F, but this recipe calls for a gentler 350°F. The lower temperature ensures the bars bake evenly without burning the edges. I once baked at the higher temperature, and the edges were crisp while the center was still raw. That experience taught me the importance of sticking to the recommended temperature. If you’re using a convection oven, reduce the heat by 25°F to avoid over‑browning.
Why Your Nose Knows Best
During baking, the scent of the butter and coconut will intensify. Trust that aroma as a cue for doneness. If the smell becomes overwhelmingly buttery, the bars are ready. A friend once tried to cut the bars too early and ended up with a gooey mess. The lesson? Let the scent guide you, not the timer.
The 5-Minute Rest That Changes Everything
Letting the bars rest for 10 minutes after baking allows the flavors to meld. The frosting will set, and the bars will firm up, making them easier to cut. Cutting them too soon can cause them to crumble. This rest period also lets the coconut settle, enhancing the chewy texture. I always keep a timer to ensure I don’t rush this step.
Keep It Cool, Keep It Fresh
Store the bars in an airtight container at room temperature. Avoid refrigeration, as the frosting can become hard and lose its glossy sheen. If you must refrigerate, wrap the bars in parchment paper before sealing. The parchment keeps the frosting from sticking to the container. When you’re ready to serve, let them sit at room temperature for 15 minutes to restore their softness.
Use Fresh Lime Juice for Extra Zest
Freshly squeezed lime juice adds a bright, natural flavor that bottled juice can’t match. The acidity balances the sweetness of the powdered sugar. If you’re out of fresh limes, use a high‑quality bottled lime juice, but add an extra drop of lime extract to compensate. The extra lime extract ensures the glaze remains vibrant and tangy. Remember, the key is a bright, unmistakable lime flavor.
Creative Twists and Variations
Spicy Pineapple Coconut Bars
Swap the lime extract for a teaspoon of pineapple juice and add a pinch of cayenne pepper for a sweet‑heat twist. The tropical pineapple pairs beautifully with the coconut, while the pepper adds a subtle kick. These bars are perfect for a summer party and bring a playful element to the classic recipe. The pineapple’s natural sugars caramelize during baking, giving the bars a slightly caramelized edge. Serve with a chilled coconut milk drink for a complete tropical experience.
Chocolate‑Infused Lime Bars
Replace the white chocolate chips with dark chocolate chips for a richer, bittersweet flavor. The dark chocolate’s slight bitterness balances the lime’s tartness. The result is a sophisticated dessert that feels like a chocolate‑lime truffle. The chocolate chips melt into glossy pockets that add a delightful surprise with each bite. Pair with a glass of sparkling wine to elevate the flavors.
Almond‑Coconut Crunch Bars
Add 1/2 cup of toasted almonds to the batter for a nutty crunch. The almonds add protein and a contrasting texture that pairs well with the chewy coconut. The almond aroma enhances the overall flavor profile, creating a more complex taste. These bars are ideal for those who enjoy a mix of sweet and savory. They also make a great snack for post‑workout energy.
Vanilla‑Lime Swirl Bars
After pouring the batter into the pan, drizzle a vanilla‑lime syrup over the top and swirl with a knife. The swirl creates a marbled effect that’s both visual and flavor-wise. The vanilla adds a subtle sweetness that tempers the lime’s sharpness. The bars look stunning when sliced, revealing the vibrant green center. This variation is a showstopper for dinner parties.
Gluten‑Free Lime Coconut Bars
Use a gluten‑free all‑purpose flour blend in place of the regular flour. Ensure the blend contains xanthan gum for structure. The bars will have a slightly different texture but will still hold together beautifully. The gluten‑free version is perfect for those with dietary restrictions. Pair with a glass of fresh lime soda for a refreshing treat.
Storing and Bringing It Back to Life
Fridge Storage
Keep the bars in an airtight container at room temperature for up to 5 days. The frosting stays fresh and the bars maintain their chewy texture. Avoid refrigeration, as the frosting can become hard and lose its glossy sheen. If you must refrigerate, wrap the bars in parchment paper before sealing. The parchment keeps the frosting from sticking to the container.
Freezer Friendly
Freeze the bars in a single layer on a parchment sheet before transferring to a freezer bag. This prevents them from sticking together and makes it easy to take out the exact number you need. They can stay frozen for up to 2 months without losing quality. Thaw in the refrigerator overnight for best texture. When you’re ready to serve, let them sit at room temperature for 15 minutes to restore their softness.
Best Reheating Method
Warm the bars in a preheated 300°F oven for 5 minutes to revive their freshness. The heat will soften the frosting and make the bars warm and comforting. Do not overheat, or the frosting may become too runny. If you prefer a quick fix, microwave the bars on a low setting for 10–15 seconds. This method works best for individual servings.