I still remember the night I accidentally set my kitchen on fire while trying to make a “quick” dessert for a friend's birthday. The oven door was open, the batter was too thick, and the kitchen smelled like burnt sugar and regret. By the time the smoke alarm started wailing, I realized I had been chasing a myth: that blackberries could be turned into a comforting, buttery cobbler without the fuss of a proper recipe. I stared at the pile of blackberries on my counter, and a spark of inspiration flickered—what if I could turn that mess into a masterpiece?
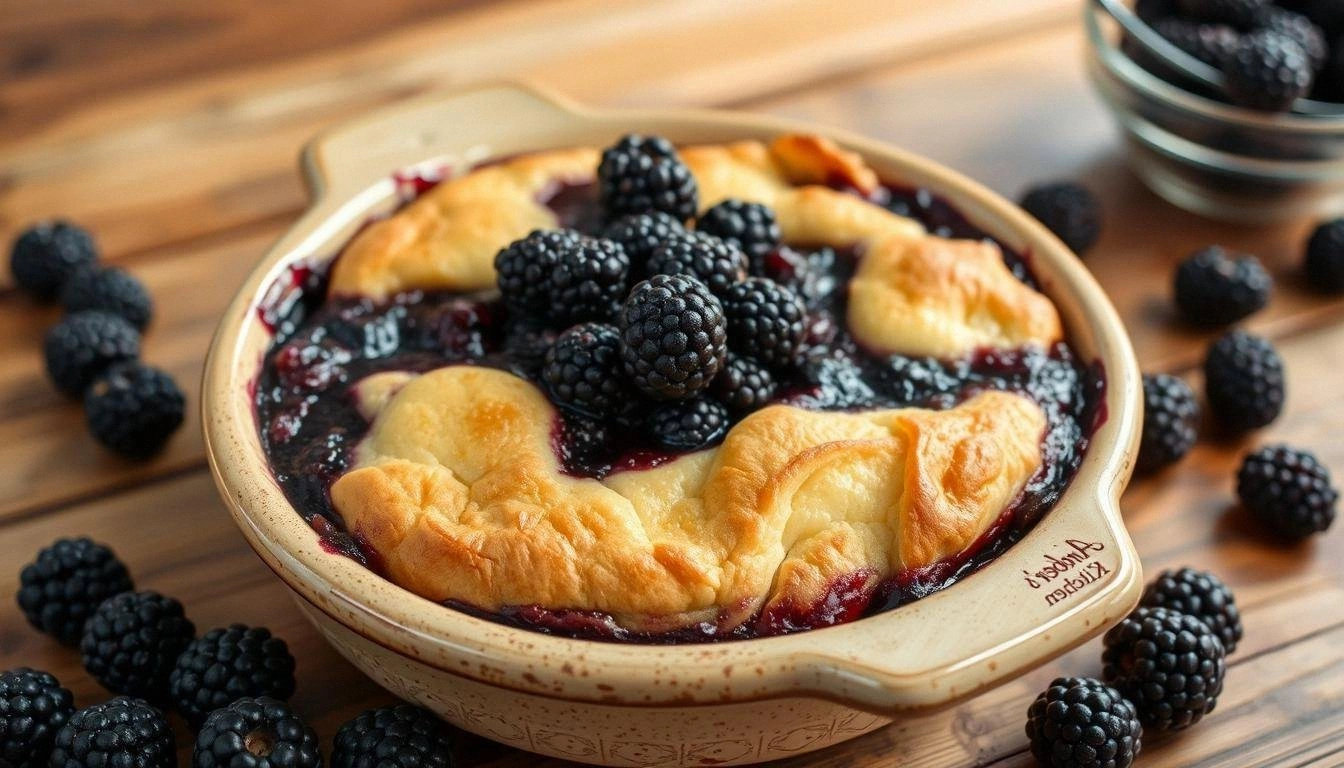
Picture this: a glossy, golden crust that crackles like a summer sunrise, resting on a bed of plump blackberries that burst with tartness the moment you take a bite. The aroma is a sweet, earthy perfume that lingers in the air, making your living room feel like a cozy bakery. The texture is a delightful dance of crisp edges and a velvety, syrupy center that oozes out with every forkful. That is the sensory experience I promise you will get from this version of the blackberry cobbler.
What sets this recipe apart is that it flips the script on the traditional cobbler. Instead of a heavy, cakey topping that hides the fruit, I use a light, self‑rising flour base that lets the blackberries shine. I add a splash of milk to create a silky sauce that coats the berries like velvet. And the secret? A touch of vanilla that rounds out the tartness and gives the dessert an unexpected depth. This is hands down the best version you'll ever make at home.
I dare you to taste this and not go back for seconds. The first bite will send a wave of bright, sweet‑tart flavor across your palate, and the second bite will bring a comforting warmth that feels like a hug. If you’ve ever struggled with a cobbler that turns out too dry or too soggy, you’re not alone—this recipe solves that problem with a simple technique. Picture yourself pulling this out of the oven, the whole kitchen smelling incredible, and friends asking for your secret.
Let me walk you through every single step — by the end, you'll wonder how you ever made it any other way. From selecting the perfect blackberries to mastering the crust, I’ll share my playbook, my hacks, and my one‑time fails. The method is straightforward, but the results are so rich you’ll think you’ve stumbled into a bakery. Stay with me here — this is worth it.
What Makes This Version Stand Out
- Flavor: The blackberries are the star, their natural tartness balanced by a hint of vanilla and a subtle sweetness from the sugar. The result is a dessert that tastes like summer in every bite.
- Texture: The crust is light and flaky, not heavy or cakey, allowing the fruit to shine. It crisps to a golden brown while the interior stays moist and buttery.
- Simplicity: All you need is a handful of pantry staples and fresh blackberries. No fancy equipment or time‑consuming steps.
- Ingredient Quality: Using fresh blackberries gives a vibrant color and a burst of flavor that frozen fruit can’t match, unless you’re in a pinch.
- Make‑Ahead Potential: The batter can be assembled a day ahead and chilled, allowing the flavors to meld while you’re busy with other tasks.
- Crowd Reaction: This dessert has the power to turn a casual gathering into a memorable event. People will keep asking for the recipe.
- Cooking Method: Baking the topping on top of a milk‑syrup base creates a unique, silky texture that sets this cobbler apart from conventional ones.
- Versatility: The recipe works with fresh or frozen berries, and you can tweak the sweetness to match your taste.
Inside the Ingredient List
The Flavor Base
Blackberries are the heart of this dessert. They provide a burst of natural sweetness and a deep, slightly floral aroma that lingers long after the last bite. Fresh berries are ideal because they release their juices as they bake, creating a syrupy coating that clings to the crust. If you’re using frozen berries, let them thaw and drain excess liquid to avoid a soggy result.
The milk adds a subtle creaminess that balances the tartness of the fruit. Whole milk is recommended because of its higher fat content, which gives the sauce a richer mouthfeel. If you’re lactose intolerant, a dairy‑free milk (like oat or almond) will work, but the flavor profile will shift slightly toward a nuttier note.
The Texture Crew
Self‑rising flour is the secret to a light, airy crust. It contains baking powder and salt, so you don’t have to add extra leavening agents. The flour’s fine texture helps create a tender crumb that melts in your mouth. If you’re gluten‑free, you can replace it with a gluten‑free self‑rising blend, but keep in mind the crust may behave a bit differently.
Granulated sugar is the sweetener that not only balances the tartness but also caramelizes on the crust, giving it a beautiful golden color. The sugar also helps create a slight crispness on the top as it bakes. Don’t skip the sugar; it’s the sweet anchor that holds the dessert together.
The Unexpected Star
Melted butter adds richness and depth to the batter. The butter’s fat content helps the crust rise and become flaky. It also contributes a silky mouthfeel to the sauce that coats the blackberries. If you prefer a lower‑fat version, you can substitute half the butter with unsalted oil, but the flavor will be a touch less indulgent.
Vanilla extract is the subtle flavor enhancer that ties all the components together. A teaspoon is enough to give the dessert a warm, aromatic finish that complements the berries. A good quality vanilla (like Madagascar or Tahitian) will give you a richer, more complex flavor.
The Final Flourish
Large mixing bowls, a whisk, and measuring cups are the tools that make the process smooth. The bowl should be large enough to hold the berries and batter without spilling. A whisk helps incorporate the milk evenly, ensuring the batter stays smooth and free of lumps.
An 8×12 inch baking dish or a 3‑quart pan is the vessel for this dessert. The size matters because it determines the thickness of the crust and the depth of the sauce. A larger pan means a thinner crust and a more pronounced berry sauce, while a smaller pan will yield a thicker, cake‑like topping.
Everything’s prepped? Good. Let’s get into the real action.
The Method — Step by Step
- Preheat your oven to 375°F (190°C). This temperature is perfect for a golden crust without burning the berries. While the oven warms, gather all your ingredients and tools. I always keep my mixing bowl and whisk within arm’s reach so I can work efficiently.
- In a large bowl, combine the self‑rising flour, granulated sugar, and a pinch of salt. Mix them together so the sugar is evenly distributed. This dry mix will form the base of your crust. I find that whisking the dry ingredients first creates a smoother batter later.
- Pour the milk into a separate small bowl and whisk until it’s lightly frothy. The milk will help the batter stay moist and create a silky sauce. If you’re using whole milk, you’ll notice a richer texture. Once frothy, set the milk aside.
- Add the melted butter and vanilla extract to the dry mix. Stir until the mixture resembles coarse crumbs. This step ensures the butter is evenly distributed and the vanilla is fully incorporated. The aroma of vanilla starts to mingle with the flour.
- Gently fold the milk into the dry mixture. Do this in a slow, circular motion to avoid over‑mixing, which could toughen the crust. The batter should be smooth but still a bit lumpy—don’t worry if it looks uneven; it will even out in the oven.
- Fold in the fresh blackberries. Be gentle so the berries don’t break apart. The berries will release their juices, forming a syrupy coating as they bake. I like to spread them evenly across the bottom of the pan.
- Transfer the batter to your baking dish. Use a spatula to smooth the top, ensuring the crust is even. The crust should be about an inch thick; if it’s too thick, it may not bake evenly.
- Bake for 30–35 minutes. The crust should turn a deep golden brown, and the edges will start pulling away from the pan. The interior should be set but still slightly jiggle. When the top is crisp and the berries are bubbling, it’s time to pull it out.
- Let the cobbler rest for 10 minutes. This resting period allows the sauce to thicken and the flavors to meld. During this time, you can prepare a scoop of vanilla ice cream or a drizzle of whipped cream.
- Serve warm with your favorite toppings. A dollop of fresh whipped cream, a scoop of vanilla ice cream, or a sprinkle of toasted pecans will elevate the dessert. The contrast of warm, buttery crust with cool, creamy toppings is pure bliss.
That’s it — you did it. But hold on, I’ve got a few more tricks that will take this to another level.
Insider Tricks for Flawless Results
The Temperature Rule Nobody Follows
Many bakers bake cobblers at 350°F (175°C), but that temperature can produce a soggy top. I always bake at 375°F (190°C) to get a crisp crust. The higher heat caramelizes the sugar faster, giving the topping a beautiful, golden finish.
Why Your Nose Knows Best
The aroma that fills your kitchen is a reliable indicator of doneness. When you smell a warm, buttery scent with a hint of caramelized sugar, the cobbler is almost ready. Trust your nose; it’s a seasoned judge of baked goods.
The 5-Minute Rest That Changes Everything
Letting the cobbler sit for 5–10 minutes after baking allows the sauce to thicken and the flavors to meld. If you cut into it immediately, the juices will spill out, and the crust will be soggy. This short rest is worth the extra wait.
The Butter‑Butter Trick
If you want an extra buttery crust, brush the top of the batter with melted butter right before baking. This will give the crust an extra shine and a richer flavor. I do this on special occasions when I want the dessert to feel indulgent.
The Crust Cracking Ritual
Right before you bake, sprinkle a few extra sugar crystals on top of the crust. This creates a sweet, crunchy texture that contrasts beautifully with the soft interior. The sugar also helps the crust brown evenly.
The Final Flourish
Finish the dessert with a drizzle of honey or a dusting of powdered sugar for a touch of elegance. If you’re feeling adventurous, add a pinch of sea salt to highlight the sweetness of the berries.
Creative Twists and Variations
This recipe is a playground. Here are some of my favorite ways to switch things up:
Citrus Burst
Add the zest of one lemon or orange to the batter for a bright, zesty note. The citrus will cut through the sweetness and add a refreshing undertone. Serve with a dollop of lemon curd for an extra kick.
Almond Crunch
Sprinkle toasted almond slivers on top of the crust before baking. The almonds add a nutty crunch and a subtle flavor that pairs wonderfully with blackberries. This variation is great for a brunch crowd.
Maple‑Infused
Replace half of the sugar with pure maple syrup. The maple adds depth and a caramel-like sweetness that complements the berries. It also creates a slightly darker crust.
Chocolate Drizzle
Drizzle melted dark chocolate over the warm cobbler just before serving. The chocolate’s bitterness balances the berry’s tartness and adds a decadent finish. A sprinkle of sea salt on top enhances the flavor.
Spiced Autumn
Add a pinch of ground cinnamon, nutmeg, and a splash of bourbon to the batter. This gives the dessert a cozy, spiced aroma reminiscent of fall. It’s perfect for holiday gatherings.
Berry‑Berry‑Berry
Mix in a handful of blueberries or raspberries for a multi‑berry medley. The different textures and flavors create a complex, fruit‑filled experience. This version is especially striking when presented in a clear glass dish.
Storing and Bringing It Back to Life
Fridge Storage
Cool the cobbler completely before covering it tightly with plastic wrap. Store in the refrigerator for up to 3 days. When you’re ready to serve, let it sit at room temperature for 15 minutes to soften the crust slightly.
Freezer Friendly
Wrap the cobbler in foil and place it in a freezer‑safe container. It will keep for up to 2 weeks. When reheating, thaw overnight in the fridge, then warm in a 350°F (175°C) oven for 10–15 minutes.
Best Reheating Method
Add a tiny splash of water or milk to the top before reheating. This steams the cobbler back to life, keeping the crust crisp and the sauce silky. A quick 5‑minute microwave session also works, but watch for uneven heating.
Final thoughts: This blackberry cobbler is a show‑stopper that blends tradition with innovation. It’s a dessert that’s as beautiful to look at as it is delicious to eat. The combination of a buttery crust, sweet‑tart berries, and a silky milk sauce creates a sensory experience that will have everyone asking for seconds. I’ve spent countless hours tweaking this recipe, and I’m proud to share the final, perfected version with you. Happy baking!